
What is 192.168.1.2 used for? Can it be your default gateway? Can it be a host IP address? Can it be a static IP address? How to use it? You’ll find all the answers in the following article.
CONTENTS
What Kind of IP Address is 192.168.1.2?
192.168.1.2 comes from a dedicated block of private addresses (192.168.x.x) within the Class C block of IP addresses (192.0.0.0-223.255.255.255).
The meaning of the term private in private IP address
That ‘’private’’ in a syntagma private IP address means that the address is not publicly routable on the internet and can only be used inside small private networks (aka LANs). Private IP addresses are assigned to every device connected to your home network (including your router, access points, wireless bridges, range extenders). This IP address is like a phone number dedicated to each device – it allows them to communicate with each other. Routers and other networking equipment have private IP addresses assigned to them by their manufacturers. Other devices (laptops, phones, PCs, tablets, printers, smart speakers, etc.) get their IP addresses from the router.
Every LAN network in your neighborhood (or in the world) can use the same set of private addresses for internal communication. So, your PC may have 192.168.1.4 assigned to it, but your first neighbor can have the exact same address assigned to its printer. And it’ll all be fine as long as these private addresses are used on two different LANs.
So, devices within one LAN use private IP addresses to communicate with each other and with a router. But how do they access the internet? Well, the router also has a public IP address assigned to it by your ISP. When you want to access some website from your computer, the request is sent to your router (for this communication, private IP addresses are used). The router then sends the request to a DNS server (usually owned by your ISP), the server finds the IP address of the website that you want to visit, and sends feedback to your router. Public IP addresses are used for the communication between the router and a DNS server.
Devices on your local network and your networking equipment can only use private IP addresses. The address assigned to your router/access point/range extender (we are referring to the private IP address assigned by the manufacturer) is called the default gateway (default IP address). The addresses assigned to your PC, laptop, and other gadgets used to access the internet are also private and are called host IP addresses. Host IP addresses can be dynamic (assigned automatically by the router) or static (assigned manually by you).
192.168.1.2 can be both – default gateway and host address (but not at the same time). Just like any private IP, it can be static or dynamic.
What Devices Use 192.168.1.2 as a Default Gateway?
192.168.1.2 is not the most common default gateway, but there are still at least a few manufacturers that use this address as a default gateway for their networking equipment. The most popular brands (and models) using 192.168.1.2 as a default gateway are:
Rosewill (wireless router – RNX-R4)
Zyxel (access points – G-570U, PLA4231, NWA1100-N, NWA-3160; range extenders – WRE6606; wireless bridges – WAP5605, WAP5805; router – NBG6604)
Dane-Elec (media streamer)
EnGenius (ESR-9710, ERB-9250)
Fortinet (FAP-210B, FAP-14C)
Is 192.168.1.2 My Default Gateway?
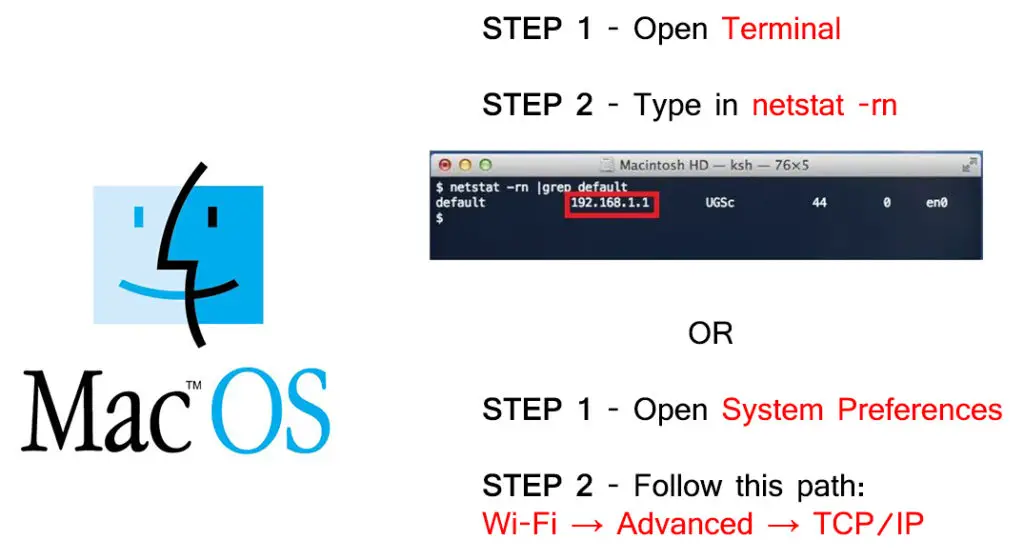
Regardless of the device you are currently using, there’s always at least one way of finding your default gateway. The easiest way that works for every device – take your router and check out the bottom side. The default gateway may be printed on the label.
Here’s what you need to do if the default IP is not printed on the label.
Mac
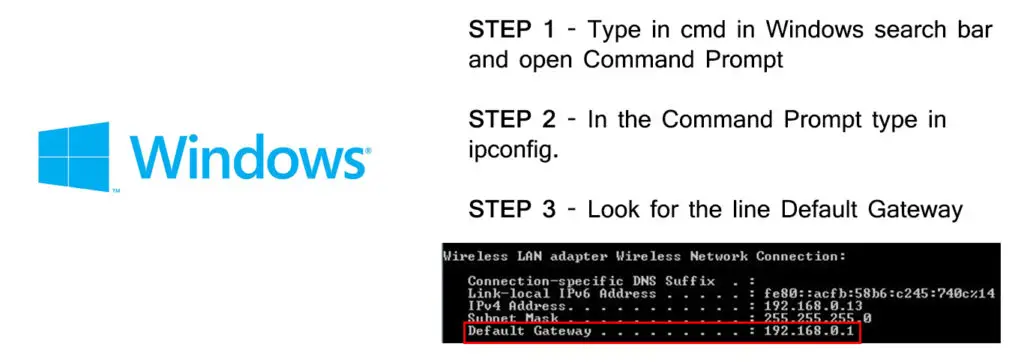
Windows
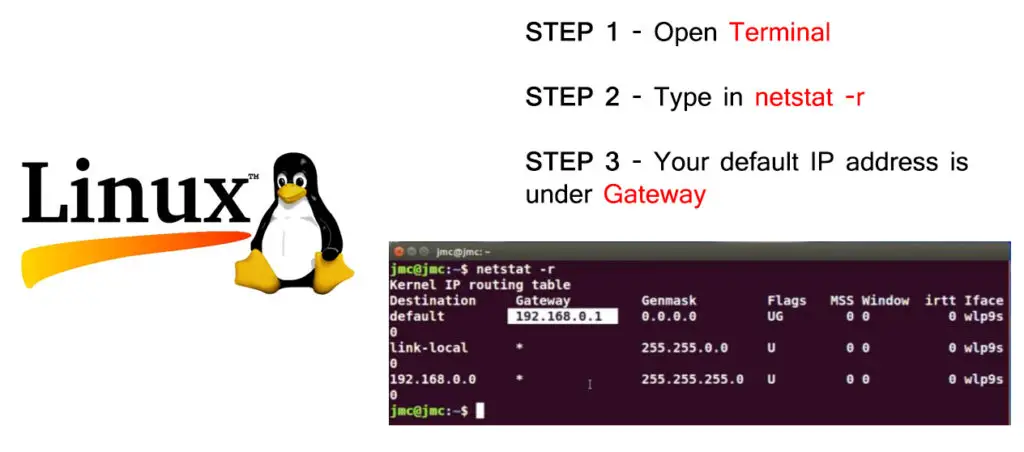
 Linux
Linux
What Can I Do with 192.168.1.2 if it’s My Default Gateway?
If you have one of the above-mentioned devices, then you can use 192.168.1.2 to access your device’s dashboard (web console). Why would you do that, you may ask.
Well, if you want to change your network settings, protect it with a password, enable sharing (Samba, FTP, DLNA), adjust parental control settings, firewall settings, set preferences, create a guest network, or change any other aspect of your wi-fi network, you absolutely need to use your router’s web console. To access it, you need to enter that default IP address. The first two steps are always the same:
STEP 1: Type the default IP address in your browser’s address bar (http://192.168.1.2). Make sure that you don’t type it inside the search bar – the result will not be the same.

STEP 2: LOGIN – Enter your router’s default credentials (Username and Password). Below, you can see an example of a login screen. The router used in the example is Rosewill RNX-R4. This router uses 192.168.1.2 as a default gateway.
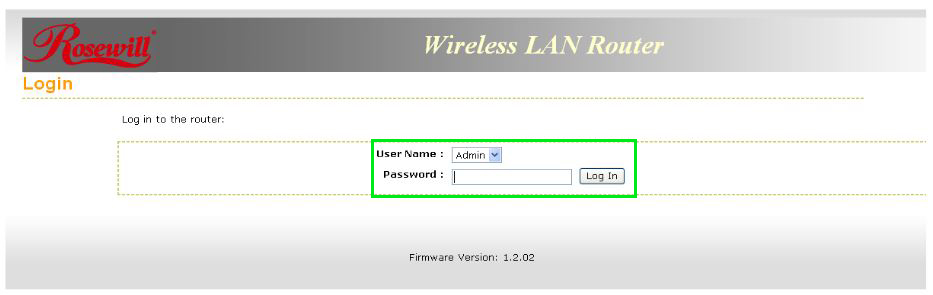
Example of a login screen of Rosewill RNX-R4 wireless router (default username – Admin, default password – n/a)
If you don’t know your default username and password, you can find it on the label/sticker on the back (or bottom) of your router. You can also find it in the user manual or on the official webpage of the manufacturer.
How to Change Network SSID and Password?
Once you log into your router’s dashboard, you can change whatever settings you want, including wi-fi network name (SSID) and wi-fi password. Changing SSID and password is probably the most commonly performed action. Most users don’t really experiment with any other settings, because they are afraid of making a mistake. We’ll show you how to change an SSID and password on the previously mentioned Rosewill RNX-R4.
This router has a very simple setup wizard. You just have to click on wireless settings and follow the on-screen instructions.
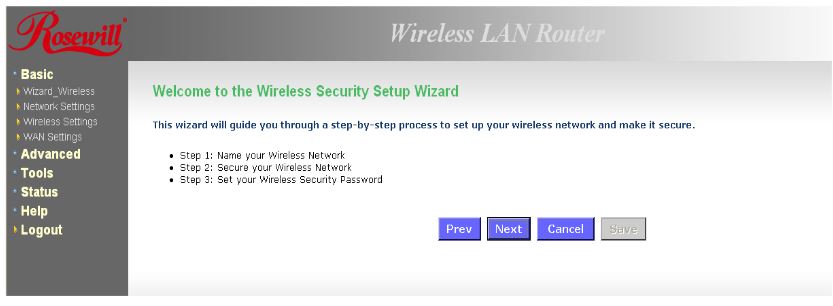
STEP 1 – Open Wireless Settings and click Next
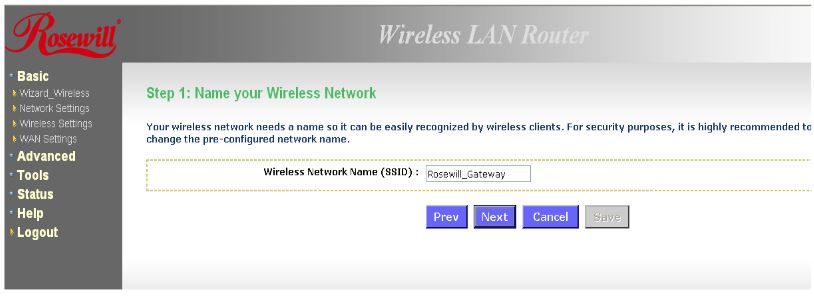
STEP 2 – Enter the desired network name (SSID) and click Next
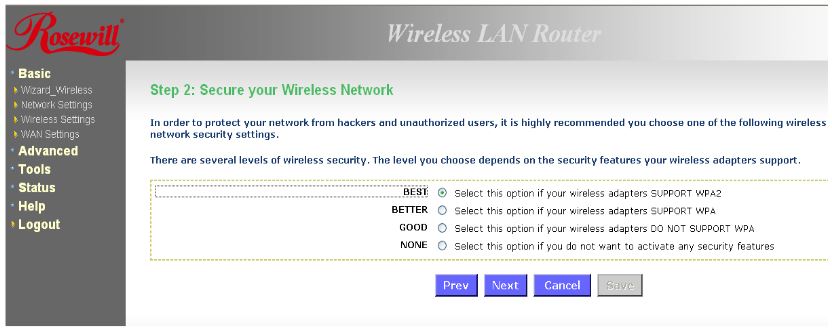
STEP 3 – Select wireless security protocol (preferably WPA2) and click Next
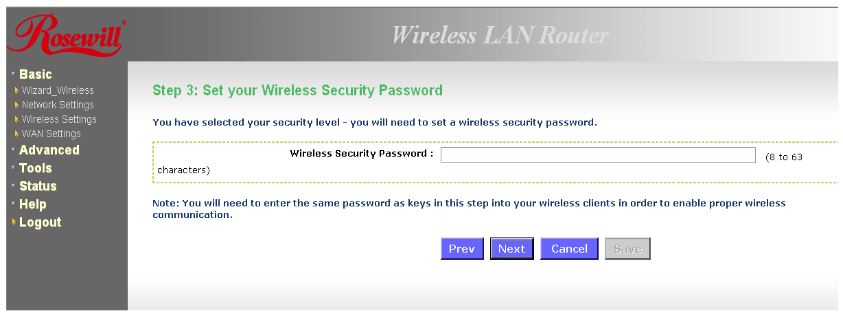
STEP 4 – Enter new password and click Next
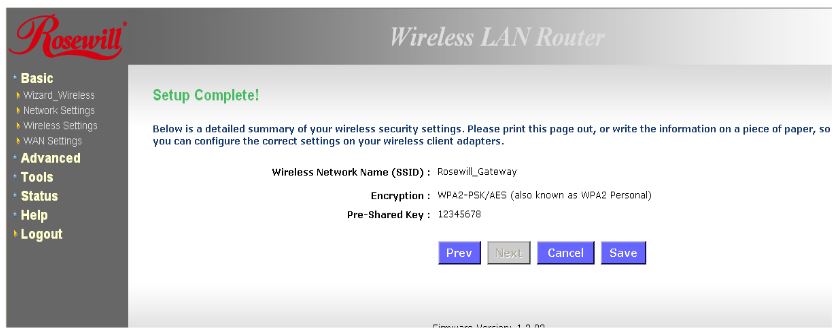
STEP 5 – Confirm changes
192.168.1.2 as a Host IP Address
192.168.1.2 is more often used as a host IP address. You see, one of the most common default gateways used on numerous routers and other devices is 192.168.1.1. In most of these routers, the DHCP pool usually starts with 192.168.1.2. This means that the first device connected to the router gets this address. And that’s how 192.168.1.2 becomes the host IP address.
Dynamic IP
In your home wi-fi network, your router is in charge of assigning a unique private IP address (unique within that network) to every connected device. In your router’s dashboard, you will find DHCP settings and a DHCP pool. This pool represents a range of addresses that your router assigns to devices connected to the network. For example, if your default IP is 192.168.1.1, the DHCP pool may look like this: 192.168.1.2-192.168.1.254.
So, if the first available address in the DHCP pool is 192.168.1.2, it will be automatically assigned to the first device connected to your network (probably to the PC you used to set up the router). If the address is assigned automatically (without your intervention), then it’s considered a dynamic IP address. The dynamic IP address will not always be assigned to the same device.
Within the router settings, you will see something called the DHCP lease time. Devices that connect to your home wi-fi don’t get to use IP addresses indefinitely. They only lease their addresses from your router for a certain period of time (aka lease time). When that time expires, the router will check if the device is still connected. If it is connected, the router will lease it the same IP address again. If it’s not, the router will take the address back and will give it to the next device that connects to your wi-fi.
Static IP
Some applications require that certain devices have the same IP address at all times. For example, if you have a printer connected to your network and if you want to access that printer from multiple devices, your printer should always have the same address.
In that case, you need to assign a static IP address to your printer, and you have to do that manually. Any address from the router’s DHCP pool can be both static or dynamic IP, but it’s recommended to exclude the IP address that you want to make static from the DHCP pool. Here’s an example:
Let’s assume that your default IP address is 192.168.1.1 and that your DHCP pool is 192.168.1.2-192.168.1.254. Let’s also assume that you want to assign the first available address to your printer. To do that, you would have to make a small change in the DHCP pool (to shrink it) and set 192.168.1.3 as the starting address (you have to exclude 192.168.1.2 from the pool). Then, you’ll have to go to DHCP reservation, enter the MAC address of the device that you want to assign a static IP to (in our example, it’s your printer), and enter the address that you reserved for it (the one you excluded from the DHCP pool). That’s how an IP address becomes static.
Troubleshooting 192.168.1.2 – IP Conflicts
If you make a DHCP reservation but don’t exclude 192.168.1.2 from the DHCP pool, your router may assign the exact same address as a dynamic IP to some device connected to the network. In that case, you will have two devices connected to the same LAN with the same IP address. The phenomenon is known as an IP conflict. When an IP conflict happens, both devices will be disconnected from the network. To resolve the conflict, you have to release the IP address on both devices and then make a DHCP reservation properly.

Hey, I’m Jeremy Clifford. I hold a bachelor’s degree in information systems, and I’m a certified network specialist. I worked for several internet providers in LA, San Francisco, Sacramento, and Seattle over the past 21 years.
I worked as a customer service operator, field technician, network engineer, and network specialist. During my career in networking, I’ve come across numerous modems, gateways, routers, and other networking hardware. I’ve installed network equipment, fixed it, designed and administrated networks, etc.
Networking is my passion, and I’m eager to share everything I know with you. On this website, you can read my modem and router reviews, as well as various how-to guides designed to help you solve your network problems. I want to liberate you from the fear that most users feel when they have to deal with modem and router settings.
My favorite free-time activities are gaming, movie-watching, and cooking. I also enjoy fishing, although I’m not good at it. What I’m good at is annoying David when we are fishing together. Apparently, you’re not supposed to talk or laugh while fishing – it scares the fishes.