CONTENTS
Brief outline
In the next few paragraphs you will see the Technicolor router login steps. All you have to know before you begin is the Technicolor router login IP, username and password.
Once you login to the router we will tell you how to change the default router password, network name and wireless password.
What you need:
- Technicolor router
- Computer, tablet or mobile device
Why you need to login to your Technicolor router?
In most cases you will want to login to your Technicolor router to change the wireless network name into something else than the default one.
Maybe you’ll want to protect your wireless network with a strong password. You can also configure a Guest network, monitor how much time your children spend online and much more.
All of this can be done in the router settings. But first we have to learn how to login to our Technicolor router first.
Technicolor Router Login Steps
In order to explain the Technicolor router login steps clearly we will use a Technicolor CGA2121 router.
STEP 1: Connect to the network
If you try to login to your router from a device which is not already connected to the network either with an Ethernet cable or via the wireless connection, you will fail. Only devices which are part of the network can be used to login to the router.
STEP 2: Launch your browser and type 192.168.0.1 in the URL bar
The default Technicolor router IP is 192.168.0.1
You need to type this IP in the URL bar of the browser you normally use and press Enter on your keyboard. If the IP is correct you will be asked to enter the Technicolor router default username and password.
STEP 3: Enter the Technicolor login details
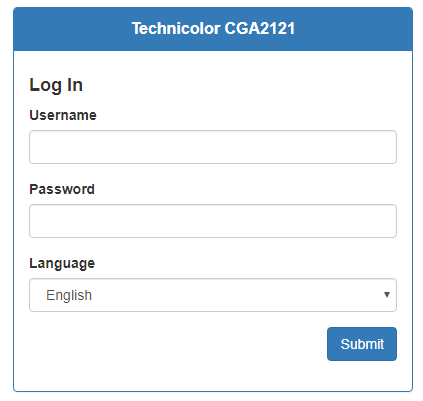
When the Technicolor login page appears you will be asked to enter the default Username and Password. In our case we will leave both fields blank and click the Submit button.
If you don’t see the router settings page after you click the Submit button you can try the following username/password combinations.
Username
Password
Step 4: You are in
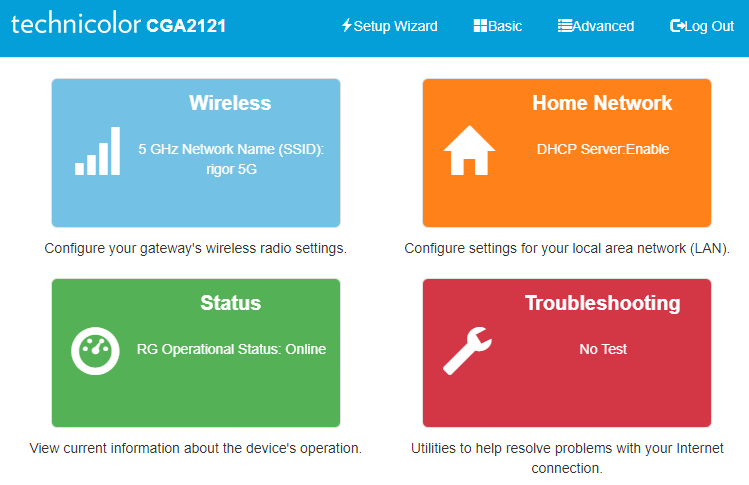
If you have followed the steps above you will see the Technicolor router settings page after you click the Submit button.
How to secure your Technicolor Router
As you have seen in the example above we have accessed the router just by clicking the Submit button. No username, no password. Just clicked the Submit button and we were in.
This is a huge security threat and we have to fix it immediately.
So, let’s begin!
Change the default Technicolor router login username and password
1.Login to your Technicolor router as described above.
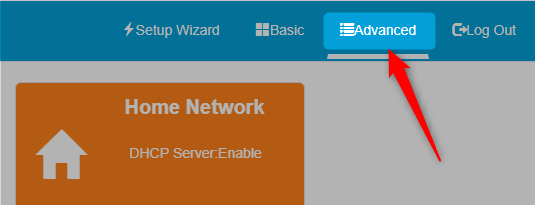
2. Click on Advanced in the top menu.
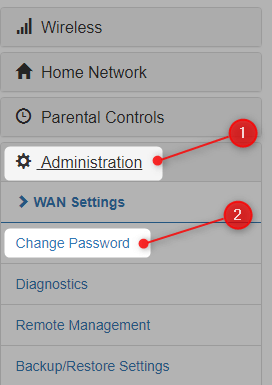
3. Click Administration in ne left menu and then Change password.
In the Change Password page you have to:
- Type a new username in the New User Name field.
- Type a new router password and confirm the password in the appropriate fields.
- Save the changes by clicking the Save Settings button.
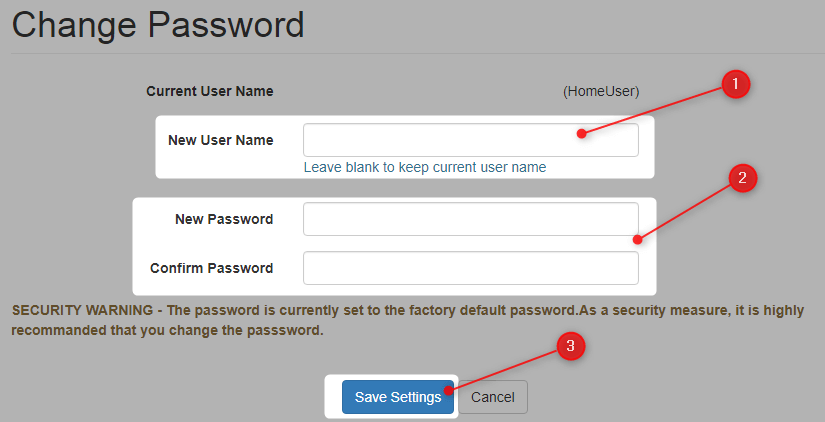
After you click the Save Settings button you will see the following message:
“SECURITY WARNING – The user settings were changed successfully.”
Change the Technicolor network name and WiFi password
1. Login to your router as before.
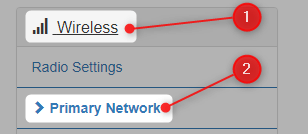
2. Go to Wireless and then Primary Network in the menu on the left.
3. In the new window you can change the Technicolor Network name.
- Make sure to name the 2.4 GHz and 5 GHz network differently. For example, add 5G at the end of the 5 GHz network name.
- Set both Wireless networks to ON.
- Broadcast SSID to ON.
- Security mode WPA2-Personal for both.
- Encryption to AES.
- In the Passphrase field type your new WiFi password. This password can be the same for both the 2.4 GHz and 5 GHz networks.
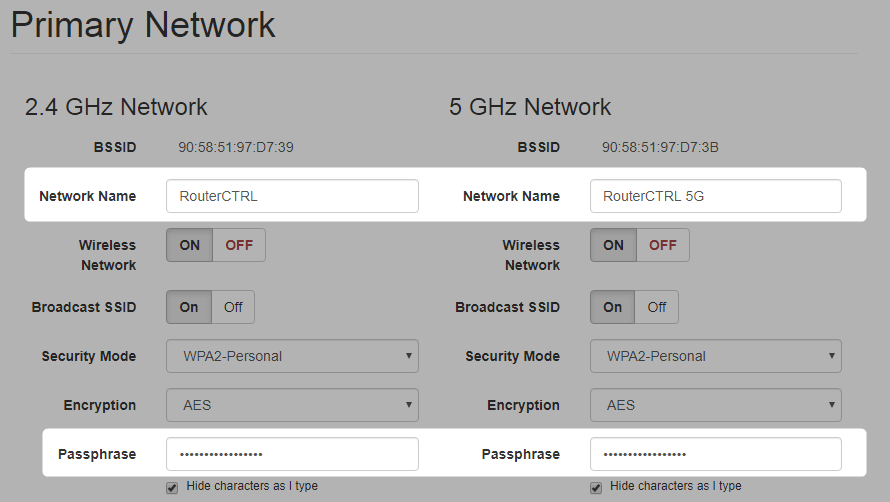
3. Scroll down a little and click the Save Settings button to save your new Network name and password.

Final Words
We are sure you now know the exact Technicolor router login steps and how to secure your router, at least on a basic level.
While you are logged in, you can set up a Guest network, play with the Parental Controls, change your router Firewall protection levels and so on.
Don’t be afraid to make the changes you need, just make sure to write down what you did in case something goes wrong. You never know. Luckily, there is a way to get everything back by resetting the router to factory settings.
Have a nice day!

Hey, I’m David. I’ve been working as a wireless network engineer and a network administrator for 15 years. During my studies, I also worked as an ISP field technician – that’s when I met Jeremy.
I hold a bachelor’s degree in network engineering and a master’s degree in computer science and engineering. I’m also a Cisco-certified service provider.
In my professional career, I worked for router/modem manufacturers and internet providers. I like to think that I’m good at explaining network-related issues in simple terms. That’s exactly what I’m doing on this website – I’m making simple and easy-to-follow guides on how to install, set up, and troubleshoot your networking hardware. I also review new network equipment – modems, gateways, switches, routers, extenders, mesh systems, cables, etc.
My goal is to help regular users with their everyday network issues, educate them, and make them less scared of their equipment. In my articles, you can find tips on what to look for when buying new networking hardware, and how to adjust your network settings to get the most out of your wi-fi.
Since my work is closely related to computers, servers, and other network equipment, I like to spend most of my spare time outdoors. When I want to blow off some steam, I like to ride my bike. I also love hiking and swimming. When I need to calm down and clear my mind, my go-to activity is fishing.
