This article will explain how to access your Ziggo router settings. Ziggo customers use several different routers and modems and if they want to make any changes in the settings they need to know the Ziggo router login steps first.
We have explained all the steps below, but first let’s see what you need before you start following the steps.

CONTENTS
Before You Begin
You can easily access the Ziggo router settings from your smartphone, tablet or computer.
Now you need to connect that device to your network either wirelessly or using a wired connection.
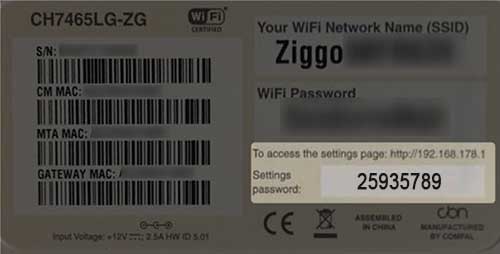
And at last you will need the Ziggo router admin IP, username and password. You can find these in the table below, on their website, then printed on a label on the router and in the user’s manual.
After you make sure that you have everything ready you can proceed and you should access the Ziggo router settings in a minute.
What Are The Default Ziggo Router Details?
Ziggo uses several different routers so check this table and find the default login details for your router model.
| Router Model | Default IP | Admin Username | Admin Password |
|---|---|---|---|
| Connect box | http://192.168.178.1 | – | check the router label |
| Hitron CGNV4 | http://192.168.0.1 | admin | admin |
| Technicolor TC7210 | http://192.168.178.1 | ziggo | wireless |
| Ubee EVW3200 and EVW321b | http://192.168.178.1 | ziggo | wireless |
| Cisco EPC3925 with UPC SSID | http://192.168.1.1 | admin | admin |
| Cisco EPC3925 with Ziggo SSID | http://192.168.178.1 | ziggo | wireless |
| Cisco EPC3928 | http://192.168.178.1 | ziggo | wireless |
Ziggo Router Login Step-By-Step
Follow these step-by-step instructions to access your Ziggo router settings.
STEP 1 – Connect The Device To The Network
We have already mentioned that you need to connect your device to the network if you want to login. This is important because the router admin page can be accessed only by devices that are part of the network. If they aren’t they can’ be used to access the router settings.
Depending on the device you are using you can connect using the wireless connection, or if your device has a LAN port you can use an Ethernet cable to connect it to the router. The wired type of connection is highly recommended because of its stability.
STEP 2 – Use The Web Browser On Your Device
Now it’s time to start the web browser on the device you are using. The web browser helps us see and manage the router’s Web-Based GUI. It is a simple user interface that provides access to all the router settings and can be easily used by everyday users. Of course, there are some advanced settings, but some of them like changing the WiFi name and password or creating a Guest network can be used even by complete beginners.
STEP 3 – Type The Ziggo IP In The Browser’s Address Bar

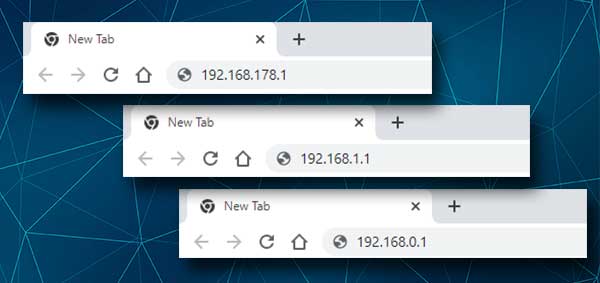
Right now you have to type the Ziggo IP address into the browser’s Address bar. As you can see in the table above one of these IPs (192.168.178.1, 192.168.1.1 or 192.168.0.1) will trigger the router login page. There is no need to type http:// in front of the IP because most modern browsers add this automatically. However if you see an error message when you enter just the IP, try adding http:// to see whether it fixes the problem.
STEP 4 – Enter The Ziggo Default or Custom Username And Password
When you enter the correct IP address, the Ziggo router login page will appear. When that happens enter the admin username and password into the required fields (check the table above to see the default usernames and password for your router model).
Then press the Login button and if the username and password are correct, the Ziggo router admin dashboard will open. Now you can start managing the router settings but remember to avoid the settings you are not familiar with. Changing some settings may make your home or business network unstable. Therefore, either create a backup of the router configuration first, or ask someone experienced for help.
Recommended reading:
- What is Passpoint Secure Wi-Fi? (Passpoint Secure Wi-Fi Explained)
- How to Configure a Router to Use WPA3?
- How to Block Wi-Fi Signals from Neighbors? (Ways to Reduce Wi-Fi Interference)
- A Quick Guide on How to Enable Wi-Fi in Windows 10
Can’t Access The Ziggo Router Settings? Try This
Although it doesn’t happen often, in some cases the Ziggo router login process can fail at some point. When that happens, it is good to know what to do, fix the issue and continue with the router login steps.
Here is a short checklist that will tell you what to pay attention to.
Check Your Connection
If you believe that the connection is causing the router login to fail, check the following:
– Is the device still connected to the network? Airplane mode is possibly enabled. Maybe you have pressed the WiFi button and disabled WiFi during the process. You may have connected to the wrong network. Try connecting the device directly to the router using a network cable.
Check The Router’s IP address
When you enter the IP and it doesn’t open the router login page check the following:
– Did you type the IP address correctly? People sometimes make typing errors and instead of 192.168.x.x they type 192.186.x.x or they type letters like 192.168.o.1 or 192.168.l.l.
– Is your router using the IP you have just typed? Check this guide and find the router IP address.
– Did you type the IP into the Search bar? If you see search results from Google or Bing you have entered the IP into the search bar. Instead, type it in the URL bar at the top and try again.
Check The Router’s Admin Login Details
– Have you typed the username and password correctly? Even the slightest mistake will make the router login to fail.
– Check the router label and see whether you are using the correct admin username and password.

– If you or someone else has changed the admin login details, you need to login with the custom ones. The default ones can be used again in case you reset the router to factory settings.
Check The Device You Are Using
– The device you are using should obtain its IP address automatically. Check whether this is the case with your device.
Final Words
The Ziggo router settings can be changed easily once you learn how to access the router admin dashboard. The login process is quite simple and straightforward. But once again, be careful when changing some of the settings and in case you decide to change the admin password you need to keep the new one safe.
In case you forget it, the only solution to access the router settings again, is to reset the router to factory settings. After that you will be able to login using the default admin login details, but your router will have to be configured again.

Hey, I’m David. I’ve been working as a wireless network engineer and a network administrator for 15 years. During my studies, I also worked as an ISP field technician – that’s when I met Jeremy.
I hold a bachelor’s degree in network engineering and a master’s degree in computer science and engineering. I’m also a Cisco-certified service provider.
In my professional career, I worked for router/modem manufacturers and internet providers. I like to think that I’m good at explaining network-related issues in simple terms. That’s exactly what I’m doing on this website – I’m making simple and easy-to-follow guides on how to install, set up, and troubleshoot your networking hardware. I also review new network equipment – modems, gateways, switches, routers, extenders, mesh systems, cables, etc.
My goal is to help regular users with their everyday network issues, educate them, and make them less scared of their equipment. In my articles, you can find tips on what to look for when buying new networking hardware, and how to adjust your network settings to get the most out of your wi-fi.
Since my work is closely related to computers, servers, and other network equipment, I like to spend most of my spare time outdoors. When I want to blow off some steam, I like to ride my bike. I also love hiking and swimming. When I need to calm down and clear my mind, my go-to activity is fishing.
