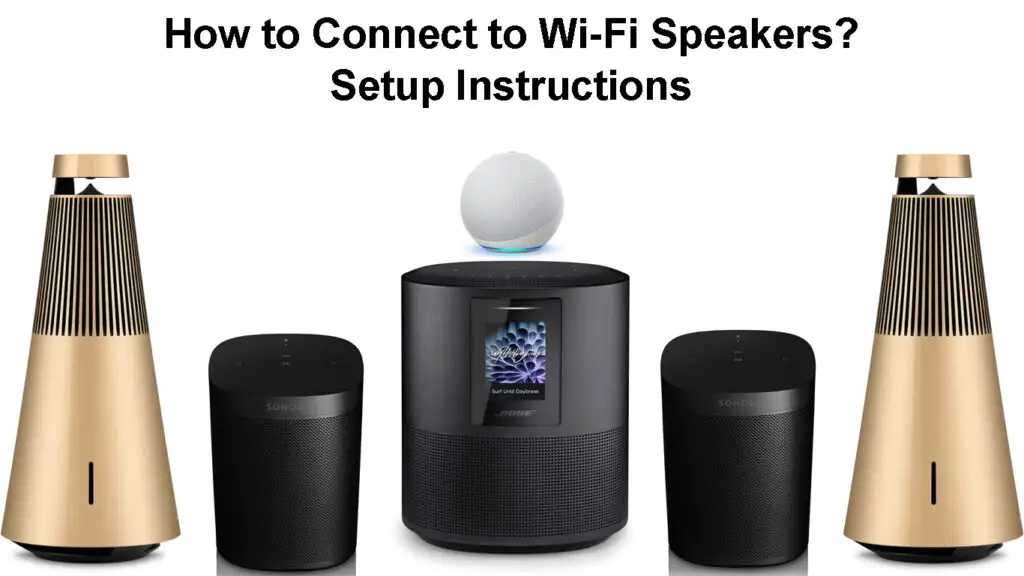
From Bluetooth soundbars to Wi-Fi home theaters, wireless speakers have recently become the “in-thing” and are slowly taking over from the dominant wired audio options.
These speakers don’t require wires or cables, effectively decluttering your home from the unsightly connections running below your carpets and along your walls.
Even though wired speakers seemingly deliver better sound quality, Wi-Fi speakers have advanced over the years, narrowing the gap and making it impossible to notice the difference.
The best part is that you can wirelessly connect your smartphone, laptop, tablet, or smart TV to your Wi-Fi speakers for a stimulating audio experience.
You only need to plug your Wi-Fi speakers into a wall outlet and ensure you have an active internet connection to integrate them with your smart entertainment unit.
However, since Wi-Fi speakers are relatively new, connecting them to your device can be challenging.
So, in this tutorial, you will learn how to connect to Wi-Fi speakers to take your entertainment to the next level.

CONTENTS
How Do Wi-Fi Speakers Work?
Before setting up your Wi-Fi speakers, you may need to learn how they work and produce sound.
Generally, Wi-Fi speakers work by connecting to your local Wi-Fi network to enable them to receive audio signals from your wireless devices such as smartphones, tablets, laptops, and smart TVs.

These speakers have a built-in wireless adapter that makes them Wi-Fi-compatible for seamless wireless connections.
They connect to your Wi-Fi network like any other Wi-Fi-enabled device and communicate with other connected gadgets within the network.
Audio signals travel from the source device, such as a smartphone or smart TV, to the Wi-Fi speakers via the router.
You can use your Wi-Fi speakers to play audio files without issues so long as the speakers are within the coverage area.
Wi-Fi Speakers Vs. Wired Speakers Vs. Bluetooth Speakers
You must connect your Wi-Fi speakers to your wireless network before setting it up to play audio files from your source device.
The quickest way to connect your Wi-Fi speakers to your Wi-Fi network is through the Wi-Fi Protected Setup (WPS) button.
Most Wi-Fi speakers and routers have a WPS button for easy connectivity between compatible devices.
WPS is a feature that allows you to create a secure network between devices without requiring a password.
Here are the steps to connect your Wi-Fi speakers to your home network using the WPS button:
- Place your Wi-Fi speakers next to your wireless router.
- Turn on the speakers.
- Press and hold the WPS button on the speakers (usually found on the rear)
- Wait for a beep sound before releasing the WPS button.
- Within 2 minutes, press the WPS button on the wireless router until the status lights start to flash or blink green.
Connecting Pioneer Wi-Fi Speaker to Wi-Fi via WPS Button
Connecting Wi-Fi Speakers to an Android Device
After connecting your Wi-Fi speakers to your home Wi-Fi, proceed to connect it to your Android or iOS device.
Here are the steps:
- Go to Google Play Store on your smartphone.
- Download and install the appropriate app for your Wi-Fi speakers, such as Play-Fi, Muzo Player, or the proprietary app that came with your speakers
- Turn on your speakers.
- Launch the downloaded app on your Android smartphone or tablet
- Tap the Wi-Fi Setup Wizard on the app
- Enter your Wi-Fi password
- Press the WPS button on the speakers (your speakers will search for a Wi-Fi connection)
- Tap Next on the Wi-Fi Setup Wizard to connect your Android device to your speakers
Setting Up B&O Beoplay M5 Wi-Fi Speaker
Connecting Wi-Fi Speakers to an iOS Device
Connecting your iOS device to your Wi-Fi speakers is equally easy since it follows a similar procedure as connecting them to an Android device.
Here are the steps:
- Go to Apple App Store on your smartphone.
- Download and install the appropriate app for your Wi-Fi speakers, such as Play-Fi, Muzo Player, or the recommended app for your speakers
- Turn on your speakers.
- Launch the downloaded app on your iOS device
- Tap the Wi-Fi Setup Wizard on the app
- Enter your Wi-Fi password
- Press the WPS button on the speakers (your speakers will search for a Wi-Fi connection)
- Tap Next on the Wi-Fi Setup Wizard to connect your iOS device to your speakers
Setting Up SONOS One Wi-Fi Speaker
Connecting Wi-Fi Speakers to a Windows PC
You must enable DLNA casting on Windows and turn on media streaming to connect Wi-Fi speakers to your laptop or desktop.
But first, you must connect your Wi-Fi speakers to your local network, as explained in the previous section.
Once your speakers are on your network, you can proceed to enable DNLA casting and media streaming.
Here’s how to go about it:
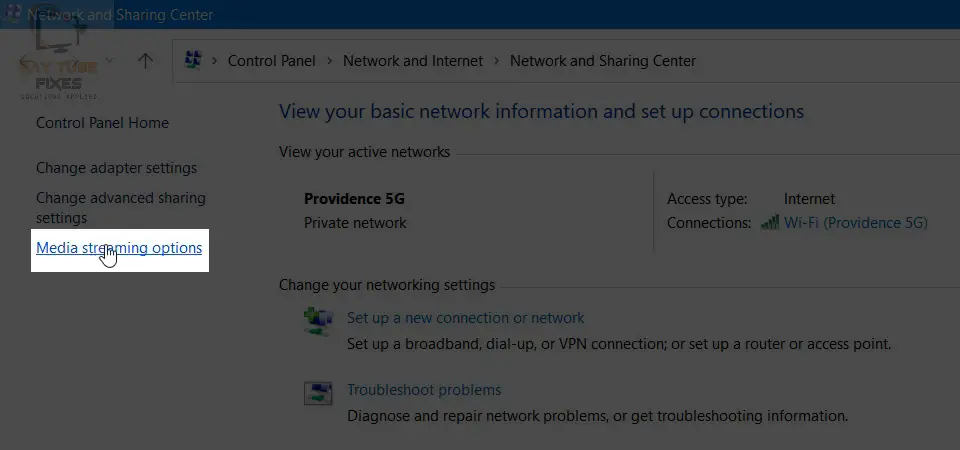
- Press the start key
- Type Media Streaming Options on the search bar

- Click the result to open media streaming options.
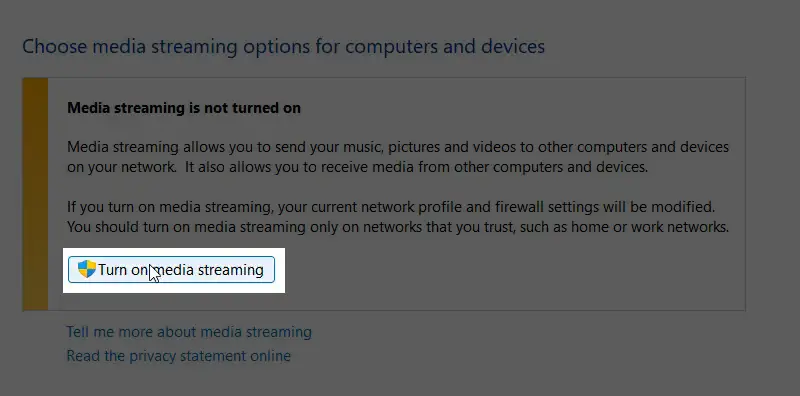
- Click Turn on media streaming.

- Your computer will display your Wi-Fi speakers under “show devices on a local network.”
- Click OK to apply the settings.
Pros of Wi-Fi Speakers
Wireless
The main advantage of Wi-Fi speakers is that they don’t require wires or cables, effectively keeping your space neat.
Better Range
Wi-Fi speakers have a better range than other wireless options, such as Bluetooth. You can play and stream content anywhere within your space so long as the speakers are within the coverage area.
Better Sound Quality
Wi-Fi speakers usually produce better sound quality than Bluetooth speakers since they rely on Wi-Fi connections that can handle large data streams.
Compatible with Multiple Devices
Wi-Fi speakers are compatible with multiple devices, such as smartphones, tablets, laptops, and smart TVs.
Cons of Wi-Fi Speakers
Connectivity Issues
Connecting to Wi-Fi speakers can be a long and tedious task if you don’t know what to do.
Less Portable
Wi-Fi speakers are less portable since they must be connected to a wall outlet to remain powered during play.
Conclusion
Connecting to Wi-Fi speakers can be tricky if you don’t know what to do or where to begin.
Fortunately, you can use our handy tips to connect to Wi-Fi speakers with your smartphone, tablet, or computer.

Hey, I’m Jeremy Clifford. I hold a bachelor’s degree in information systems, and I’m a certified network specialist. I worked for several internet providers in LA, San Francisco, Sacramento, and Seattle over the past 21 years.
I worked as a customer service operator, field technician, network engineer, and network specialist. During my career in networking, I’ve come across numerous modems, gateways, routers, and other networking hardware. I’ve installed network equipment, fixed it, designed and administrated networks, etc.
Networking is my passion, and I’m eager to share everything I know with you. On this website, you can read my modem and router reviews, as well as various how-to guides designed to help you solve your network problems. I want to liberate you from the fear that most users feel when they have to deal with modem and router settings.
My favorite free-time activities are gaming, movie-watching, and cooking. I also enjoy fishing, although I’m not good at it. What I’m good at is annoying David when we are fishing together. Apparently, you’re not supposed to talk or laugh while fishing – it scares the fishes.
