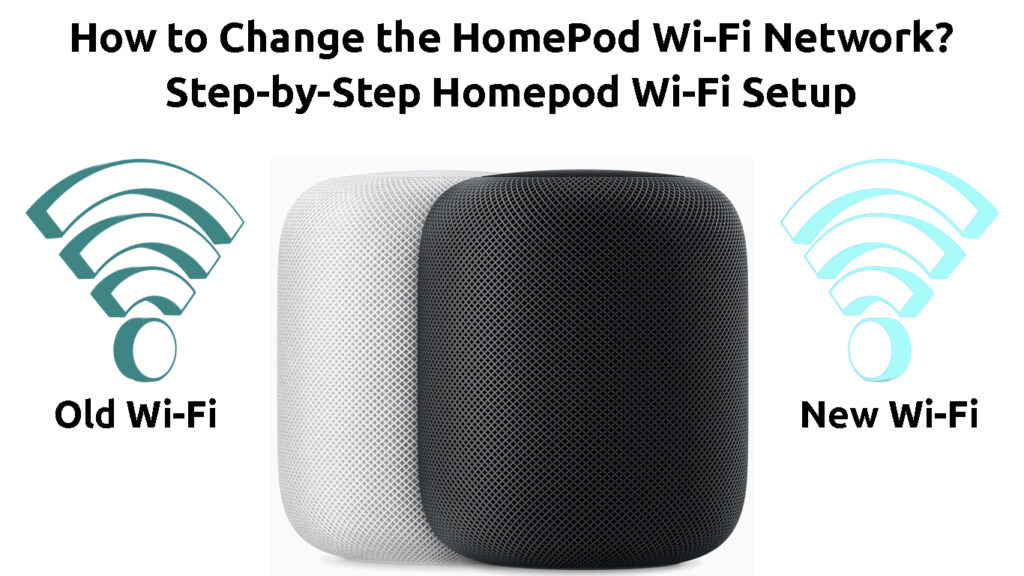
Do you want to bring your HomePod everywhere with you and still have internet access? You might be surprised to learn that changing the HomePod Wi-Fi network is extremely easy and won’t take longer than a few minutes!
Here is a quick guide on changing the HomePod Wi-Fi network regardless of whether you have a regular HomePod or a HomePod mini. If something goes wrong, there’s a special troubleshooting section that will help you identify and solve the most common issues with connecting a HomePod to Wi-Fi.

CONTENTS
How to Change the HomePod Wi-Fi Network
Step 1: Connect Your iPhone or iPad to the New Wi-Fi Network
Your HomePod is linked to your iPhone or iPad. Thus, to change the Wi-Fi network on your HomePod, you’ll have to first join that network via your iPhone or iPad.
Homepod – Initial Setup
Firstly, you should navigate to the settings of your device. Then, you should tap on the Wi-Fi menu, which is usually located in the first part of the settings. Once you’re there, you can enable Wi-Fi.
Your gadget will automatically start searching for available networks around you. When it finds the network you want to join, you’ll need to tap on it. In case it’s protected by a password, you should enter that password to complete the connection process.
Step 2: Change the HomePod Wi-Fi Network
Once you connect to a desired wireless network, it’s time to configure it on your HomePod! You’ll do that by going to the Home app on your iPad or iPhone.
The exact steps you’ll have to go through vary depending on the version of your Home app and the version of your operating system. But, regardless of the operating system and the Home app version, your first task while in the app is to examine the first page.
When your HomePod and your phone/iPad are operating on different networks, the first page of the Home app will inform you of that. On an older app version, you’ll likely see an exclamation mark next to the Wi-Fi Network notification. You should tap on that notification to access additional settings.
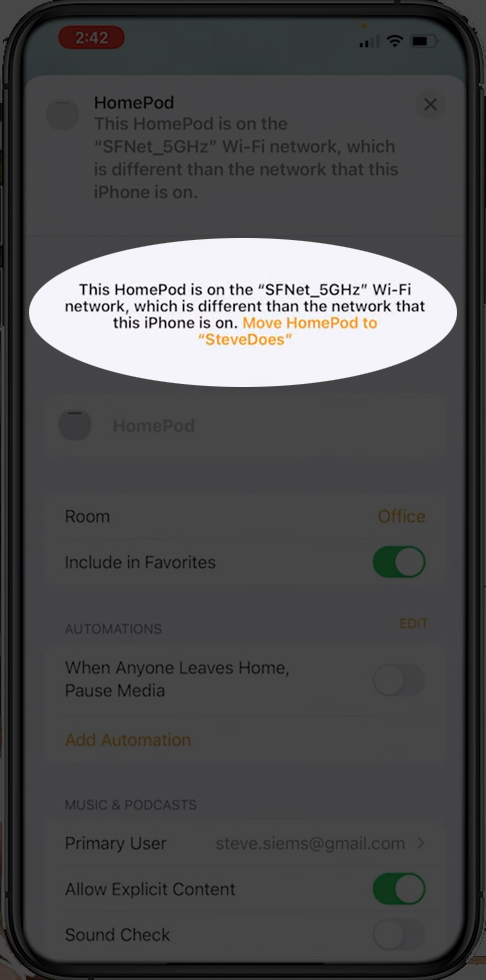
Then, you should scroll down to look through all of the options available. One of them will display a message notifying you that your HomePod operates on a different network than your iPhone or iPad. You’ll need to tap on that message to change the network the HomePod is using.

As soon as you click on the message, the HomePod will start connecting to the network. You should give it a few seconds to properly connect and you’re done!
How to Change Your HomePod’s Wi-Fi Network
For Newer Home App Versions
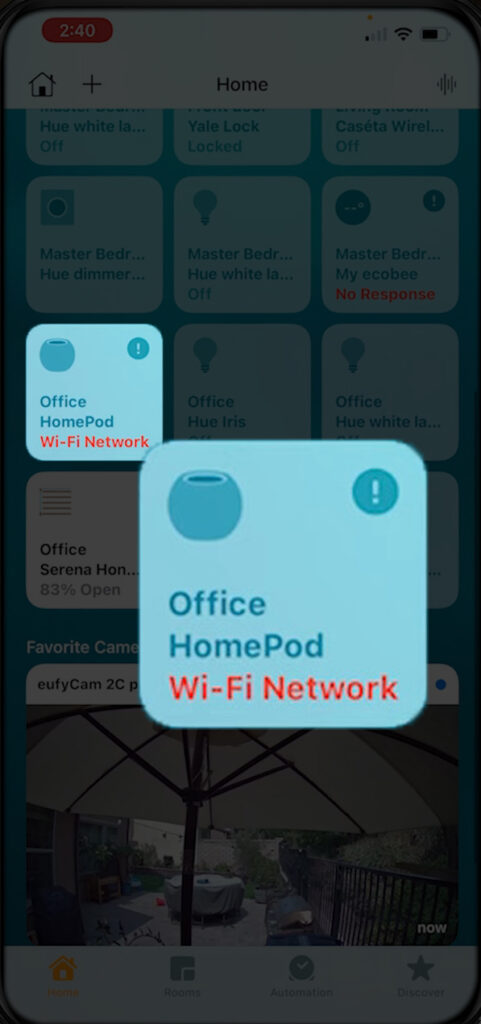
In case you’re using a newer version of the Home app, you’ll see a list of all your accessories. Under the name of the HomePod, you’ll see the words Wi-Fi Network in red. That is a clear indication that something is wrong with the wireless network your HomePod is using.

You should then tap the HomePod’s name in the app to display additional options. You’ll see a message informing you that the HomePod runs on a different network than your device. You won’t be able to tap on it to change the network, but there is a way to access this option.
You could tap on a Gear icon located at the bottom of the screen. Alternatively, you can pull your screen all the way to the bottom and slowly drag it up. You’ll then see different notifications along with a new message that looks the same as the one that informed you that your HomePod and iPhone or iPad are not using the same network. However, you can tap on this message. If you tap on it, your HomePod will automatically switch to the network your iPhone or iPad is using.
Step 3: Test Out the Connection
Your last step in the process of changing the Wi-Fi network on the HomePod is testing out the connection. You can try using your HomePod for a basic task to see if everything is working properly.
In addition, you should exit the Home app and open it again after a few seconds. You should then check whether there is a message in red or an exclamation mark next to the HomePod’s name. If there isn’t, your HomePod was successfully connected to new Wi-Fi. In other words, you have changed Homepod’s Wi-Fi network.
How to Connect Your HomePod to College/Hotel Wi-Fi
Setting Up the HomePod on a New Wi-Fi – Troubleshooting Tips
If you’re experiencing issues with connecting your Homepod to a different network, something may be wrong with your devices. Here are the easiest ways to fix the problem.
1. Fix Your Wi-Fi
It’s possible that your Wi-Fi is not working which is why you’re experiencing a problem with connecting your HomePod to your home network. You can try performing any online activity on another device to check whether that’s the case.
If your Wi-Fi is not working at all, you can restart or reset your router and try again. You could also visit the official website of your internet service provider to check for outages in your area.
2. Restart the HomePod
Restarting the HomePod should remove any bugs that may be preventing it from connecting to another Wi-Fi network. Thankfully, this process is pretty easy and should be complete within two minutes.
To restart the HomePod, you’ll need to open the Home app. Then, you should hold the name of the HomePod until new options pop up. You should scroll down to the bottom and choose the Restart HomePod option. If you don’t see this option, you’ll find it when you first tap on the Gear icon. You’ll then need to choose Restart HomePod to complete this process.
If restarting doesn’t help, you may have to reset your HomePod to factory default settings. This will erase all existing settings, and you will have to set it up again.
How to Reboot and Factory Reset Your HomePod
3. Force Restart Your iPhone or iPad
The issue you’re experiencing could be caused by some kind of problem with your iPhone or iPad. In most cases, force restarting your device should fix it.
In case you have an iPhone, you’ll restart it using a simple button combo. First, press and release the Volume Up button. Then, do the same with the Volume Down button. After that, hold the Power button until the Apple logo appears. The restart process is similar on an iPad.
How to Force Restart an iPhone
4. Update the HomePod
To make sure that everything is running smoothly, you’ll have to keep your HomePod updated. Your device should automatically update its software whenever there is a new version available. However, that doesn’t always happen automatically, especially if the HomePod is experiencing internet connection issues.
Before you search for HomePod updates, you’ll need to update your iPhone or iPad first. You’ll do that by going to the settings of the device and tapping on the General section. Then, you should go to Software Update to download and install the latest software version.
After the installation is complete, you can open the Home app. Once you’re there, you should tap on the button with three dots and choose Home Settings. You’ll then have to click on Software Update. If a new version is available, you should download and install it.
How to Update Your HomePod
In Conclusion
The process of changing the Wi-Fi network on your HomePod is simple and won’t take longer than a couple of minutes. In case you experience an issue, you can always go back to the troubleshooting section of this article and find a quick and easy solution there!

Hey, I’m Jeremy Clifford. I hold a bachelor’s degree in information systems, and I’m a certified network specialist. I worked for several internet providers in LA, San Francisco, Sacramento, and Seattle over the past 21 years.
I worked as a customer service operator, field technician, network engineer, and network specialist. During my career in networking, I’ve come across numerous modems, gateways, routers, and other networking hardware. I’ve installed network equipment, fixed it, designed and administrated networks, etc.
Networking is my passion, and I’m eager to share everything I know with you. On this website, you can read my modem and router reviews, as well as various how-to guides designed to help you solve your network problems. I want to liberate you from the fear that most users feel when they have to deal with modem and router settings.
My favorite free-time activities are gaming, movie-watching, and cooking. I also enjoy fishing, although I’m not good at it. What I’m good at is annoying David when we are fishing together. Apparently, you’re not supposed to talk or laugh while fishing – it scares the fishes.
