A stable internet connection is essential in our daily activities. Routers are manufactured to broadcast their wireless signal across a wide range so that you can access the internet from any point in your home or business.
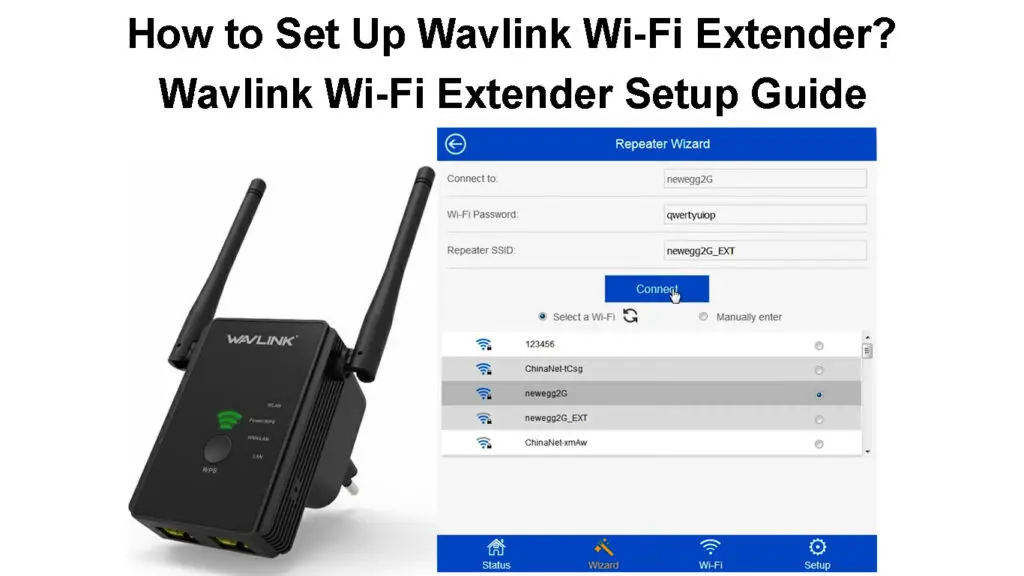
Unfortunately, routers have shortcomings; sometimes, the Wi-Fi signal might not reach where you want it to. In such scenarios, you can rely on a quality Wi-Fi extender to increase the Wi-Fi coverage. Read on as we look into how you can set up a Wavlink extender and enjoy Wi-Fi coverage in more areas.
CONTENTS
Setting Up a Wavlink Extender
There are various methods that you can use to set up the extenders. The easiest and fastest way is to use the WPS button, which would only enable you to set it up but not manage the extender’s settings.
If you wish to adjust additional settings, like changing the extender default admin password, you should set it up using Ethernet or Wi-Fi.
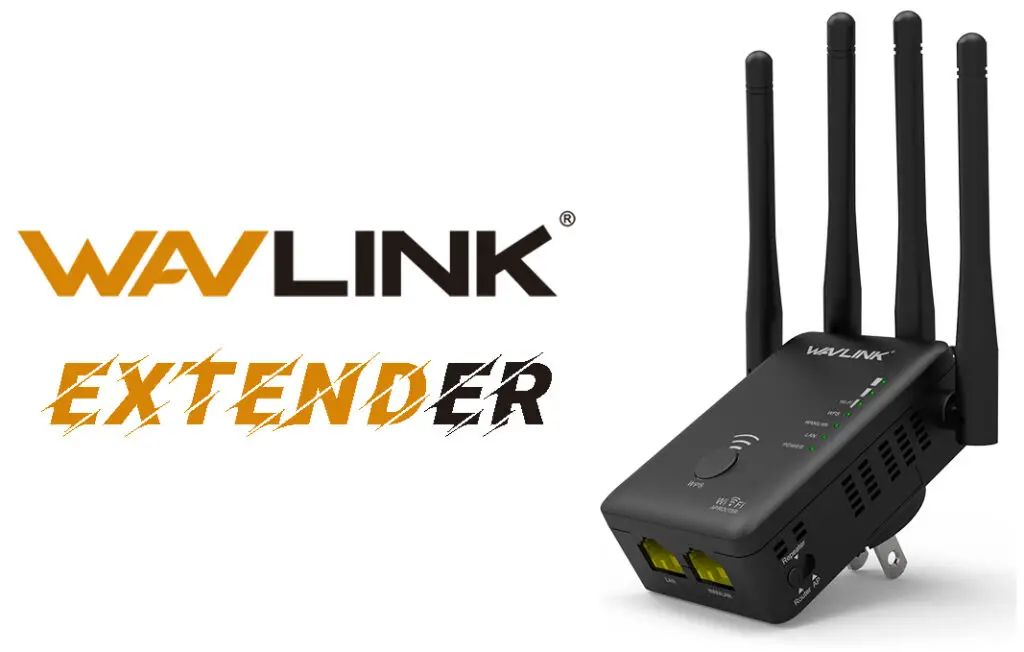
Below are all the possible procedures you can follow to set up your Wavlink extender correctly.
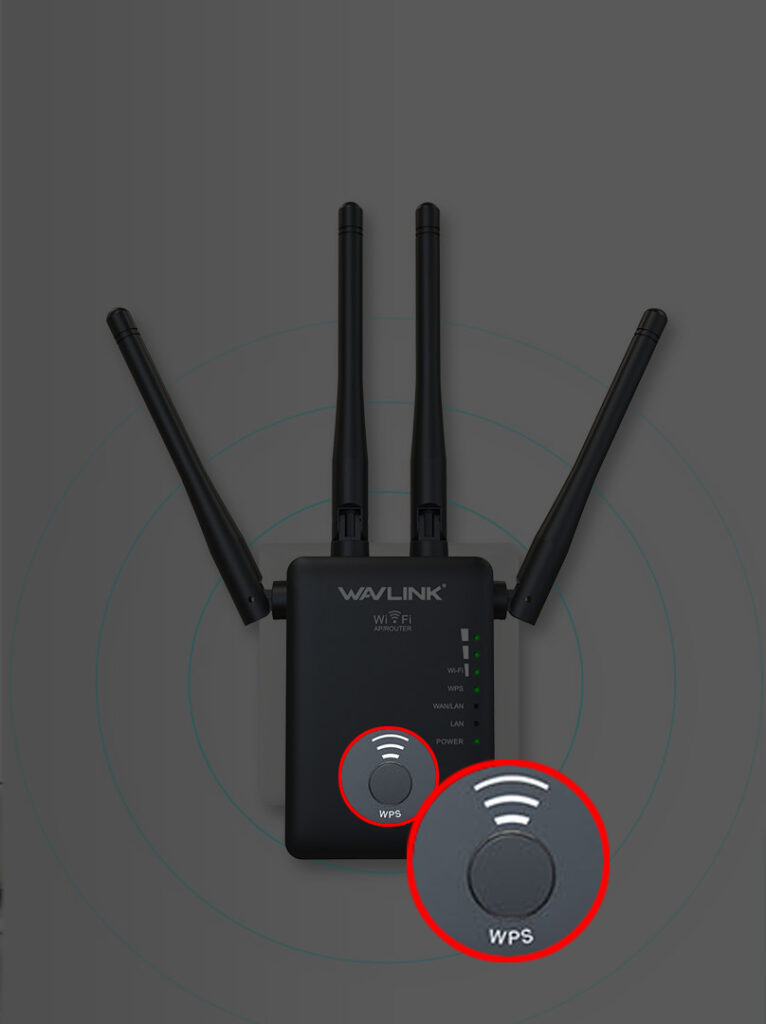
Wavlink extenders have a Wi-Fi Protected Setup feature that makes it easier to set them up. The feature requires you to push a button on the router and another on the extender. Both devices should be close to establish a connection.
The method does not require you to use the wireless network’s password. The only requirements are that the router should have WPS capabilities.
Therefore, confirm that the router has the WPS feature; if it does not, try the other methods mentioned in this article.
If the router has WPS:
- Plug the extender into a power outlet that is nearest to the router. Preferably the router and Wavlink extender should be in the same room.
- Check to see if your Wavlink extender has an on/off switch and turn it on. If it does not have one, the extender should be powered up immediately after you connect it to a working power outlet. You can Check if the extender is on by observing the LED indicators.
- Once the extender is on, ensure that the router is also on, then press the WPS button on the router. Some routers have an LED that indicates that the router has initiated its WPS setup sequence. Therefore, check for that on yours.
- Next, press the WPS button on the extender for at least six seconds while observing the LEDs. Ensure you do this within two minutes of pressing the button on the router. The WPS LED on the extender should be a solid blue; however, it might be pulsating amber before it turns blue to indicate that the extender is connecting to the router.
- Once the extender is connected to the router, you can relocate it to where your Wi-Fi signal is weak. Situate the extender halfway between the router and the Wi-Fi dead zone. This ensures the extender receives an adequate Wi-Fi signal that can be extended appropriately.
- Scan for available wireless signals in your home, and the extended signal should be among them. The extended SSID will have an _EXT suffix.
How to Set Up a Wavlink Extender (AERIAL X AC1200)
Using the Web Interface
You can also use the extenders web interphase to set it up. All you need is an existing wireless signal from your router, the Wavlink Extender, a device that can access Wi-Fi or has an ethernet port. The device should also have a web browser. You will also need an Ethernet cable if you wish to set up the extender while it is physically connected to a laptop/desktop.
Follow the steps below once you have the mentioned necessities;
- Confirm that your router and desktop are powered on, and your router is broadcasting its Wi-Fi signal.
- Connect the Wavlink extender to a power outlet and toggle the power switch on the extender if it has one.
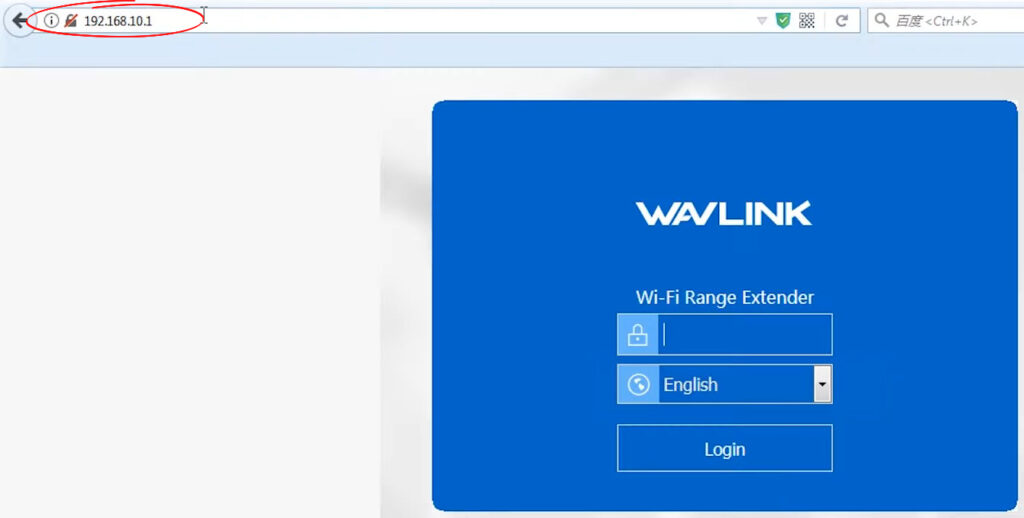
- Connect the desktop to the extender’s unsecured SSID (Wavlink Extender Setup_Ext, Wavlink N, or Wavlink AC), and you will be redirected to the extender’s web interface login page. If you are not redirected, open a web browser on the desktop and visit ap.setup or wifi.wavlink.com
- You can also use 192.168.10.1 to access the web interface if the links fail to work.
- Once you have established a connection between your device and the extender and visited its web interface, key in your login credentials to access the extender’s web interface.
- The default username and password are ‘admin.’ However, you should check the user manual that came with the extender for the specific default credentials of your extender’s model.
- On the next window, update your region, time zone, and the extender’s login password, then click Save.
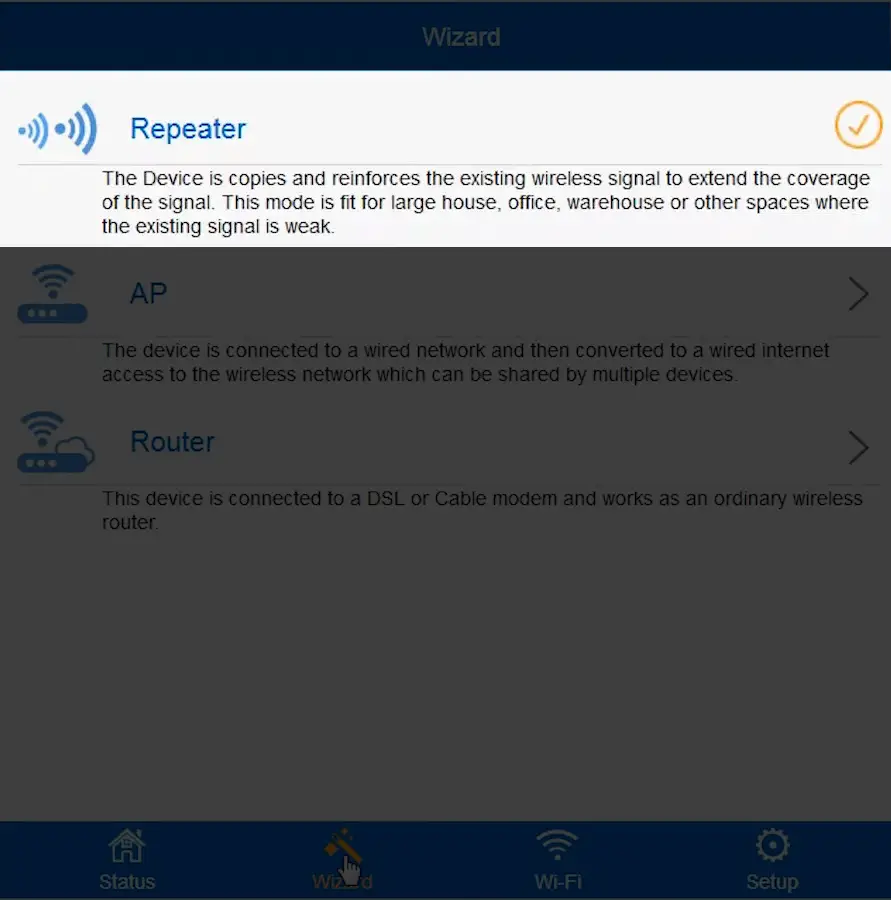
- Select repeater mode, then choose your home Wi-Fi SSID from the list of available wireless networks around you.
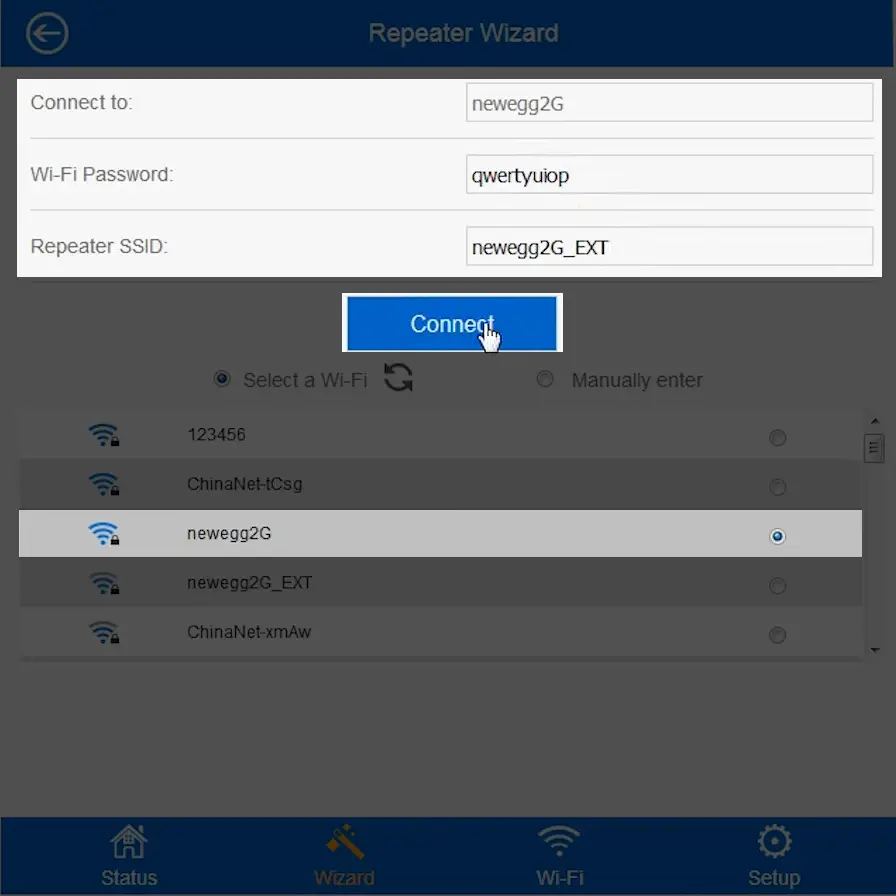
- Then, enter your home Wi-Fi password in the dialogue box labeled password. You can also proceed to rename the extender’s 2.4GHz and 5GHz bands from the default to what you want. However, it is advisable to leave them as you will find them for the moment, and you can rename them later.
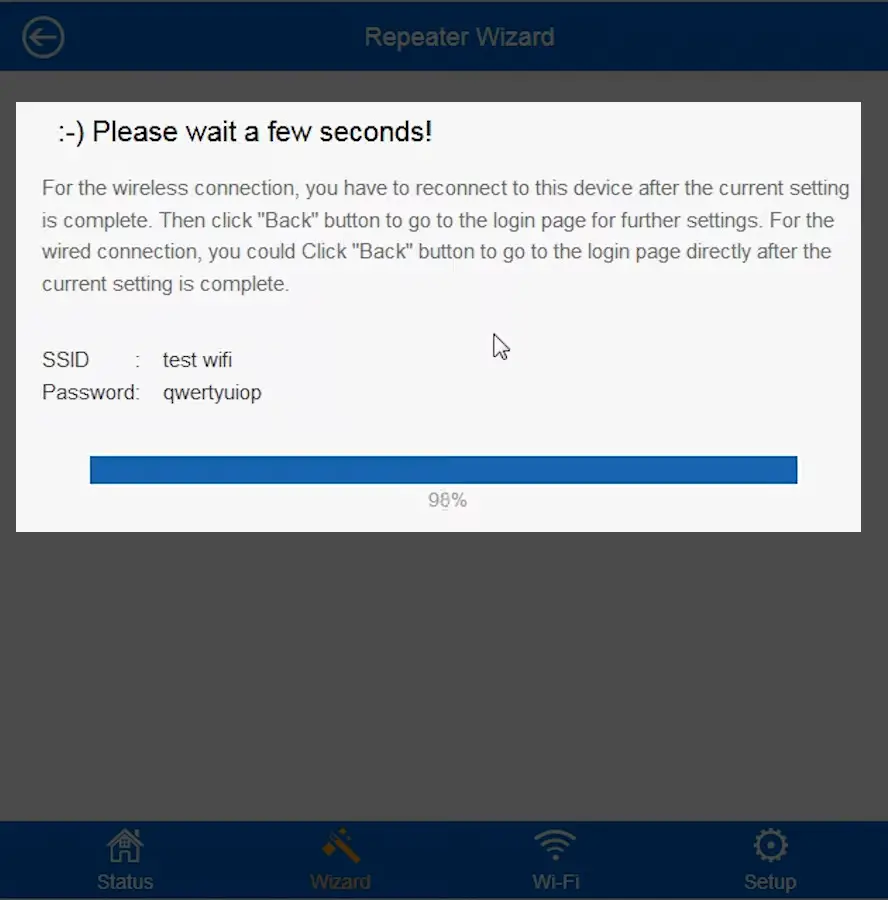
- Click Next and wait as the extender establishes a connection. Observe the progress bar on the screen to find out when the extender is done setting up.
- The LED on the extender will then light solid blue to show the extender has successfully connected to your router.
- You can now relocate the extender to a power outlet halfway between the dead zone and your router. Wait as the extender reconnects to the router; you will know it is done when it lights solid blue instead of blinking amber.
- However, the color might differ depending on the extender’s distance from the router. If it is solid blue, it means the extender is properly situated. If it is yellow, that means it is fairly placed but can be moved closer to the router if possible, and if it is red, that means the extender and router are too far apart.
How to Set Up a Wavlink Extender as a Repeater/Router/AP
Troubleshooting the Wavlink Setup
The Wavlink extender setup process is evidently an easy procedure to follow. Unfortunately, things do not always work out, and you might encounter some challenges.
You can conduct basic troubleshooting procedures before contacting Wavlink, saving you time and money. The troubleshooting tips include:
Check the Distance
Ensure the router and extender are not far apart during the initial setup. Always try to connect the two devices in the same room, then move the extender to an appropriate connection.
You can determine an appropriate location by observing the extender’s LEDs.
Check the Switches on the Router
Some Wavlink extenders have a physical switch for toggling between the extender’s various modes. Check for switches labeled Access point and repeater mode, then ensure repeater mode is the selected option.
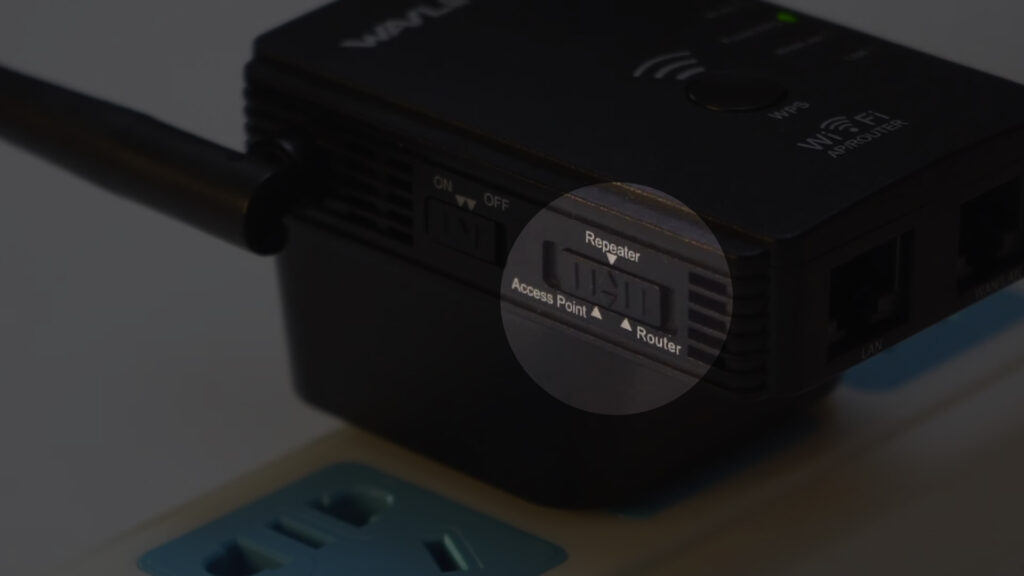
You can activate the other modes later through the extender’s web interface.
Ensure You Use the Correct Details
Not all extenders use the same link to access their web interface. Some use ap.setup while others use wifi.wavlink.com. Therefore, try both if one fails to direct you as intended.
Also, confirm that you use the correct login credentials, especially if you initially changed them from the defaults.
Disable the Antivirus and Firewall
An antivirus, ad-blocker, or firewall program can prevent you from accessing the extender’s login page. Consider temporarily disabling them to see if you have a smoother login experience.
While at it, also clear your browser’s cache and cookies. You can also shift between browsers, as that also helps.
Reset the Extender
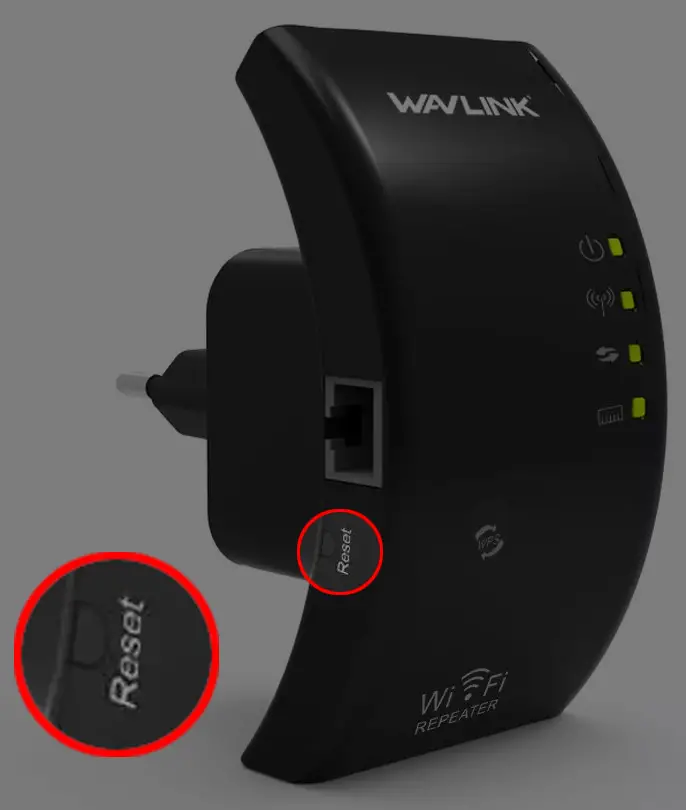
If the extender persistently has issues while setting up, you can reset it even without accessing the web management page. Simply locate the reset button, usually on the underside, and press it using a paperclip or anything that can fit in the hole containing the reset button.
Conclusion
You can always rely on extenders to improve Wi-Fi coverage in your home. But avoid daisy chaining them as that can immensely deteriorate your wireless internet speeds. Wavlink extenders are a good choice since they are bundled with additional features such as router and AP mode that make them stand out. Contact Wavlink’s customer support if you encounter any challenges.

Hey, I’m Jeremy Clifford. I hold a bachelor’s degree in information systems, and I’m a certified network specialist. I worked for several internet providers in LA, San Francisco, Sacramento, and Seattle over the past 21 years.
I worked as a customer service operator, field technician, network engineer, and network specialist. During my career in networking, I’ve come across numerous modems, gateways, routers, and other networking hardware. I’ve installed network equipment, fixed it, designed and administrated networks, etc.
Networking is my passion, and I’m eager to share everything I know with you. On this website, you can read my modem and router reviews, as well as various how-to guides designed to help you solve your network problems. I want to liberate you from the fear that most users feel when they have to deal with modem and router settings.
My favorite free-time activities are gaming, movie-watching, and cooking. I also enjoy fishing, although I’m not good at it. What I’m good at is annoying David when we are fishing together. Apparently, you’re not supposed to talk or laugh while fishing – it scares the fishes.
