There are so many things we can do with wireless technology at the moment. There’s regular wireless internet access, wireless location tracking, even vehicles can communicate via wireless technology.
So many uses, and still, we can experience so many connection issues with wireless. That’s why we’ve decided to discuss why our Wi-Fi keeps disconnecting on Windows 10. We’re going to review the reasons and the fixes for the issue.

CONTENTS
Reasons Wi-Fi Keeps Disconnecting on Windows 10
Make sure to identify the reasons before you continue with the troubleshooting process. It’s important to know what’s causing your Wi-Fi to disconnect. The typical reasons this happens are these five:
- Old router: If you haven’t changed your router for the previous 5 years, then it’s probably time to do so unless all your devices are five years old. Keep the router in tune with the other devices you have in your home.
- Outdated wireless driver: The Windows 10 update didn’t go through because of something, and it’s been a long time since you restarted your device. So, maybe the wireless driver is outdated, and that’s why Wi-Fi keeps disconnecting.
- Router position: It’s not uncommon for people to place their routers in corners, on the bottom shelf, or somewhere where the wireless signal doesn’t have a chance to reach your device because of all the obstacles.
- Power interruption: Just check the cables and see if there’s no damage so that you can eliminate the possibility of power interruptions. If the power cables are damaged, the router will keep going off and on. This is why the Wi-Fi might keep disconnecting.
- Power management: Because of the battery and performance optimization in Windows 10, the system manages the power by turning off the wireless adapter when it needs to preserve the battery.
Wi-Fi Keeps Disconnecting on Windows 10 Fixes
Once you’ve identified the reason your Wi-Fi keeps disconnecting on Windows 10, you can try to solve it. We’ve provided both general and specific fixes for the issue. Hopefully, once you go through these, you won’t have any more trouble with your Wi-Fi.
Windows 10 Automatic Troubleshooter
One of the things that makes life much easier for IT technicians is the Windows 10 troubleshooter. With it, you can run diagnostics on the network you’re connected to, and you’ll get the feedback immediately.

To troubleshoot, just right-click on the wireless connection in the lower right corner of your screen and click on Troubleshoot Problems. The troubleshooter will go through diagnostics and fix the issue for you if it’s possible.
Reposition Your Router
To make the most of your router and the wireless signal, try repositioning it so that there are no obstacles between it and most devices around your home. It’s important to put it in a higher and more centralized position in your home.

Also, make sure that there are no mirrors, walls, aquariums, or other devices that emit a similar frequency nearby. Appliances like microwaves can interfere with the wireless signal, mirrors reflect it, and water absorbs it.
Network Power Cycle
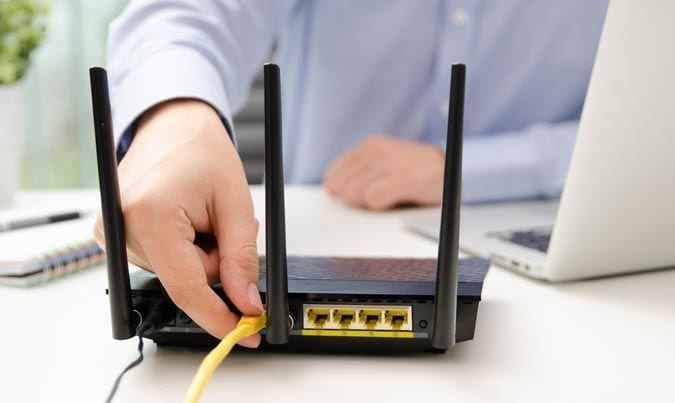
Doing a network reboot will do something good for your network because it refreshes the settings your router and your device use for the network. To do a network reboot you need to turn off the modem, the router, and the devices connected to Wi-Fi.
Recommended reading:
- Wireless Capability Is Turned Off in Windows 10 (How to Turn it On)
- Why Are There No Connections Available In Windows 10? (Troubleshooting Guide)
- Lenovo Wi-Fi Not Working in Windows 10 (Step-by-Step Troubleshooting Tutorial)
- How to Connect to Wi-Fi on Windows 11? (An Actionable Guide)
You need to turn on the modem first and wait for it to establish a connection. Then, you need to turn on the router and wait for it to start emitting the Wi-Fi signal. Finally, turn on your device to see if the Wi-Fi is working without disconnecting.
Router Factory Reset
The next usual thing we do is reset the router to factory settings. It’s the next most common step in network troubleshooting. To reset the router’s settings, find the Reset button on the back of the router.

Use a paperclip or a needle to press the button and hold it for at least 30 seconds. The router should restart and reconfigure itself. Once that is done, you can try connecting to your Wi-Fi and seeing if the connection is reliable.
Update Wireless Driver
Sometimes, the issue resides in your outdated driver. This can happen when you don’t turn off your device regularly. Not restarting your device won’t allow Windows 10 to automatically update the system.
To manually update your wireless driver, you need to type Device Manager in the search box next to the Start menu button. Click on the first result that appears, and go to the Network Adapters section.
Right-click on the wireless adapter and click Update Driver. A window will pop up and you need to select Search automatically for drivers. If there are any available, your wireless driver will be updated.
Reinstall Wireless Driver
You need to follow the same process as the previous step to find the wireless driver. Right-click on the wireless driver and select Uninstall device. Once it’s finished, go to Action on the upper left corner of the window.
Select Scan for hardware changes and the driver will be reinstalled. You should be able to connect to your Wi-Fi without any connectivity issues. Locate the wireless driver to make sure your system installed it.
Wireless Power Management
For this step, go to the Device Manager and locate the Network adapters section. Right-click on the wireless driver and hit Properties. Once there, you need to click on Power Management and you’ll see a checkbox you need to uncheck.
The checkbox says “Allow the computer to turn off this device to save power.” Once you uncheck this box, simply click OK, and Windows 10 won’t automatically turn off your wireless driver.
Change DNS
To change the DNS (Domain Name System) go to Settings > Network & Internet. On the left pane, click on Wi-Fi. Once there, go to Change adapter options under the Related settings section.
Right-click on Wi-Fi, and hit Properties. Click on Internet Protocol Version 4 (TCP/IPv4) and click Properties again. Click on Use the following DNS server addresses, and type 8.8.8.8 in the preferred DNS field and 8.8.4.4 in the alternate DNS field. Click OK and that’s it.
Reset TCP/IP Stack
To reset the TCP/IP stack, go to the search box and type Command Prompt. Right-click on the first result that appears and click Run as administrator. Once the box opens, you need to type netsh int ip reset and hit Enter. This might help you with the connectivity issues.
Change Network Type
To change the type of network you’re using, you need to go to Settings, and go to Network & Internet. Click on Wi-Fi and go to Manage known networks. Select the network you’re using at the moment and click on Properties.
Once there, just select Private instead of Public and that’s it. It might help with your connectivity issues. If it doesn’t help you should consider getting a new router or a new device unless it’s an issue with your ISP (Internet Service Provider).
Conclusion
Now you know the reasons and the fixes, and hopefully, some of these steps will solve your issue. However, If your Wi-Fi keeps disconnecting on your Windows 10 laptop after going through all these steps, then you should contact support or simply get your service from a better ISP.

Hey, I’m Jeremy Clifford. I hold a bachelor’s degree in information systems, and I’m a certified network specialist. I worked for several internet providers in LA, San Francisco, Sacramento, and Seattle over the past 21 years.
I worked as a customer service operator, field technician, network engineer, and network specialist. During my career in networking, I’ve come across numerous modems, gateways, routers, and other networking hardware. I’ve installed network equipment, fixed it, designed and administrated networks, etc.
Networking is my passion, and I’m eager to share everything I know with you. On this website, you can read my modem and router reviews, as well as various how-to guides designed to help you solve your network problems. I want to liberate you from the fear that most users feel when they have to deal with modem and router settings.
My favorite free-time activities are gaming, movie-watching, and cooking. I also enjoy fishing, although I’m not good at it. What I’m good at is annoying David when we are fishing together. Apparently, you’re not supposed to talk or laugh while fishing – it scares the fishes.
