
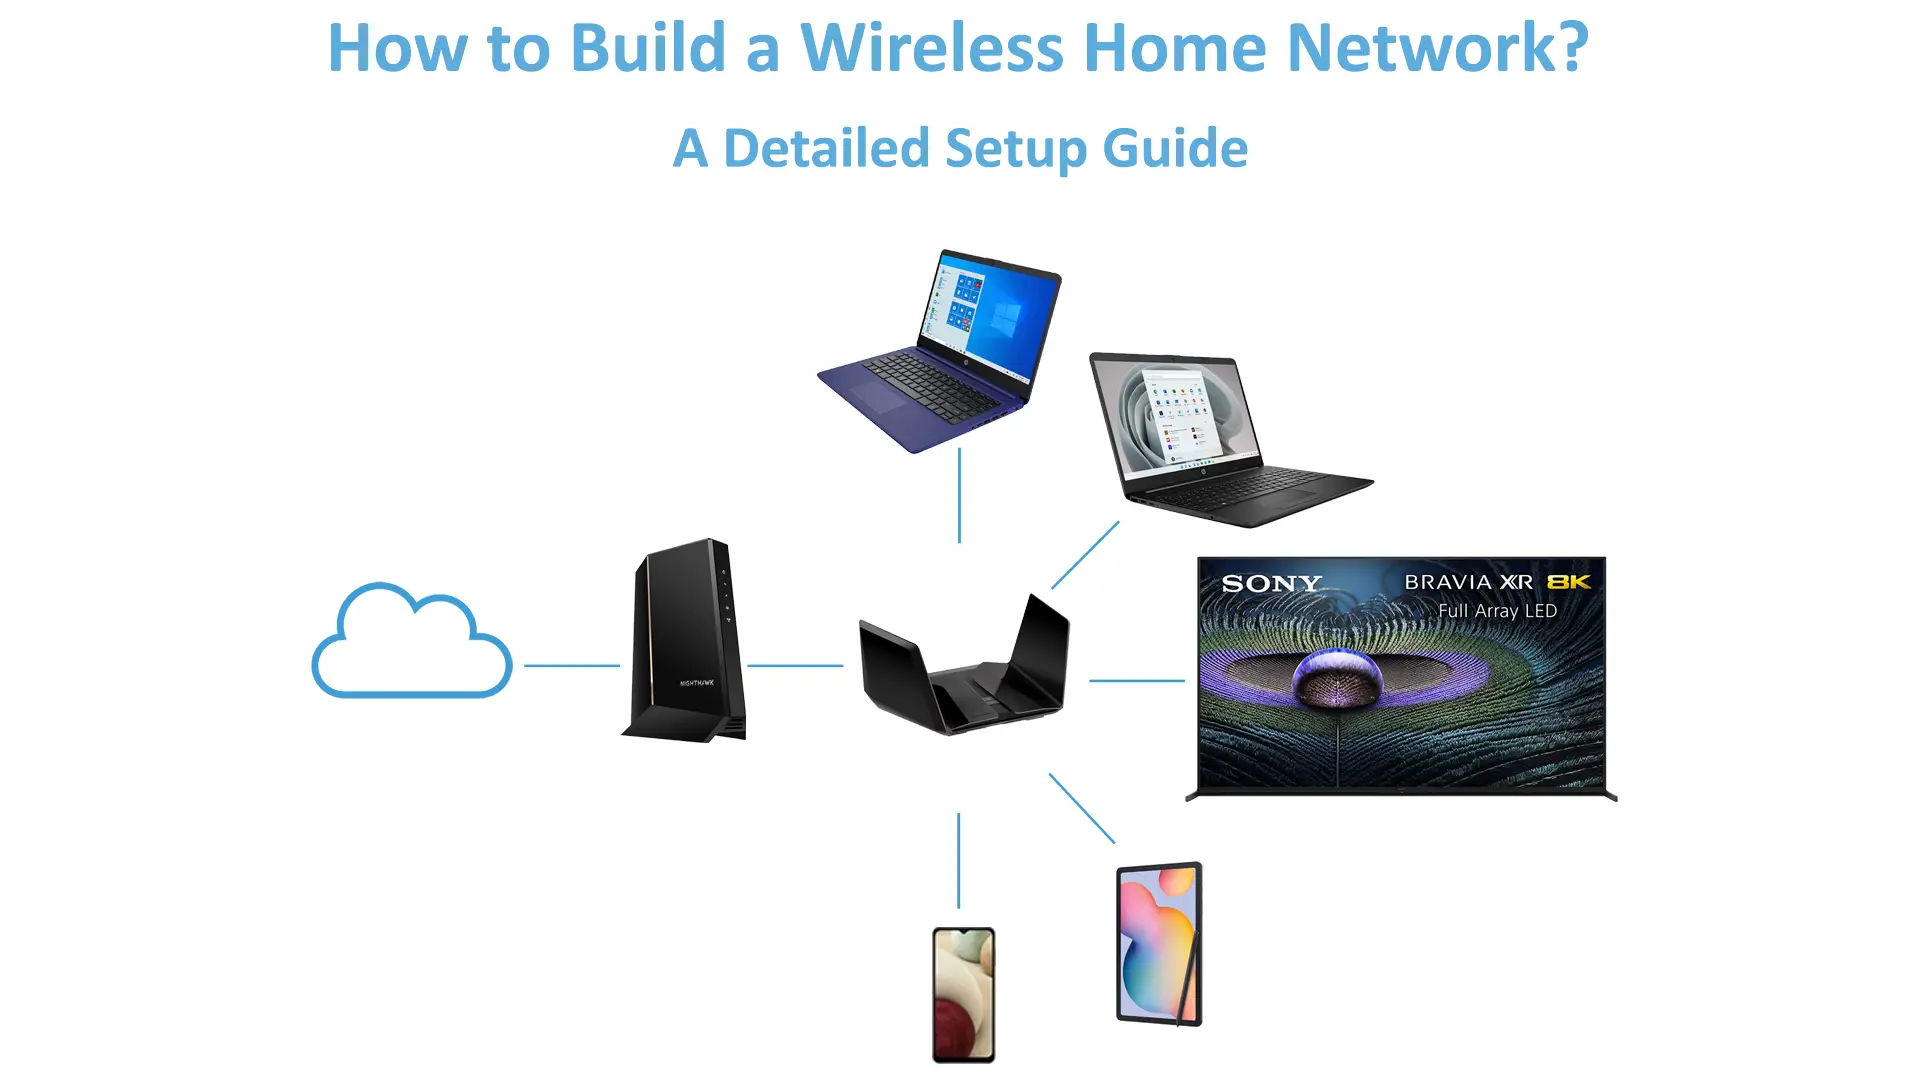
Lately, with the increase in internet usage in the new norm, it’s hard to find a home without a local internet network. The home network allows multiple devices such as PCs, laptops, tablets, TVs, and games consoles to join the network and perform various online activities. This post guides you to grasp how to build a wireless home network.

CONTENTS
Wireless and Wired (Ethernet) Home Networks – A Comparison
Before we go into the detailed steps, let’s take a look at the brief comparison between a wireless home network and a wired one, also known as the Ethernet connection. Actually, all routers available in the market today offer both connection types. It’s how you want it to be, which depends on what purpose and what devices you want to connect to the internet.
A wireless connection is adequate for general, light, and medium usage such as internet browsing, emailing, and attending online meetings/classes. However, if you want the best experience in online gaming, 4K/8K/Ultra HD streaming, downloading/uploading, or AR/VR activities, then a wired Ethernet connection is undoubted the best option.
That said, it’s worth noting that wireless networks have been improving lately, especially during the past decade, similar to other IoT developments. So much so that they can match the speed and performance of wired networks. For instance, the so-called next-gen Wi-Fi 6 can provide bandwidth as fast as the top Ethernet connections, although it may not be as reliable. In addition, Wi-Fi 6 can handle more devices and operate through more signal bands to make it less congested while ensuring devices work at maximum performance.
Recommended reading:
- Why Does My Wi-Fi Keep Disconnecting and Reconnecting? (Proven Solutions)
- What Can Cause Wi-Fi to Keep Dropping? (Top Causes and Solutions)
- How to Stop Others from Using My Wi-Fi? (Ways to Stop People from Stealing Your Wi-Fi)
The drawback is Wi-Fi 6 enabled routers and devices are still very limited, although most high-end device releases carry this feature. Users are not in a rush to shift to Wi-Fi 6 because earlier Wi-Fi versions still produce fast connections. While having limited capacity on the number of devices connected at a time, it’s more than enough for most home users.
On the other hand, wired Ethernet networks have no congestion problems since every device connects using an Ethernet cable. Additionally, Ethernet cables don’t reduce the signal speed as much as a wireless network does. Although not as versatile as wireless networks, Ethernet connections still provide the best performance.
What You Need to Build a Wireless Home Network
Next, let’s look at the device, components, and equipment required to set up a wireless home network system:
- Router – it’s a network device that connects multiple other devices, such as PCs, laptops, tablets, TVs, phones, and many more, to the internet. The router must connect to the internet using a wired Ethernet cable via a modem to distribute data.

- Wireless Access point – it’s a wireless network device acting as a gateway for other devices to connect to the network. People use wireless access points to extend network coverage so that more users can access the network. They connect the access points to the router using the Ethernet cables. Then the access points transform the signal received from the router into a wireless signal which other devices can link using Wi-Fi connections. In most homes, Wi-Fi routers are, at the same time, wireless access points.
- Ethernet hub – also known as the switch. It’s a network device used to link together multiple Ethernet-equipped devices to form a single network section.
- Ethernet cable – we recommend cat 5, cat 5e, or Cat 6 standards. The cables usually come with RJ45 connectors.
- Broadband filters – necessary to channel digital broadband signal for Wi-Fi device connections separate from the analog phone signal (necessary only for ADSL connections).
Now that you have all the necessary equipment ready, we can get started with building your wireless home network:
Locate the best place to put your wireless router. Ideally, it should be in the center of your home, and there should be no objects blocking the signal. Most people put the router next to the broadband access point for easy Ethernet connection. However, if the access point is away from the center, you can use a long Ethernet cable to change the router location to the central position for optimum Wi-Fi reception.
The Don’ts
- Place the router behind a couch.
- Place the router close to microwaves, wireless phones, or motorized devices to avoid signal interference.
Let’s get started:
- You need to switch off the modem – press the On/Off button on the modem and switch off its power supply.
- Link the router to the modem. Plug one end of an Ethernet cable into the WAN port of the router and the other end into the modem.

- Link the router to your computer for temporary use to do the setup. Plug one end of another Ethernet cable into the LAN port on the router and the other end into the computer’s Ethernet port.
- Power up all three devices in the following order – modem > router > computer.
- Now, we need to log in to the router’s admin page to configure our home network.
Lookup Your Router’s IP Address
You need to find the router’s IP address before you can log in to the router’s admin page with these steps:
- Go to Windows > Settings > Network & Internet.
- On the menu, select Network Connections.
- Under the Status page, choose Properties.
- Scroll down to find and select the properties section.
- The router’s IP address is stated at the IPv4 DNS servers, which should look like this one ‘192.168.0.1’. It could also be 192.168.1.1 or 10.0.0.1.
- Copy or memorize this IP address – you’ll need it to log into the router.
Log Into The Router’s Admin Page
Follow these steps to log in:
- Start the internet browser.
- Type in the default IP address of your router.
- Type in the username and password when prompted. Normally the credentials are in the router’s manual. Otherwise, you can locate them on a sticker at the back of the router.
Now, you should perform some basic security tweaks. Go to the Wireless Security section and add WPA2 security to safeguard your Wi-Fi network (if you have a Wi-Fi 6 router, select WPA3). Then, enter a secure passphrase containing at least eight characters.
Change your Wi-Fi network name (SSID) for easy identification. You can change it at the information section of the router’s admin page.
Select a suitable Wi-Fi channel. Choose the least congested channel so that your Wi-Fi experience gets better.
What Are the Best Wi-Fi Channels?
Now, your Wi-Fi network is ready, and you can connect devices to the network. Click on the Wi-Fi icon and find your Wi-Fi name. Type in the password, and you’re connected. You may want to check the “Connect automatically” box so that you don’t have to type the password again next time you want to join the network.
How to Extend your Home Wi-Fi Network
If you have a large home, a single router acting as your access point may not be enough. You can extend the reach of your wireless home network by adding a few Wireless Access Points (or a range extender or a powerline adapter) around the house. Your farthest devices can connect to these closer WAPs instead of the router. Alternatively, you can install a home mesh Wi-Fi system instead. The mesh system has factory-configured multiple access points that work seamlessly with the main router to give whole-home Wi-Fi coverage.
Conclusion
With the home network being a necessity nowadays, device manufacturers and Internet Service Providers develop an easy installation process. You don’t even have to do additional research to install everything on your own. This guide makes it even easier to build a wireless home network. You can start installing your equipment right away.

Hey, I’m Jeremy Clifford. I hold a bachelor’s degree in information systems, and I’m a certified network specialist. I worked for several internet providers in LA, San Francisco, Sacramento, and Seattle over the past 21 years.
I worked as a customer service operator, field technician, network engineer, and network specialist. During my career in networking, I’ve come across numerous modems, gateways, routers, and other networking hardware. I’ve installed network equipment, fixed it, designed and administrated networks, etc.
Networking is my passion, and I’m eager to share everything I know with you. On this website, you can read my modem and router reviews, as well as various how-to guides designed to help you solve your network problems. I want to liberate you from the fear that most users feel when they have to deal with modem and router settings.
My favorite free-time activities are gaming, movie-watching, and cooking. I also enjoy fishing, although I’m not good at it. What I’m good at is annoying David when we are fishing together. Apparently, you’re not supposed to talk or laugh while fishing – it scares the fishes.