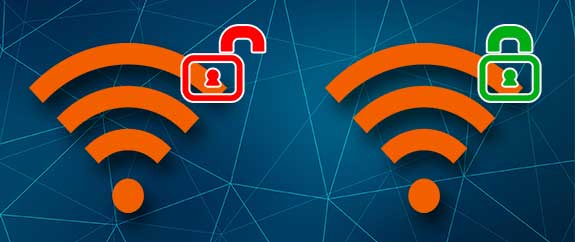
Keeping our personal data and information is something we should take very seriously today. Amongst many other ways to achieve that, in this article, we are going to discuss the security of our network and how to change an unsecured wireless network to a secured one. But first, let’s see why it is important to secure your wireless network.

CONTENTS
Why do you need to change your wireless network to secure?
It really doesn’t matter whether we are talking about a home wireless network or a business one, the risks are pretty much the same. We will mention just a few of them:
– Other people can connect to your network without you knowing about it. While most of them will use your bandwidth for their everyday online activities like gaming, surfing, and watching videos online, others may severely abuse your wireless network and perform a set of illegal activities that may cause serious problems for you. At the same time, they can access your personal files and data and monitor your network activities. This is well known as Piggybacking.
– If your wireless network is unsecured and also file sharing security is off, then a person can easily access your files and folders available for sharing. The best way would be to disable file sharing if you are not using it actively.
– Another problem with unsecured networks is that everyone who is connected can easily access your router settings if you are still using the default admin login details. It literally takes a few minutes to figure out what is the default router IP address and to find the default username and password. After the person gains access to your router settings he basically has full control over your network.
All the reasons we have just mentioned are enough to make you think about securing your wireless network. So, let’s see how to do it properly.
How to change an unsecured wireless network to secured?
When we talk about secured networks we have to mention that a secured network is the one that is protected by a WPA, WPA2, and lately WPA3 encryption. So, no matter whether you are using your home or business network if it’s open (unsecured) you need to secure it right away.
To keep things short, you can change an unsecured wireless network to a secured one from the router admin dashboard. This means that you need to log into your router first, find the wireless section, and then set up a strong and unique wireless password.
However, here is a more detailed guide on how to secure your wireless network.
STEP 1 – Get Ready
We have already mentioned that you need to login to your router first. To do it properly and successfully, you need to know the router’s default IP address and the default admin login username and password. You can find this on the label which is usually located under the router or in the user’s manual. Eventually, you can search through our router login category and find a detailed guide on how to login to your router. Just make sure to find the router brand you are using.
STEP 2 – Connect To The Network
The device you will be using to access the router settings needs to be connected to the network. You can use a smartphone, a tablet or a computer to connect and you can also connect using the Wi-Fi connection or the network cable. Once you connect the device you are ready to move to the next step.
STEP 3 – Launch A Web Browser On Your Device
The web browser is used to access the router admin dashboard. It helps us see the graphical user interface which makes managing the router simple and easy. You can use any web browser you have already installed on your device, but some router manufacturers recommend using either Google Chrome or Microsoft Edge.
Now, launch your web browser and move to the next step.
STEP 4 – Enter The Default Router IP In The Browser’s URL Bar
Router manufacturers use IP addresses from the private IP range as default IPs for their routers. Some of the most frequently used IP addresses are:
You can try entering these IPs one by one until the router login page shows up or you can find the correct IP on your own. If you are a Windows user, you can do it using the Command Prompt and the ipconfig command. If you are using another device check this guide on how to find the default router IP address.
When you enter the correct router IP in the URL bar you will be asked to enter a username and password.
STEP 5 – Enter The Admin Username And Password
If you haven’t changed any of the default router settings you will have to use the default admin username and password. However, if you have changed these earlier, use the custom ones.
The default username and password can be found on the sticker under the router. You can also try a combination of the following terms:
– for the username: user, admin, root, or leave it blank
– for the password: password, admin, user, 1234, or leave it blank
As you can see, these default admin login details are pretty simple and have to be changed as soon as possible.
When you enter the correct username/password combination you will gain access to the router’s admin dashboard.
Now, let’s find the Wireless Security section.
STEP 6 – Find the Wireless Security Section
Depending on the router brand you are using some settings may be slightly different but we are going to present the some of the most popular brands:
NETGEAR
After you access your Netgear router admin dashboard, go to Advanced and click on Setup in the left-hand menu.
Now select Wireless Setup, and check the radio button next to WPA2-PSK [AES]
In the Passphrase field enter the desired wireless password.
Click the Apply button to save the changes.
Linksys

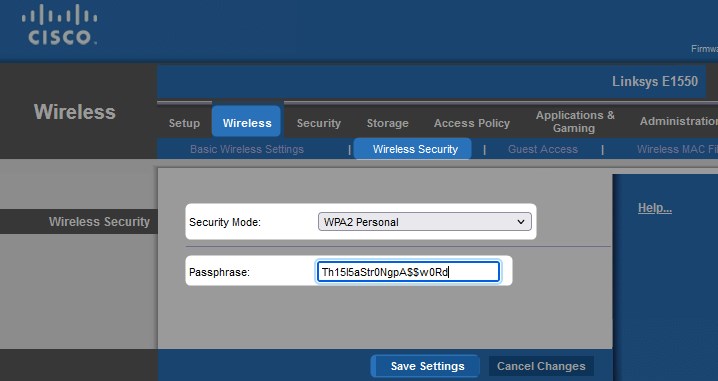
Click on Wireless in the horizontal menu at the top. Then click on Wireless Security in the sub-menu.
From the Security Mode drop-down list select WPA2 Personal.
The Passphrase field will appear. Enter the new wireless password there and click on the Save Settings button.
Belkin
After you login to your Belkin router scroll down to Advanced Settings, and in the WiFi section click on Security.
Now as a Security Mode choose WPA/WPA2-Personal (PSK). Set the Authentication to WPA2-PSK.
The Encryption Technique should be set to AES.
And finally, in the Pre-shared Key (PSK) enter the new wireless password.
Click the SAVE button to save the changes you have just made.
ASUS

In the Advanced Settings, find Wireless. In the new page scroll down to Authentication Method and select WPA2-Personal. Set WPA Encryption to AES and in the WPA Pre-Shared Key field enter the new wireless password. Click Apply to save the changes.
STEP 7- Your Wireless Network Is Secured
At this point, after you save the changes, we can say that your wireless network is now secured. You can now use the wireless password to connect your devices to it.
However, there are a few other things you can do to make your wireless network more secure. Each of these changes represents an additional layer of security.
Additional Network Security Tips
Since we have mentioned the additional security tweaks that will make your wireless network more secure, here is what you can do:
1. You can change the default router IP. As you have seen above, the default IP is used in the process of accessing the admin dashboard. So, it is not difficult for anyone who is already connected to the network to find the default IP.
2. Change the default admin password. If someone knows the brand of the router you are using he or she can easily find the default login details and access your router admin dashboard. Changing the admin password will prevent this from happening.
3. Hide your SSID. Although this looks like a nice security option, since people can’t see your network name and try to connect to it, it may cause you some problems when you want to connect a new device to the network. Besides that, hackers have their own ways to find out hidden network names so we would skip this one.
4. Disable file sharing. We have already mentioned this but if you are not actively using the file-sharing options in your network it is recommended to disable it. But if you are using it, consider creating a dedicated shared folder and protect the shared files with a password.
5. Install an antivirus program and a firewall. Installing an antivirus program on your device and keeping it up to date is highly recommended. Also, try to perform regular scans at least once a month. As for the firewall, check whether your router has a built-in firewall and enable it. If it hasn’t, install a firewall on your device as well.
6. Keep the router and modem firmware up to date. Every new firmware version comes with some patches that will protect your network from known exploits or they come with some performance upgrades and bug fixes. This is the reason why you need to check from time to time whether there is a new firmware version waiting to be installed.
Conclusion
Now you know why it is important to change your unsecured wireless network to a secured one, how to do it, and also add some additional layers of protection. Please take your time and go through the necessary steps needed to secure the network. It will take a little of your time to apply these changes but it is nothing compared to the stress when you find out that someone has hacked your network and locked you out of it.

Hey, I’m David. I’ve been working as a wireless network engineer and a network administrator for 15 years. During my studies, I also worked as an ISP field technician – that’s when I met Jeremy.
I hold a bachelor’s degree in network engineering and a master’s degree in computer science and engineering. I’m also a Cisco-certified service provider.
In my professional career, I worked for router/modem manufacturers and internet providers. I like to think that I’m good at explaining network-related issues in simple terms. That’s exactly what I’m doing on this website – I’m making simple and easy-to-follow guides on how to install, set up, and troubleshoot your networking hardware. I also review new network equipment – modems, gateways, switches, routers, extenders, mesh systems, cables, etc.
My goal is to help regular users with their everyday network issues, educate them, and make them less scared of their equipment. In my articles, you can find tips on what to look for when buying new networking hardware, and how to adjust your network settings to get the most out of your wi-fi.
Since my work is closely related to computers, servers, and other network equipment, I like to spend most of my spare time outdoors. When I want to blow off some steam, I like to ride my bike. I also love hiking and swimming. When I need to calm down and clear my mind, my go-to activity is fishing.
