
The DHCP server assigns a unique IP address (as well as several other parameters used to configure the network) to each device connected to a network. In this way, devices on the network can communicate with other devices on the same network.
Thanks to the DHCP server, you can be sure that the same IP addresses will not be assigned to two different devices. That way, the DHCP server prevents potential errors and IP address conflicts.
If you want to know how to configure a router to use DHCP, we recommend that you read this article.

CONTENTS
How to Find the Router’s IP Address
To successfully configure the DHCP server, you need to know the IP address of your router, because you need to access the configuration page of your router in order to change the DHCP settings.
You can usually find the IP address of the router on the sticker on the back of the router, but if this is not the case with your device, we will also show you how to get the IP address. This procedure may differ depending on whether you are using Windows or Mac. We will cover both variants.

How to Find the Router’s IP Address – Windows Users
- At the very beginning, of course, you must be connected to the router (either via Wi-Fi or Ethernet cable)
- Click Start, and then select Settings.
- Now, in the Settings section, find and open Network and Internet.
- Tap View your network properties.
- Scroll through this section until you find the Default Gateway. The number to the right of the Default Gateway is the IP address of your router.
Find Your Default IP in Windows 10
How to Find the Router’s IP Address – Mac Users
- If you haven’t already, you need to connect to the router.
- Tap the Apple menu on your device.
- Tap the second option that will appear in the drop-down menu – System Preferences.
- In the System Preferences section, find and open the Network option (round shape).
- Tap Advanced.
- In the Advanced section at the very top, you can see several main options. Open the TCP / IP section (to the right of Wi-Fi).
- The number next to the Router is the IP address of your router.

Steps to Configure the Router to Use DHCP
Once you know the IP address of your router, it’s time to show you how to configure the router to use DHCP. Follow the steps below:
- Open your favorite internet browser, enter the IP address of the router, and then press Enter on the keyboard. You will be redirected to the configuration page of your router.
- This step requires you to log in to the router page. The default credentials are usually located on the back of the router. If this is not the case, visit the official website of your router manufacturer and try to find the default username and password for your model. If you have changed your default password in the meantime, use it.
- Find and open the Settings section. Depending on the exact model of the router, it can be marked with router settings, settings, or similar.
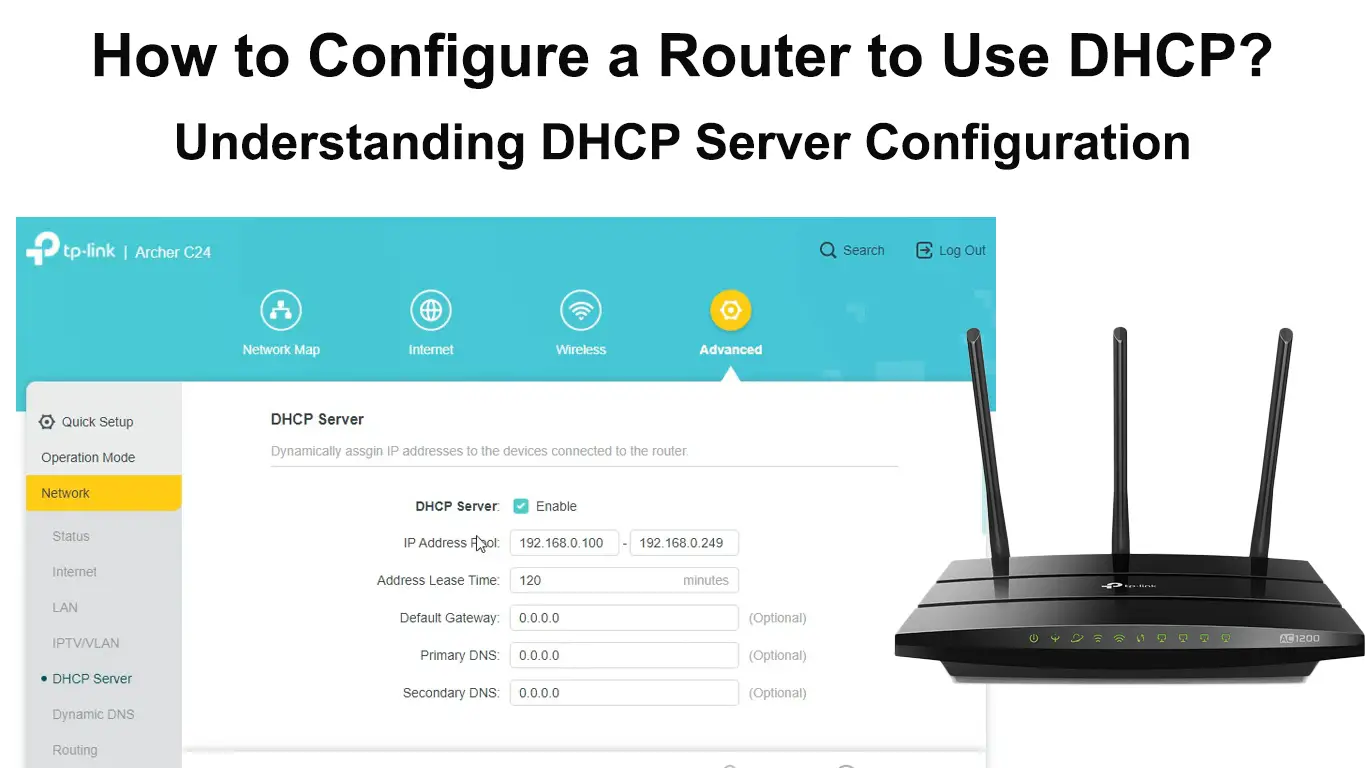
- After opening the Settings (something similar as mentioned in the previous step) in the network setup section (either Network settings or Advanced depending on the router model) find DHCP.
- Now, you have to enable the DHCP server. You must click the check box next to the DHCP server. (If Enabled is already checked, we recommend clicking Disable and then Enable again).

- At the end of the procedure, you need to save the changes. You will do this by tapping Save (or Apply depending on the router model).
Additionally, you can also adjust the IP address pool. This is the range of addresses that your router assigns to connected devices. You can adjust the DHCP lease time duration, assign a static IP address to some device, change your default gateway address, change DNS server addresses, etc.
Conclusion
We hope our article helped you configure the router to use DHCP. This procedure is very important and also very easy. If you decide to assign static addresses to each device, you should be aware that if the IP address is assigned manually, there is a higher chance of error than when using DHCP.

Hey, I’m Jeremy Clifford. I hold a bachelor’s degree in information systems, and I’m a certified network specialist. I worked for several internet providers in LA, San Francisco, Sacramento, and Seattle over the past 21 years.
I worked as a customer service operator, field technician, network engineer, and network specialist. During my career in networking, I’ve come across numerous modems, gateways, routers, and other networking hardware. I’ve installed network equipment, fixed it, designed and administrated networks, etc.
Networking is my passion, and I’m eager to share everything I know with you. On this website, you can read my modem and router reviews, as well as various how-to guides designed to help you solve your network problems. I want to liberate you from the fear that most users feel when they have to deal with modem and router settings.
My favorite free-time activities are gaming, movie-watching, and cooking. I also enjoy fishing, although I’m not good at it. What I’m good at is annoying David when we are fishing together. Apparently, you’re not supposed to talk or laugh while fishing – it scares the fishes.