If you want to connect your Android phone to your school or university wi-Fi, the chances are you will see the EAP method. Don’t let this confuse you. It is practically a security measure used to authenticate your device before it lets it connect to the Wi-Fi network.
In this article, we are going to explain what EAP is and how to connect your Android phone to a Wi-Fi secured with EAP Method.

CONTENTS
What is EAP?
EAP stands for Extensible Authentication Protocol. It is practically an authentication framework that is being used in many different network technologies, both wired and wireless. It is used to authenticate devices before they are granted permission to use the internet connection and access other network services.
EAP Explained
How Does the EAP Process Work?
To help you understand the EAP process and the way it works, we will try to explain the process of EAP authentication in simple steps.
- By clicking on the network name the user wants to join, a request to access the network is sent. This request goes to an AP.
- The AP asks the user to provide identification data, and then sends the data to an authentication server.
- The server then asks the AP whether the identification data is valid.
- The AP gets the verification from the user and sends it to the authentication server.
- The user connects to the wireless network.
Let’s Connect an Android Phone to a Secured Wi-Fi Using EAP Method
IMPORTANT: Depending on the Android version, some steps may be a bit different, but most of the steps will be the same for every phone.
If you want to access a secured Wi-Fi network using EAP, follow these steps.
- Unlock your Android phone and make sure Wi-Fi is enabled. If it isn’t, activate it and then continue to the next step.
- You can now long-press the Wi-Fi icon until the Wi-Fi settings open.
- Tap on the secured connection. Sometimes it will be named “eduroam” (most college networks) or something else (corporate networks).
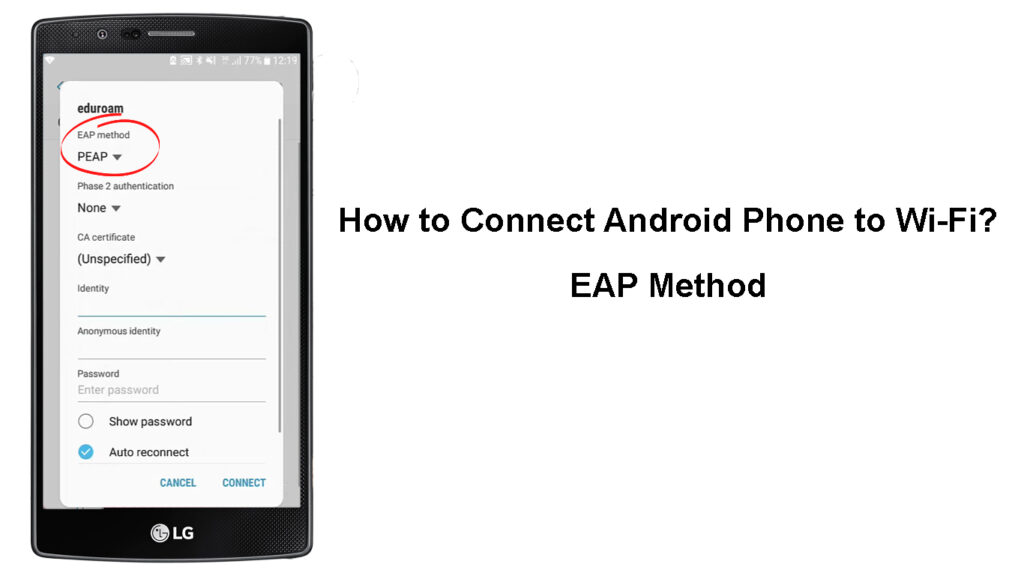
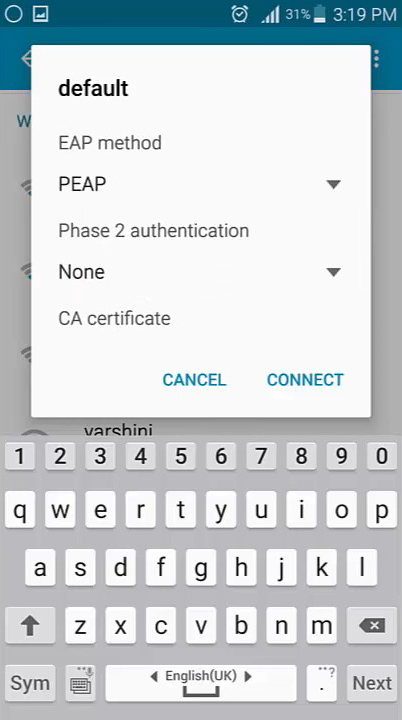
- A new window will open and you will see the EAP method at the top.

- Now fill out the following fields as follows:
From the drop-down list under EAP Method choose PEAP.
For Phase 2 authentication, choose MSCHAPV2.
Leave the CA certificate to be Unspecified. You can also select System defaults or None if Unspecified isn’t available.
In the Identity field, enter your username
Don’t write anything in the Anonymous Identity field.
Type the network password in the Password field.
- When you are done completing and selecting everything, click on Connect. Your Android phone should connect to the wireless network, and it should connect automatically the next time you are in range.
NOTE: In most cases, your Android phone won’t ask you to enter the domain, but if it does, you must have the right domain name and password. It’s usually your college’s web address.
How to Connect to a College Wi-Fi Using an Android Phone (EAP Method)
Android Phone Won’t Connect to Eduroam – What to Do?
If you can’t connect to the Wi-Fi network using your Android phone try the following solutions.
Restart Your Android Phone
In most cases, restarting your Android phone will be the simplest solution. You can press the Power button and when Reboot appears on the screen select it. The phone will shut down and then turn on again. Give it some time to boot completely, and try to connect to the wireless network again.
Recommended reading:
- Should You Turn Off Wi-Fi Router When on Vacation?
- Can You Restrict Wi-Fi Connections on Android Phone? (Ways to Limit Wi-Fi Usage)
- How to Connect to Wi-Fi Instead of Ethernet on Windows 10? (How to Give Priority to Wi-Fi Connection?)
If you can remove the phone’s battery, do that and put it back after one minute. Turn on the phone and try to connect again.
Turn Wi-Fi On and Off
Unlock your Android phone and swipe down from the top of the screen and click on the Settings icon. Now tap on Connections, then on Wi-Fi, and disable Wi-Fi for a few seconds. Then enable it and try to connect again.
Clear the Security Certificates
Removing the security certificates is another thing you should try if you can’t connect to the wireless network.
- Unlock your Android phone and tap on the Settings icon.
- Tap on Biometrics and Security.
- Scroll down to the end and click on Other security settings.
- Scroll all the way down to Clear credentials
- Tap on OK.
- If asked to enter your PIN code, enter it and click on Done. You should see a notification saying “Credential storage cleared”.
How to Clear Credentials on a Samsung Phone
- Try to connect your Android phone again to the secured Wi-Fi network, and see whether this fixes the problem.
Contact Support
If you have tried the solutions given above, and you still can’t connect to the Wi-Fi network, it is recommended to get in touch with support.
The contact information can be found on the official school or university website, so either ask someone to find the contact information for you or use your cellular connection temporarily until you find the contact info.
Final Words
Connecting your Android phone to Wi-Fi secured with the EAP method isn’t that complicated if you have the right info. If you are not sure, you need to get in touch with the network admin or visit the school/university website and find the necessary information. Most universities have step-by-step connection tutorials published on their websites.
Of course, if you have any problems connecting to the secured Wi-Fi, we recommend trying the suggested solutions. In case nothing works, contact tech support.

Hey, I’m Jeremy Clifford. I hold a bachelor’s degree in information systems, and I’m a certified network specialist. I worked for several internet providers in LA, San Francisco, Sacramento, and Seattle over the past 21 years.
I worked as a customer service operator, field technician, network engineer, and network specialist. During my career in networking, I’ve come across numerous modems, gateways, routers, and other networking hardware. I’ve installed network equipment, fixed it, designed and administrated networks, etc.
Networking is my passion, and I’m eager to share everything I know with you. On this website, you can read my modem and router reviews, as well as various how-to guides designed to help you solve your network problems. I want to liberate you from the fear that most users feel when they have to deal with modem and router settings.
My favorite free-time activities are gaming, movie-watching, and cooking. I also enjoy fishing, although I’m not good at it. What I’m good at is annoying David when we are fishing together. Apparently, you’re not supposed to talk or laugh while fishing – it scares the fishes.
