DIRECTV is an excellent service, right? Still, regardless of how many different channels you can switch between, we are all a bit spoiled at this point, and we want to watch exactly what we want and when we want it. To unlock that level of functionality, you’ll need to connect your DIRECTV receiver to Wi-Fi.
Whether you’ll be able to do it quickly, with a bit of fiddling, or not at all, will depend on what model of receiver you have.
CONTENTS
Requirements for Connecting DIRECTV Receiver to Wi-Fi
Before we dive into the instructions on how to connect your DIRECTV to Wi-Fi, let’s find out what model of receiver you’re dealing with.
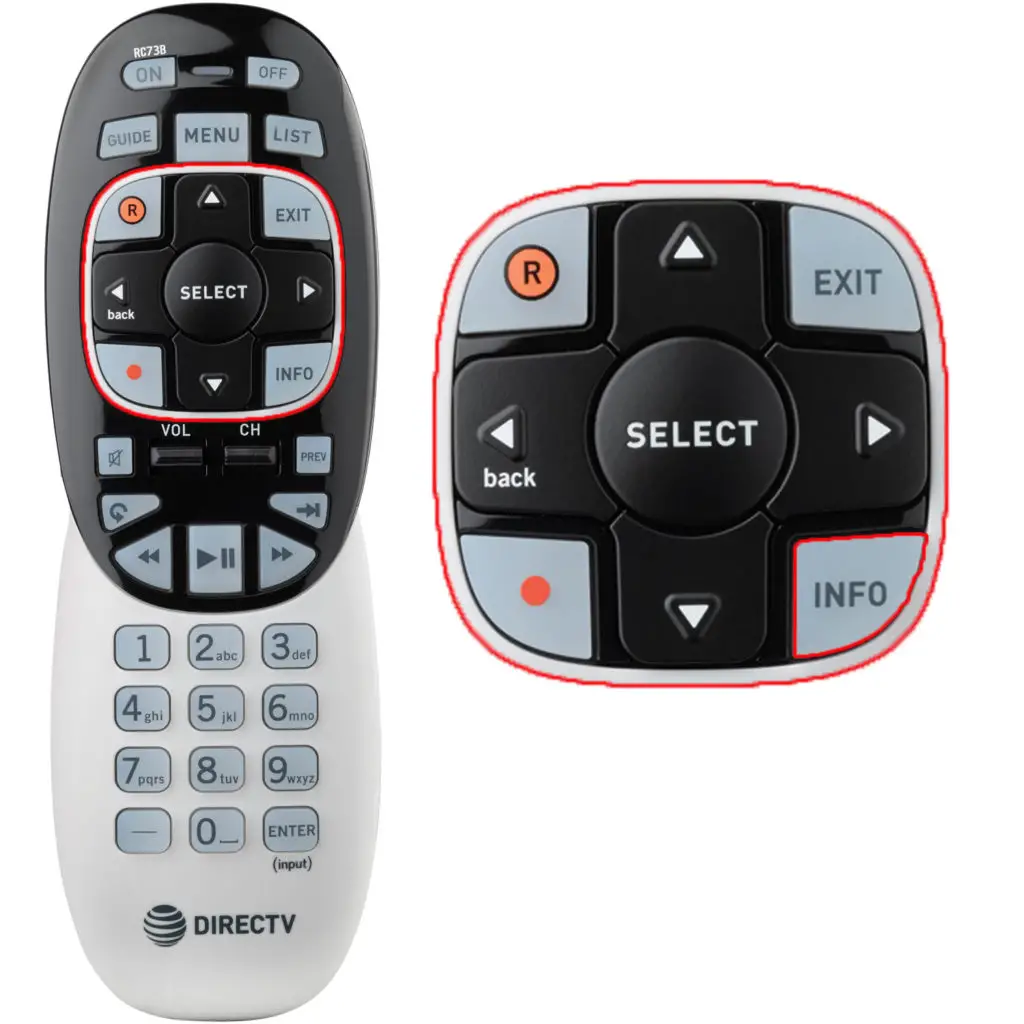
To find that out, press and hold the INFO button on your remote controller and find the model name next to the Receiver on the Info & Test screen.
There are only a handful of DIRECTV receiver models with built-in Wi-Fi capabilities.
Those are Genie 2, Genie HR44, Genie HR54, and Genie H44.
If your model is one of the above, you are in luck, and the setup and connecting process should be a smooth sail.
NOTE: It goes without saying that you’ll also need a strong Wi-Fi signal and broadband internet speed on top of having the correct DIRECTV receiver model.
How to Connect Compatible DIRECTV Receiver to Wi-Fi?
Connecting a DIRECTV receiver with built-in Wi-Fi support is pretty straightforward, and you can do it in a few simple steps.
Firstly, turn on your receiver and go to the menu by pressing the MENU button on the remote controller. Once inside the menu, go to Settings and Help > Internet Setup > Connect Now.
Secondly, select Set Up Wireless.
Lastly, choose your SSID (wireless network name) from the list of available Wi-Fi networks and enter your Wi-Fi password.
Once the receiver connects to the network, it will take a while to update and display all the services, so don’t panic if you don’t see them right away.
However, there is one thing you should pay attention to. It’s the Wi-Fi speed the receiver can realistically achieve. You can check this out through the Info & Test screen. If the speed is above 2 Mbps, you are good to go. If not, you should try figuring out how to improve it. Otherwise, you might end up looking at buffering screens more than you would like.
How to Connect DIRECTV Receiver to Wi-Fi
How to Connect Other Models to Wi-Fi Using the DIRECTV Cinema Connection Kit
If you are a proud user of one of the DIRECTV’s receivers without built-in Wi-Fi support, you might still be able to connect to Wi-Fi. Unfortunately, you will need an additional piece of equipment, and more setup work.
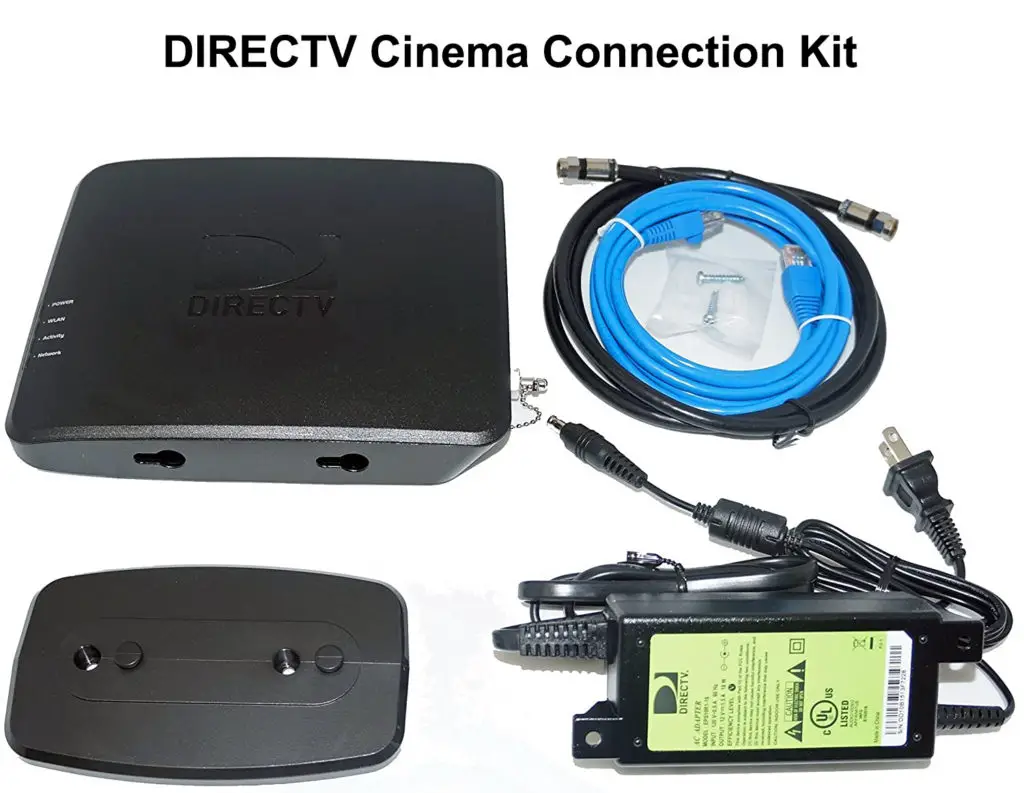
A wireless cinema connection kit is an additional device that will allow you connectivity to the internet, including Wi-Fi. You can get this kit from DIRECTV or even buy it on Amazon.
However, it won’t work with any model. Like before, press and hold the INFO button on your remote controller and find the model name next to the Receiver on the Info & Test screen.
You want to see HR32, R22, HR20, or HR24. If you have one of these models, you can make it work.
Order the Wireless cinema connection kit, and we will help you set it up and connect to the Wi-Fi.
Unboxing and Connecting Wireless Cinema Connection Kit
When the package arrives, open it and get everything out of the box. You should see a Cinema connection kit, power adapter, coaxial cable, and a LAN/Ethernet cable. If it’s all there, it is time to start connecting the pieces.
Firstly, unplug the coaxial cable running to your DVR or DECA adapter, if you have one, and connect it to the LNB port on the back of the Cinema connection kit. Make sure you align it correctly and screw it all the way for a firm and secure connection.
Secondly, remove the cap from the SAT RCVR connector on the back of the Cinema connection kit. Take the coax cable that came with the kit and screw one end into the SAT RCVR. The other end goes into SAT in 1 or DECA adapter, depending on where you removed the original coax cable from.
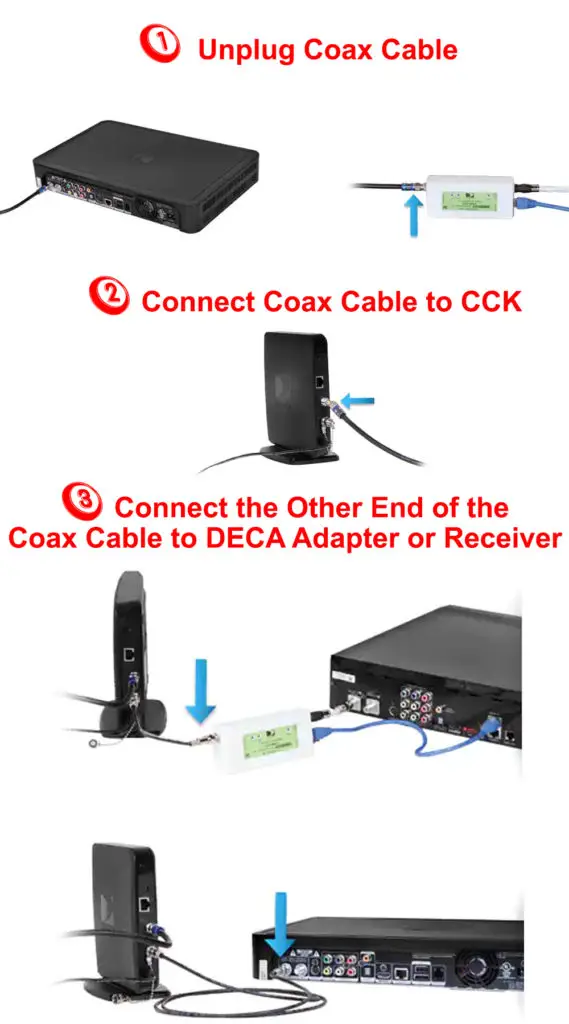
Once you connect the Cinema Connection Kit and the receiver, power everything up.
Connecting Cinema Connection Kit to Wi-Fi
Wait for the signal LED lights on the Cinema connection kit to stop blinking, then go to MENU.
Find your SSID, choose it, enter the password, and that is it.
Simple, right?
Just one more thing. There’s a chance that you won’t be able to connect to the Wi-Fi. In that case, you will still be able to get streaming services, but you’ll have to use an ethernet cable to connect.
Summary
To use the full potential of your DIRECTV services, you’ll need to connect your receiver to the internet. If you want to go wireless, there are two options depending on your model.
If you have Genie 2, Genie HR44, Genie HR54, and Genie H44, press HOME on the remote controller, then Settings and Help > Internet Setup > Connect Now > Set Up Wireless.
On the other hand, if you have an R32, R22, HR20, or HR24 receiver, you will need a Cinema connection kit to connect to the internet. Once you get the kit, unscrew the coax cable previously connected to the DECA adapter or receiver and plug it into the LNB port on the back of the Cinema connection kit.
Take the coax cable that came with the kit and plug one end into SAT RCVR port on the kit and the other into the same port on the receiver or DECA where you have previously removed the coax cable.
Once you connect everything, power it up and wait for the LED lights on the kit to turn solid. Then go to the menu and connect to your Wi-Fi. If the kit can’t detect your Wi-Fi network, you’ll have to use the ethernet cable between the router and the Cinema connection kit.

Hey, I’m Jeremy Clifford. I hold a bachelor’s degree in information systems, and I’m a certified network specialist. I worked for several internet providers in LA, San Francisco, Sacramento, and Seattle over the past 21 years.
I worked as a customer service operator, field technician, network engineer, and network specialist. During my career in networking, I’ve come across numerous modems, gateways, routers, and other networking hardware. I’ve installed network equipment, fixed it, designed and administrated networks, etc.
Networking is my passion, and I’m eager to share everything I know with you. On this website, you can read my modem and router reviews, as well as various how-to guides designed to help you solve your network problems. I want to liberate you from the fear that most users feel when they have to deal with modem and router settings.
My favorite free-time activities are gaming, movie-watching, and cooking. I also enjoy fishing, although I’m not good at it. What I’m good at is annoying David when we are fishing together. Apparently, you’re not supposed to talk or laugh while fishing – it scares the fishes.

