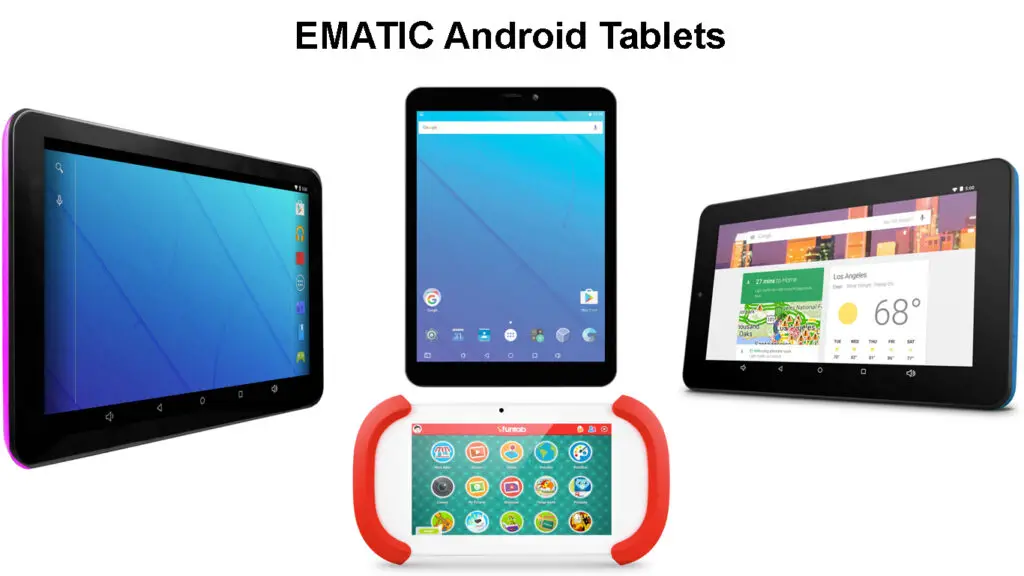
Ematic tablets are affordable and extremely easy to use, which makes them a great investment! If you recently purchased an Ematic tablet, and you’re searching for ways to connect it to a Wi-Fi network, you’ve come to the right place! Today we’re bringing you an in-depth guide on connecting the Ematic tablet to the internet depending on the model of your device!

CONTENTS
How to Connect the Ematic Tablet to a Wi-Fi Network?
All of the Ematic tablets come with built-in Wi-Fi technology. Therefore, they’ll easily connect to a wireless network and grant you access to the internet.
The most important thing in this process is having a wireless network your tablet can connect to. So, your first task should be moving closer to the source of the Wi-Fi connection with the tablet in your hands. Then, you can try connecting to the network using the steps explained in this post.
Once you connect to a wireless network for the first time, your tablet will automatically connect to the network every time it’s nearby. Thus, you won’t have to go through the hassle of configuring it every time you need access to the internet.
Connecting to a Wi-Fi Network on the Ematic Android Tablet
There are various models of Ematic Android tablets. However, you should be able to configure Wi-Fi on any of them following our steps. In case you don’t see the same options, you should look for similar ones in your settings.

Step 1: Find the Wireless Network Settings
You’ll begin the process of connecting your Ematic tablet to a wireless network by navigating to the settings. It’s located in the All Apps menu. Then, you should look for the Wireless & Networks section. The first option you’ll see is Wi-Fi and you’ll notice an on/off slider at the top. If your Wi-Fi is turned off, you’ll switch it on by taping on the slider.
Step 2: Search for Your Wi-Fi Network
As soon as you turn the Wi-Fi feature on, your Ematic tablet should start searching for the available wireless networks you can join. You should wait until the device detects yours and tap on the network name once it does.
Step 3: Connect to Your Wi-Fi
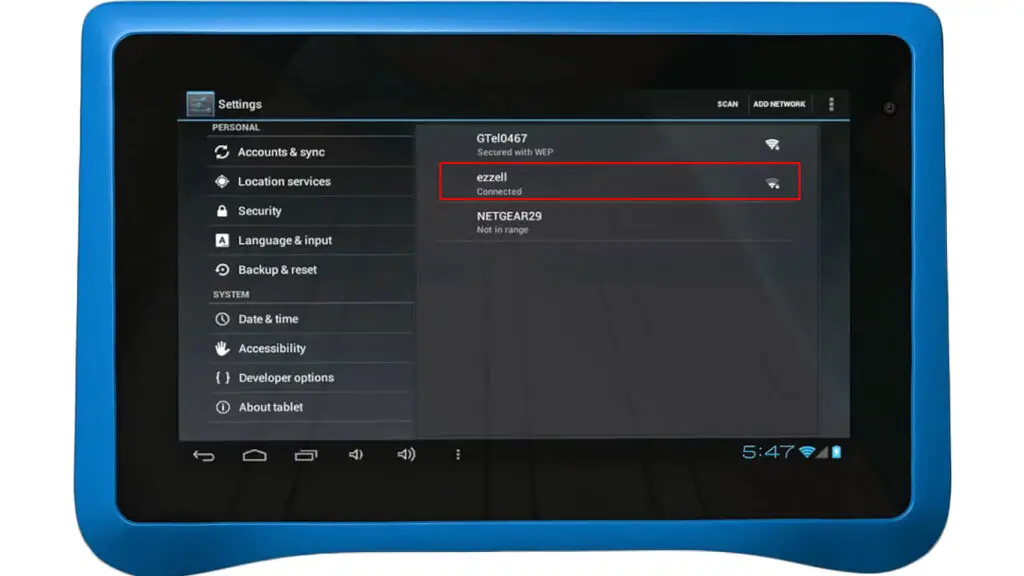
When you tap on the name of your network, the tablet will connect to it. If the network is password-protected, you will be asked to enter your password. You’ll then the wireless icon appearing in the status bar. The number of white lines on the antenna icon showcases the strength of your wireless signal.
Connecting an Android Tablet to Wi-Fi
Connecting to a Wireless Network on an Ematic FunTab
Ematic FunTab is a tablet designed for children. It comes with more than fifty apps that offer a variety of interesting and educational content for the youngest members of your family. This Ematic model allows for full control over the content and the usage of the tablet. That way, you can customize your child’s experience and establish restrictions that will make the usage of the gadget safer.
Introducing Ematic FunTab
Even though the internet is not the safest place for a child, it can be a great source of knowledge and fun. That is why the Ematic FunTab comes with built-in Wi-Fi technology. So, you’ll be able to connect your child’s tablet to your wireless network. Once you do that, you might want to open parental controls to make this experience safer and more comfortable for your kids.
Getting Started with Ematic FunTab
Here is a step-by-step guide on how to connect the Ematic FunTab to a Wi-Fi network.
Step 1: Find the Wi-Fi Section
The Ematic FunTab is extremely easy to use. Thus, you won’t have to go through the settings of your device or enter multiple sections to find the Wi-Fi option. When you’re on the home screen, you should simply slide down. You’ll see various options displayed, including Wi-Fi.
Step 2: Scan for Available Wireless Networks
Once you slide down your screen to reveal additional settings, you’ll see a slider next to Wi-Fi. If it’s turned off, you should simply tap on the slider to turn on wireless connections.
When your connections are turned on, the tablet should display a list of available Wi-Fi networks around you. You should then tap on your Wi-Fi once the device detects it.
Step 3: Connect to Your Network
You can start connecting to your network by tapping on the name of the network. You’ll then have to enter your Wi-Fi password. When the connection is established, you should tap the Back button to return to the home screen. It’s at the bottom part of the screen.

In case your tablet doesn’t detect your Wi-Fi network, you can tap on the Refresh option to trigger the tablet to look for available networks once again. This option is located at the top of the screen, next to the Wi-Fi on and off slider.
If that doesn’t work, you may have to manually add the network by clicking on the Plus (+) sign. This will help if your Wi-Fi SSID is hidden. Alternatively, you could navigate to the settings of your tablet and tap on the Wireless & Networks option. You can then access Wireless Settings and manage existing networks as well as add new ones. If you want to add a new network, you need to obtain various parameters of that Wi-Fi such as its name, encryption type, security key, and security type.
Connecting Other Models of Ematic Tablets to a Wireless Network
If your Ematic Tablet doesn’t have the same options as those described above, it’s probably because your tablet doesn’t run on Android OS. Ematic also makes Windows tablets. Here’s how to connect any other model of the Ematic tablet to Wi-Fi.
Step 1: Go to the Settings of Your Ematic Tablet
The first step in the process of connecting your Ematic tablet to a Wi-Fi network is navigating to the settings of your gadget. You’ll find this section by tapping on the Menu icon on your home screen.
Step 2: Find the Network Settings
Once you get into the settings of your Ematic tablet, you should find the Wireless & Networks section and tap on it. When the section opens, you’ll see the option to turn your Wi-Fi on or off. You should swipe the Off button if your Wi-Fi is off to turn it on.
Step 3: Scan for Available Networks
When you turn your Wi-Fi on, you should navigate to Wi-Fi Settings. This option is displayed in the Wireless & Networks section. Once you’re there, your tablet will automatically start scanning for available networks. You should look for your Wi-Fi and tap on it when your device detects it.
In case the tablet doesn’t start scanning automatically, you can trigger the scan on your own. You’ll do that by going to the Menu in the Wi-Fi Settings. There, you’ll see the Scan option. You should tap on it,, and the gadget will start scanning for available networks.
In case your Ematic tablet is unable to detect your network, you can manually add it. you’ll find this option in the Wi-Fi settings. Once you tap on the Add a Wi-Fi network option, you’ll have to enter various specs of your network. When you’re done, simply click on Save and your tablet should now have a solid internet connection.
Step 4: Connect to Your Wireless Network
As soon as you tap on the name of the network you want to join, the tablet will ask you for the network’s password. That is, of course, if you protect your network with a password. You should type your credentials and click on Connect.
Once it establishes the connection, your tablet will inform you of that by displaying a Connected message. The next time you’re within the range of that network, the tablet will automatically connect to it.
Connecting Windows Tablet to Wi-Fi
In Conclusion
Hopefully, our guide on how to connect the Ematic tablet to Wi-Fi helped you gain internet access on your device quickly and easily! In case you experience an issue during this process, you may have to turn the Wi-Fi feature off for a minute or two. Then, you can turn it back on. What’s more, you could restart your gadget or even perform a factory reset if the issue persists.
How to Factory Reset Your Ematic Windows Tablet

Hey, I’m Jeremy Clifford. I hold a bachelor’s degree in information systems, and I’m a certified network specialist. I worked for several internet providers in LA, San Francisco, Sacramento, and Seattle over the past 21 years.
I worked as a customer service operator, field technician, network engineer, and network specialist. During my career in networking, I’ve come across numerous modems, gateways, routers, and other networking hardware. I’ve installed network equipment, fixed it, designed and administrated networks, etc.
Networking is my passion, and I’m eager to share everything I know with you. On this website, you can read my modem and router reviews, as well as various how-to guides designed to help you solve your network problems. I want to liberate you from the fear that most users feel when they have to deal with modem and router settings.
My favorite free-time activities are gaming, movie-watching, and cooking. I also enjoy fishing, although I’m not good at it. What I’m good at is annoying David when we are fishing together. Apparently, you’re not supposed to talk or laugh while fishing – it scares the fishes.
