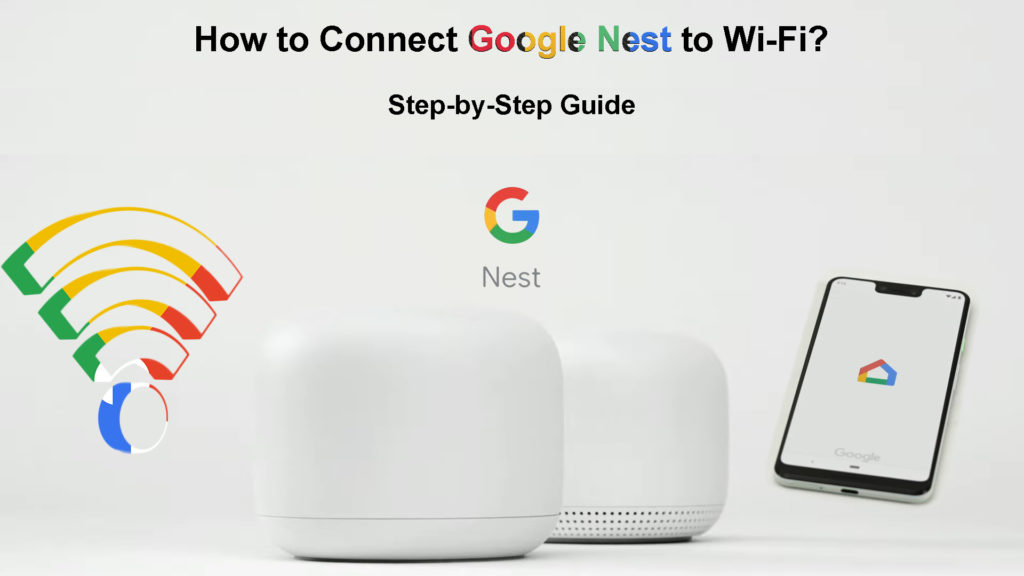
Google, being one of the FAANG – American big-five technology companies, always strives to provide a one-stop IT platform to internet users – the same way Apple provides services with its comprehensive ecosystem. But Google seems to nudge ahead with its offering when it comes to wireless home network solutions, while Apple has stopped producing its Wi-Fi equipment (Apple discontinued AirPort in 2018). Google’s answer to the home Wi-Fi network is Google Nest Wi-Fi. In this article, we will show you how to connect Google Nest to Wi-Fi.

CONTENTS
What is Google Nest?
Let’s take a look at some details about Google Nest first. Originally known as Google Wi-Fi, it was launched in 2016 as a mesh Wi-Fi system capable of providing whole-home coverage. Like other mesh Wi-Fi systems, it consists of the main node and is supported by additional nodes called Nest Wi-Fi Access Points (AP).
The main node and APs work together to provide the best coverage no matter where you are within the home area since you can place your Access Point anywhere you like (as long as they can receive the signal from the main unit or other access points). It will make your device always close to the Nest router or access points. Moreover, the Wi-Fi network is scalable. That means you can add as many Nest Wi-Fi Access Points as you wish so that you can cover your entire home, no matter how large it is and what shape it has.
The 2nd Gen of Google Wi-Fi was introduced in 2019 and rebranded as Google Nest Wi-Fi. It comes with improved processors, but the highlight of the improvement is the Access Points that come with a speaker. It’s not just a regular speaker, but you can associate the speaker with Google Assistant. It means you would be able to control your home network system using voice commands via the AI-powered Google Assistant.
Introducing Google Nest Wi-Fi
Connecting Google Nest to Wi-Fi
These days, networking equipment manufacturers make it easy for their customers to DIY the device setup. It will save time and the trouble of engaging a professional technician to install and set up the network.
Connecting Google Nest to Wi-Fi is a simple procedure. While it’s not like a one-touch operation, you won’t get lost if you follow the step-by-step guide to connect the devices to Wi-Fi.
Before you start connecting, here’s a checklist of things you must have to enable a Wi-Fi connection:
- Google Nest Wi-Fi devices – you need at least a Nest Wi-Fi router (the main node). You can also add as many Nest Access Points as you wish to cover your entire home. You even add a second Nest Wi-Fi router if you have a bigger house or want to extend the coverage to the surrounding outdoor areas such as patios and the back yards.
- A Google Account (not really a problem since two-thirds of people have a Google Account).
- An Android phone/tablet (Android 8 onwards).
- Or an iPhone/iPad (iOS 14 onwards).
- A Google Home app from Google Play Store or App Store. Make sure you download the latest version.
- A Modem to receive the internet signal from your Internet Service provider and pass it to your Nest router.
- If you’re on an Apple device, you need to disable a VPN service if you have it (temporarily).
Connecting your Google Nest Wi-Fi Router to your Wi-Fi Network
Follow these steps to set up your Wi-Fi network via Google Nest Wi-Fi:
- Plug in your modem and switch it on.
- Download and install the Google Home app from either Google Play Store or App Store.
- If you have already installed the app on your device, check if it’s updated with the latest version.
- Create a Home with the following steps:
- Activate the Google Home app.
- Tap Add at the top part.
- Then, tap Create new home.
- Go through the on-screen steps to set up a new Home.
- Next, find the best location to place the Nest router. Ideally, it should be right at the center of the house, vertically and horizontally. In addition, try to avoid an enclosed area and place it away from obstacles. Moreover, placing the Nest router away from electronic devices allows for a better, uninterrupted Wi-Fi signal.
- Next, connect one end of the Ethernet cable to your Nest router’s WAN port and the other end to the modem.
- Then, plug your Nest router into a power source and wait for the light to turn on.
- On your device, activate the Google Home app.
- Find and Tap Add > Set up device > New device.
- Select the Home that you created earlier.
- Select your Google Nest router.
- Next, find the QR code located at the Nest router’s bottom and scan the code from your device.
- Name your Wi-Fi network (SSID) and create a strong and safe password.
- Wait for a while until your Nest router finishes creating your home Wi-Fi network.
- Tap Yes to add another device/Access Point.
Setting Up Google Nest Wi-Fi
Adding an Access Point or a Second Nest Router
You can always add Access Points to your Google Nest Wi-Fi network. These points can be in the form of Nest Wi-Fi devices, including additional routers and Google Wi-Fi points.
Here are the steps to add a point to your network:
- Activate the Google Home app.
- Find and Tap Add > Set up device > New device.
- Select your Home.
- Select the intended device to add and press Next.
- Look at the bottom of the device and find a QR code to scan.
- You have now connected a point to your network. If you hear a sound from the point, tap the Yes button.
- Then, follow the steps until the setup is finished.
- Repeat the process to add more points.
- Finally, test the Nesh Wi-Fi system to find out if it works.
How to Add a Nest Wi-Fi Point to the Existing Nest Wi-Fi System
Troubleshooting the Google Nest Wi-Fi
If you still cannot connect your Google Nesh to Wi-Fi after going through the steps, you may need to perform some troubleshooting.
Follow these steps to troubleshoot Google Nest Wi-Fi connection:
- Pull out all the plugs on the modem, router, and Access Points.
- After a few seconds, plug everything back.
- Ensure you connect all of the devices to the same Wi-Fi network.
- Go to the checklist of things and requirements you need to start the connection.
- Reset your Nest router to factory settings.
Here’s how to reset to factory settings:
- Open the Google Home app again.
- Search for Wi-Fi.
- Go to the Settings.
- Select factory Reset Network and press OK.
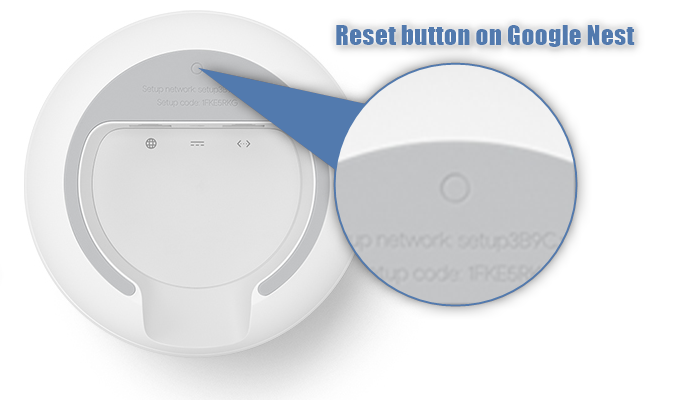
- But if you want to reset the router only, press the factory reset button and hold it for about 10 seconds or so until you see a yellow light turning on. Then the reset process commences and would take about 10 minutes to complete. You know the reset is complete when you see a white light.

If resetting to factory settings also didn’t work, it’s probably time to contact the Google Support team as a last resort. The technicians will probably be able to assist you with troubleshooting.
Conclusions
Numerous Wi-Fi router manufacturers in the market produce all types of routers with various technologies, including mesh Wi-Fi systems. You could easily pick up a powerful and popular Wi-Fi router at a bargained price. However, having a Wi-Fi router made by Google has an obvious added advantage – almost all routers would end up being part of Google’s online appearance.
Therefore, having a Google-made router (Google Nest Wi-Fi) would naturally flow into the Google ecosystem. In addition, you can use the speakers embedded in the Nest Access Points to activate Google Assistant and control the Nest Wi-Fi without lifting a finger.
The only problem is when you are not a techie person and have butterflies in your stomach when it comes to setting up the Wi-Fi network. However, we’ve got you covered – just follow our guide and you will easily connect Google Nest to Wi-Fi.

Hey, I’m Jeremy Clifford. I hold a bachelor’s degree in information systems, and I’m a certified network specialist. I worked for several internet providers in LA, San Francisco, Sacramento, and Seattle over the past 21 years.
I worked as a customer service operator, field technician, network engineer, and network specialist. During my career in networking, I’ve come across numerous modems, gateways, routers, and other networking hardware. I’ve installed network equipment, fixed it, designed and administrated networks, etc.
Networking is my passion, and I’m eager to share everything I know with you. On this website, you can read my modem and router reviews, as well as various how-to guides designed to help you solve your network problems. I want to liberate you from the fear that most users feel when they have to deal with modem and router settings.
My favorite free-time activities are gaming, movie-watching, and cooking. I also enjoy fishing, although I’m not good at it. What I’m good at is annoying David when we are fishing together. Apparently, you’re not supposed to talk or laugh while fishing – it scares the fishes.
