Windows 11 has been out for a while now, but there are still many people who don’t know how to connect to Wi-Fi. This is a problem because, without Wi-Fi, you can’t use the internet. In this article, we will show you how to connect to Wi-Fi on Windows 11 in two different ways.
The process is very simple and only takes a few minutes. Besides that, we are going to give you some tips on what to do if you can’t connect to Wi-Fi on Windows 11.

CONTENTS
How to Connect to Wi-Fi on Windows 11?
Here are two easy ways that can help you connect your Windows 11 device to your wireless network. You will see that connecting to the Wi-Fi in Windows 11 is quite similar to the steps in Windows 10. So, let’s begin!
Use The Quick Settings To Connect To Wi-Fi
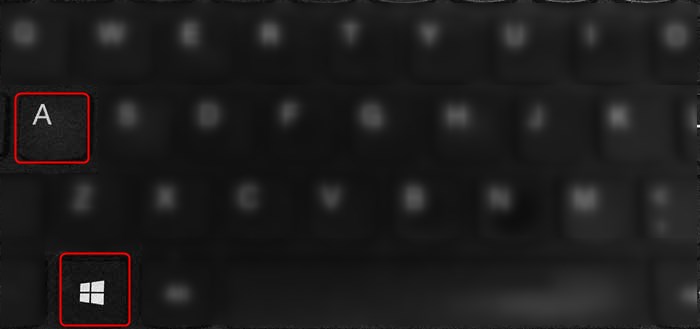
You can click on the Quick Settings (Network icon) in the bottom-right of the screen, next to the clock. Alternatively, you can click on the Windows button and the letter A on the keyboard (Win + A).

When the quick settings pane appears, click on the arrow (>) next to the WiFi icon.

From the list of network names, select the one you want to connect to and click Connect.
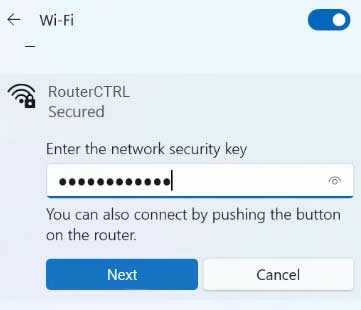
You will be asked to enter the network security key. Type the wireless password there and click on Next.

If the wireless password is correct, and you have entered it correctly, you will be connected to the network.
Use The Settings App To Connect To Wi-Fi
The second way to connect to your Wi-Fi network on Windows 11 is from the Settings app.

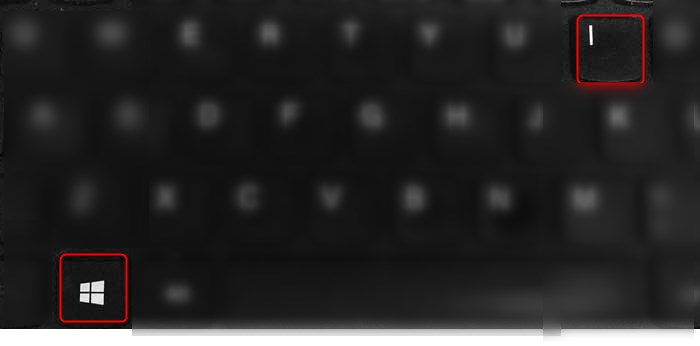
You can open it by pressing the Windows button on your keyboard and the letter “i” (Win + I). You can also right-click the windows start button and then select Settings from the list.
After that click on Network & Internet in the menu on the left, and then click on Wi-Fi. If it isn’t enabled, enable it by pressing the toggle on/off button.

After that click on Show available networks.
Click on the network name you want to connect your Windows 11 powered computer to and enter the wireless password and click Next.
Recommended reading:
- How to Enable a Wi-Fi Adapter in Windows 10?
- How to Reset Wi-Fi Adapter in Windows 10? (3 Ways To Do It Properly)
- DHCP Is Not Enabled for Wi-Fi (Windows 10)
- Wi-Fi Keeps Disconnecting in Windows 10 (Reasons and How to Fix It)
Can’t Connect to Wi-Fi on Windows 11? Try this!
Sometimes connecting to the wireless network on Windows 11 will fail for some reason. If that happens to you, here are a few things you should check or try in order to connect.
Is Wi-Fi Enabled On Your Laptop?
Some laptops have a physical switch that can enable or disable wireless connectivity. So, if your laptop has one, maybe you have disabled WiFi by accident. Turn it on and try to connect again.
Is Airplane Mode Disabled?

When Airplane Mode is activated on your Windows 11 machine you will be disconnected. Make sure to have this option disabled and try again.
Are You Typing The Wireless Password Correctly?
Sometimes we make a typing mistake and then we can’t connect to the network. Therefore, you need to pay special attention when you are typing the wireless password. It is case-sensitive and even the slightest mistake will make the attempt to connect to the Wi-Fi unsuccessful.
Restart Your Computer
Just like with any other electronic device, the fastest and in most cases the most effective way to fix a problem is to restart the device. The same applies to your computer. When you restart it there are high chances that the issue will be resolved.
Just right-click the Start button and then click on Restart. When the computer boots up again check whether you can connect to your WiFi now.
Forget The WiFi Network
Whenever we connect to a new wireless network, Windows saves the wireless password and other information and will connect your device the next time you are within the wireless signal range.
Sometimes when we change the wireless network password, or something else happens, our Windows 11 powered computer will automatically try to connect using the old password. If that happens, you should forget the network. After that, you will be able to enter the wireless password again and connect.
So, how to forget the network in Windows 11? Well, you can easily do it from the Settings app. Simply click on the Start button and then click on Settings. From the left-hand menu select Network & Internet. Now on the right, click on WiFi. In the new panel click on Manage known networks.
This will open a list of all the networks you have been connected to since you have installed Windows 11 on your computer. Now you have to find the network name you want to forget and click on the Forget button on the right.
Now when you want to connect to the network, you have to select the network name and enter the wireless password again.
Connect To The Other Network
Most wireless routers today support both 2.4 and 5GHz networks. For example, if you can’t connect to the 2.4GHz network, try connecting to the 5GHz one. In most cases, you shouldn’t have problems connecting to the other one.
Run The Network Troubleshooter
Finding and fixing some networking problems can be done with the Network Troubleshooter. Here is how to activate it and troubleshoot your networking issues.
First, click on the Start menu button and then click on the Settings icon.
You can also right-click on the Start menu and select Settings from the list.
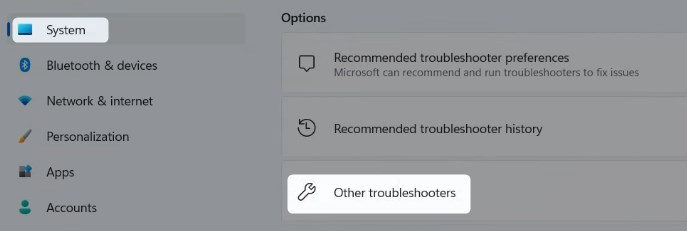
Now click on System in the menu on the left, and then scroll down and select Troubleshoot. Now select Other troubleshooters.

Now scroll down and when you see Network Adapter in the list click on the Run button on its right.
Windows 11 will now scan the network trying to diagnose and fix the issue you are experiencing.
Restart Your Network
Restarting your network is another solution you can try. It will create a new connection to your Internet Service Provider. It requires you to restart both the modem and the wireless router. In order to do this properly, you have to do this in the following order:
1. Turn off the modem and the router.
2. Disconnect the modem from the electrical outlet and remove the backup battery if there is one.
3. Disconnect the wireless router now.
4. Wait for a few minutes.
5. Connect the modem to the electrical outlet and turn it on. In case you have removed the battery, plug it back in before you connect the modem to the electrical outlet.
6. After a few minutes. When the modem boots up completely, connect and turn on the router.
7. After a few minutes when the router boots up completely, try to connect to your wireless network.
NOTE: If you have a router/modem combo, you should restart just that device.
Conclusion
We hope that the information presented here was clear and that you have managed to connect to your WiFi on Windows 11. Also, in case something goes wrong, and you can’t connect, try the tips and solutions from this article and we are pretty sure you will connect successfully pretty soon.

Hey, I’m David. I’ve been working as a wireless network engineer and a network administrator for 15 years. During my studies, I also worked as an ISP field technician – that’s when I met Jeremy.
I hold a bachelor’s degree in network engineering and a master’s degree in computer science and engineering. I’m also a Cisco-certified service provider.
In my professional career, I worked for router/modem manufacturers and internet providers. I like to think that I’m good at explaining network-related issues in simple terms. That’s exactly what I’m doing on this website – I’m making simple and easy-to-follow guides on how to install, set up, and troubleshoot your networking hardware. I also review new network equipment – modems, gateways, switches, routers, extenders, mesh systems, cables, etc.
My goal is to help regular users with their everyday network issues, educate them, and make them less scared of their equipment. In my articles, you can find tips on what to look for when buying new networking hardware, and how to adjust your network settings to get the most out of your wi-fi.
Since my work is closely related to computers, servers, and other network equipment, I like to spend most of my spare time outdoors. When I want to blow off some steam, I like to ride my bike. I also love hiking and swimming. When I need to calm down and clear my mind, my go-to activity is fishing.
