Ubuntu might not be a mainstream name for Windows users, but it remains one of the best operating systems for coders, programmers, testers, and web developers. The OS has several easy-to-use features and a decluttered graphical interface for a stress-free user experience.
Like any other operating system, you can connect Ubuntu to Wi-Fi to make the most of its features. However, enabling Wi-Fi on Ubuntu might not be as straightforward as on other operating systems.
This guide explains several ways to enable Wi-Fi on Ubuntu for a smooth and seamless internet experience.

CONTENTS
Using the system menu is the quickest way to enable Wi-Fi on Ubuntu. It allows you to manage your settings and connect to your Wi-Fi network with just a few clicks.
Here are the steps to enable Wi-Fi on Ubuntu via the system menu:
- Click the system menu at the right side of the top bar.
- Click the Wi-Fi icon to open the Wi-Fi section.
- Click your Wi-Fi name (network name).
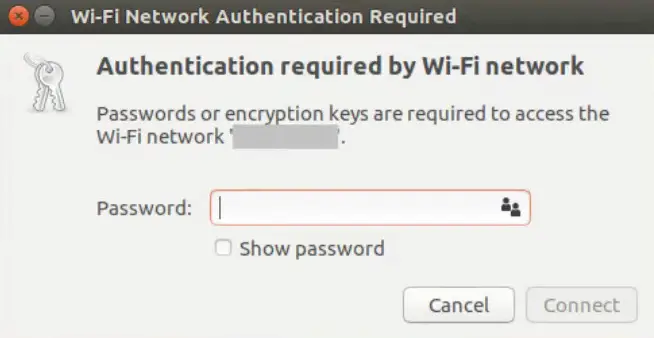
- Enter your Wi-Fi password when prompted.

- Wait for your PC to establish a connection.

Alternatively:
- Click the Network Icon at the top right corner of the screen.
- Click the checkbox next to Enable Wi-Fi.
- Click the network icon again to choose your Wi-Fi network.
- Enter the Wi-Fi password when prompted.
- Click Connect
Note: The network icon will change to a dot with curved bars if the connection is successful
Connect to Wi-Fi in Ubuntu – The Easiest Way
Method 2 – Using Network Manager Text User Interface (NMTUI)
The Network Manager Text User Interface (NMTUI) is a tool or application for configuring wired and wireless networks in Linux-based operating systems. This command-line terminal provides a high-level interface for interacting with your network and managing your connections. You can use NMTUI to enable and disable Wi-Fi on Ubuntu at any time without issues.
Here’s how to use NMTUI to enable Wi-Fi on Ubuntu:
- Press Ctrl+Alt+T to launch a terminal in Ubuntu.
- Type $ nmtui in the terminal to open the network manager.
- Select Activate a connection and click OK.
- Select your home Wi-Fi network name and press the Enter key.
- Enter your Wi-Fi password when prompted.
- Wait for your computer to connect to your network.
- Thereafter test your connection by executing the ping command (ping 8.8.8.8 –c 4).
Network Manager – Introduction
Method 3 – Using Linux Terminal
You can also enable Wi-Fi on Ubuntu via the Linux terminal or command line (similar to the command prompt in Windows operating systems). The only slight issue is that this method requires you to master and execute various Linux commands.
Here’s how to go about it:
- Open a command terminal in Ubuntu.
- Type the following command: iwconfig, to know your Wi-Fi network name.
Note: Depending on your version of Ubuntu, your Wi-Fi network name will appear as wlan0 or wlp4s0
- To enable Wi-Fi, type the following command: sudo ifconfig wlan0 up or sudo ifconfig wlp4s0 up
- If you want to disable Wi-Fi, type the following command: sudo ifconfig wlan0 down or sudo ifconfig wlp4s0 down
Connecting to Wi-Fi Using Terminal
Method 4 – Using the WPA_Supplicant
The WPA_supplicant is a tool or client software used to configure and manage wireless networks and network interfaces. It has a WPA authenticator that implements WPA key negotiation.
Here’s how to use the WPA_supplicant to enable Wi-Fi on Ubuntu:
- Open the terminal in Ubuntu.
- Type the following command: sudo apt install wpasupplicant
- Enter wpa_passphrase “your-ESSID” “your-wifi-passphrase” | sudo tee /etc/wap_supplicant.conf
The above command will create a configuration file listing the networks you want your computer to access. You must enter your ESSID network name and password in the above command.
- Enter sudo wpa_supplicant –c / etc/wpa_supplicant.conf –I wlp4s0 or sudo wpa_supplicant –c / etc/wpa_supplicant.conf –I wlan0
Connecting to Wi-Fi in Ubuntu Using WPA_Supplicant
Connecting to a wireless network on Ubuntu can be challenging when dealing with a hidden Wi-Fi network.
Your Wi-Fi name must appear on the list of scanned wireless networks within range for you to connect your computer to the internet.
Fortunately, it is possible to connect to a hidden Wi-Fi network using these steps:
- Click the system menu at the right side of the top bar.
- Click the Wi-Fi icon to open the Wi-Fi section.
- Click Wi-Fi Not Connected.
- Click Wi-Fi Settings.
- Click the menu button at the top-right corner of your screen.
- Select Connect to Hidden Network.
- Next, click the Connection drop-down list and select a previously-connected hidden network.
- Alternatively, click New and type the network name of the hidden network.
- Go to the Wi-Fi security drop-down list and choose the wireless security type.
- Enter the password or passkey.
- Click Connect
Connecting to Hidden Wi-Fi in Ubuntu
Alternatively, you can connect your PC to a hidden Wi-Fi network using the command line terminal on Ubuntu.
Here are the steps:
- Launch the terminal on Ubuntu.
- Execute the following command: $ nmcli c add type wifi con-name <name> ifname wlan0 ssid <ssid>
- Enter the following command: $ nmcli c modify <name> wifi –sec_key-mgmt wpa-psk wifi-sec.psk <password>
- Establish a connection by entering the following command: $ nmcli c up <name>
Note – Hiding your network name is no longer a practical security option for wireless networks.
Why Is Wi-Fi Not Connecting On Ubuntu?
Like other operating systems, Ubuntu also experiences connectivity issues. Fortunately, troubleshooting and fixing Wi-Fi issues on Ubuntu does not have to be complicated.
Here are a few tips for troubleshooting and fixing connectivity issues on Ubuntu:
- Check Your Internet Connection
Your Ubuntu PC might not connect to Wi-Fi because you don’t have an active internet connection. Before messing with your network configuration, verify if you have an active internet connection. Inspect your modem and router to confirm if all cables are firmly in place. You can connect your smartphone or tablet to your wireless network to verify that the internet is working.
- Check Your Wireless Adapter
Wi-Fi issues might arise because of a defective wireless adapter or network card. Improper installation may also cause connectivity problems. Ensure you install the Wi-Fi adapter correctly in the appropriate slot and confirm that your operating system recognizes the device.
You can check the status of the wireless adapter by following these steps:
- Open a terminal window on Ubuntu
- Type the following command: nmcli
- Scroll down to State (If connected, the output will be State: Connected)
- Check Wi-Fi Drivers
Ubuntu and other Linux-based operating systems have pre-installed drivers for various wireless adapters. If you are using a plug-and-play adapter, Ubuntu will automatically install the appropriate drivers for the device. If your wireless card is unsupported, you may experience Wi-Fi issues until you install the correct drivers from the internet or the Ubuntu ISO file. Connect your computer to the internet via an Ethernet cable and search for Wi-Fi drivers for your wireless adapter.
How to Install Wi-Fi Drivers in Ubuntu
- Enable Your Wireless Card in BIOS
Sometimes, Wi-Fi might not work on Ubuntu because your wireless adapter is disabled in BIOS. Open a command terminal in Ubuntu and type rfkill to check if your device is enabled or disabled. If you notice the phrase “Hard blocked: yes” you need to access your PC’s motherboard and turn the BIOS switch on. Alternatively, enable your wireless adapter during booting.
Connected to Wi-Fi in Ubuntu Without Internet Access – Troubleshooting
Frequently Asked Questions
Question: Does Ubuntu come with Wi-Fi drivers?
Answer: Ubuntu and other Linux-based operating systems come with additional drivers for various wireless adapters. If your Linux distro does not support your Wi-Fi adapter, you may have to search for and install drivers from the internet. Connect your computer to the internet via an Ethernet cable or USB tethering to download and install Wi-Fi drivers.
Question: Why is Wi-Fi not working on Ubuntu?
Answer: Wi-Fi might not work on Ubuntu for several reasons. First, check if you have an active internet connection before proceeding with other troubleshooting steps. You might experience Wi-Fi issues because your wireless adapter is unrecognized or your PC doesn’t have the appropriate Wi-Fi drivers installed. If your wireless card is faulty or disabled on BIOS, you may not be able to establish a Wi-Fi connection.
Question: How do I enable Wi-Fi on Linux?
Answer: You can quickly enable and disable Wi-Fi on Linux via the graphical user interface (GUI). Right-click the Wi-Fi network icon at the top-right corner of your screen and click the checkbox next to Enable Wi-Fi. Click the network icon again to choose the Wi-Fi network you wish to connect to and enter the Wi-Fi password when prompted before clicking Connect.
Question: How do I reset my Wi-Fi on Ubuntu?
Answer: The quickest way to reset your Wi-Fi on Ubuntu is to restart your network interface card or wireless adapter. Launch a terminal on Ubuntu and type the following command: sudo service NetworkManager restart. If you have an older Ubuntu operating system, type the following command: sudo service network-manager restart.
Question: How do I know if my Ubuntu is connected to the internet?
Answer: You can check your Ubuntu internet connection status via the Ping command. Launch a terminal session on Ubuntu and type the following command: ping google.com. You will see Google’s ping response time under each output line if your internet is active. If your connection is inactive, the displayed message will be “ping: unknown host.”
Conclusion
As you can see, enabling Wi-Fi on Ubuntu shouldn’t be an issue as long as you have an active internet connection. Ensure your Wi-Fi card is functioning optimally and you’ve entered the correct network password for a smooth and seamless connection.

Hey, I’m Jeremy Clifford. I hold a bachelor’s degree in information systems, and I’m a certified network specialist. I worked for several internet providers in LA, San Francisco, Sacramento, and Seattle over the past 21 years.
I worked as a customer service operator, field technician, network engineer, and network specialist. During my career in networking, I’ve come across numerous modems, gateways, routers, and other networking hardware. I’ve installed network equipment, fixed it, designed and administrated networks, etc.
Networking is my passion, and I’m eager to share everything I know with you. On this website, you can read my modem and router reviews, as well as various how-to guides designed to help you solve your network problems. I want to liberate you from the fear that most users feel when they have to deal with modem and router settings.
My favorite free-time activities are gaming, movie-watching, and cooking. I also enjoy fishing, although I’m not good at it. What I’m good at is annoying David when we are fishing together. Apparently, you’re not supposed to talk or laugh while fishing – it scares the fishes.

