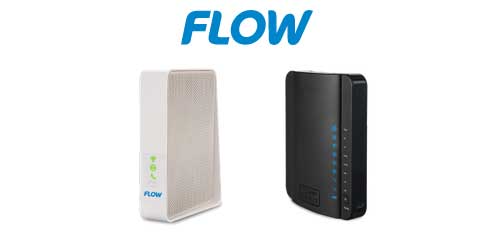
In case you want to access your Flow router settings and manage your home network, you have to learn the Flow router login steps. The process is pretty simple and straightforward and, in this article, we are going to show you how to do it step by step.
In order to make it successful we have to prepare a few things.
CONTENTS
What You’ll Need:
- A device to connect to the network
- Access to the network either wired or wireless
- The default Flow router admin login details

What Are The Default Flow Router Details?
The default login details for Flow routers are the following:
Default IP address: 192.168.0.1
Default username: admin
Default password: password (or check the label located at the bottom of your Flow router)
If these default details have been changed by you or your ISP, you will have to use the new ones to login. However, if you can’t remember what they are, you will have to reset your Flow router to factory settings and set it up again.
How To Login To Flow Router?
Once you have everything ready, you will gain access to the Flow router admin dashboard in a few moments.
STEP 1 – Connect The Device To The Local Network
It is important to connect your device to the network, otherwise accessing the router settings will fail. So, based on your device you can connect to the network either using the Ethernet cable or connect using the WiFi.
STEP 2 – Launch The Browser On Your Device
Open the browser you normally use. It will help us access the router’s web-based interface or the admin dashboard. You can use any of the web browsers available again but make sure it has been updated recently.
STEP 3 – Type The Flow Router IP Address Into The URL Bar

Make sure to enter the default Flow router IP 192.168.0.1 into the browser’s URL bar and press the Enter key on the keyboard or the Return button on your mobile device. The browser has an URL bar and a Search bar. Typing the IP address into the search bar is wrong. Instead of the router login page you will see Google results for that IP address.
However, if you see an error message please type the IP again or check whether 192.168.0.1 is really the router’s IP address.
STEP 4 – Type The Flow Router Admin Username And Password
After you press that Enter/Return button you should be asked to enter a username and a password. As we have said before, these admin login details are printed on a label located at the bottom of the Flow router. These admin login details are case-sensitive so be careful.
Click the Login button and you should see the Flow router admin dashboard.
STEP 5 – You Can Manage Your Flow Router Now
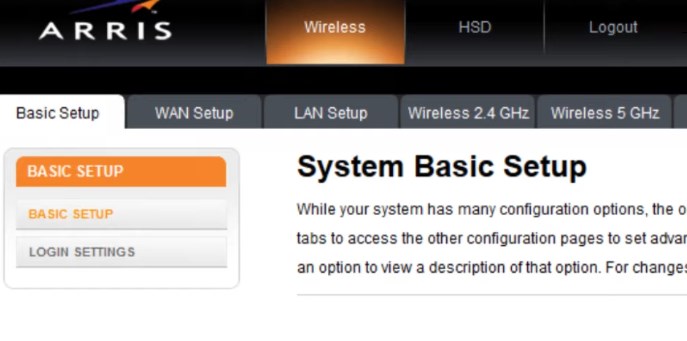
At this point you will have access to all the Flow router admin settings in the System Basic Setup. You can change the wireless network settings, block devices from the network, improve the security of your network and so on.

However, you need to know that the router comes with some default settings that have been set up in the factory. These default settings have to be changed either during the initial network setup or you can do it later. But it is important to change them because they represent a security risk for your network.
One of the recommended changes you have to make is changing the admin password and changing the default wireless settings (network name and password). In case these have been changed, you don’t have to do anything. However, you can change the wireless password as it is recommended to do that from time to time.
But if you haven’t changed the admin password already and you also want to change the wireless network name and password, keep reading.
Change The Flow Admin Password (Step-By-Step)
When you make this change you will stop anyone from accessing the admin dashboard without your permission. Keeping the default one isn’t recommended because anyone who is already connected to the network can easily access the admin dashboard without you knowing about it. In order to avoid this here is where to find these settings.
1. Login to the Flow router as described above and the System Basic Setup will appear.
2. Click on Login Settings in the menu on the left.
3. Enter the current admin password in the Old Password field.
4. Enter the new admin password in the New Password and Repeat New Password fields.
5. Click on the Apply button to confirm the changes.
NOTE: If you get logged out of the admin panel when you save the settings, login again using the new admin password.
Change The Flow WiFi Name And Password (Step-By-Step)
The WiFi settings are pretty important for your network security. Your WiFi network has to be protected with a strong password. The network name should be easily recognizable. Follow these steps to find the WiFi management section and make the necessary changes.
1. Access the Flow router settings as presented above. You should see the System Basic Setup page.
2. At the Basic Setup page (select it in the menu on the left) you will see the WiFi network names and passwords for your 2.4 and 5GHz network.

3. In the Wireless 2.4 GHz section, in the Wireless Network Name (SSID) you should erase the old network name and type in the new one. You can do the same in the Wireless 5 GHz section as well but make sure the network names are not the same for the 2.4GHz and 5GHz networks.
4. In the Wireless 2.4 GHz section, in the Pre-Shared Key field you will have the possibility to erase the old WiFi password and type in the new one. You can do the same in the Wireless 5 GHz section as well. You can use the same WiFi password for both the 2.4GHz and 5GHz networks.
5. Click on Apply to save the changes.
NOTE: Reconnect your wireless devices after you save the changes. Select the new network name and use the new wireless password to connect.
Recommended reading:
- How to Configure a Router to Use WPA3?
- How to Configure Router to Use WPA2?
- How to Encrypt Your Wireless Network? (An In-Depth Guide)
Final Words
This is it for now. We hope that this article was helpful. Accessing the Flow router settings successfully for the first time is enough to remember all the steps so you won’t need this guide in the future.
However, what you also need to remember are the admin login details. You will definitely need those again. Now after you have accessed the router settings, feel free to explore all the options and features this router has.

Hey, I’m David. I’ve been working as a wireless network engineer and a network administrator for 15 years. During my studies, I also worked as an ISP field technician – that’s when I met Jeremy.
I hold a bachelor’s degree in network engineering and a master’s degree in computer science and engineering. I’m also a Cisco-certified service provider.
In my professional career, I worked for router/modem manufacturers and internet providers. I like to think that I’m good at explaining network-related issues in simple terms. That’s exactly what I’m doing on this website – I’m making simple and easy-to-follow guides on how to install, set up, and troubleshoot your networking hardware. I also review new network equipment – modems, gateways, switches, routers, extenders, mesh systems, cables, etc.
My goal is to help regular users with their everyday network issues, educate them, and make them less scared of their equipment. In my articles, you can find tips on what to look for when buying new networking hardware, and how to adjust your network settings to get the most out of your wi-fi.
Since my work is closely related to computers, servers, and other network equipment, I like to spend most of my spare time outdoors. When I want to blow off some steam, I like to ride my bike. I also love hiking and swimming. When I need to calm down and clear my mind, my go-to activity is fishing.
