CONTENTS
Brief Overview
Do you want to change your WiFi name into something cool and more memorable? Do you want to control the time your kids spend online or have a separate WiFi network for your guests? Are you trying to fix a connectivity issue? All of this is pretty easy to do if you know the Frontier router login steps. This article will show you how to login to your Frontier router properly.
Before You Login to the Frontier Router
In order to make the login process successful we need to make sure that we have the following:
– The device we are using to login to the router needs to be connected to the network where the Frontier router is. So either plug the Ethernet network cable in or get the WiFi password to connect.
– You need to know the default router IP, username and password. You can get these from the user’s manual, the sticker on the back of the router or check the following section of this article.
What is the Frontier Router Login IP?
Frontier rents routers produced by several different manufacturers like: Actiontec, Arris, Netgear and so on. So, depending on the router model you have the default IP would be:
- 192.168.0.1 for Actiontec F2250
- 192.168.1.1 for Actiontec GT784WNV, Actiontec WR424 Rev E, F and I, D-Link DSL-2750B and Greenwave G1100
- 192.168.254.254 for Netgear D2200D, Netgear 7550, Arris NVG443B, Arris NVG448B, Arris NVG448BQ, Arris NVG468MQ
- 192.168.1.254 for Pace 4111N, Pace 5031NV, Pace 5168NV, Arris NVG589
You can also find the default router IP using the Command Prompt and the ‘ipconfig’ command in Windows.
What Are the Frontier Router Username and Password?
For Actiontec routers the username is admin, and the password can be admin, password or password1.
For Arris routers the username is Admin and the password can be found printed on a label on the router.
For D-Link routers the username is admin and the password is also printed on the label on the router.
For Netgear routers use admin both as username and a password.
For Pace routers leave both fields blank.
How to Login to a Frontier Router?
Now when you have everything the Frontier router login process is simple.
STEP 1 – Launch Chrome, Firefox or another browser
Launch any of the mentioned browsers on the device you are using to login to the router.
STEP 2 – Enter the default router IP in the browser’s URL bar
Enter the default IP (192.168.0.1, 192.168.1.1, 192.168.1.254, 192.168.254.254) in the browser’s URL bar and press the Enter button on the keyboard. If the IP is correct, you will be asked to enter the router admin username and password.
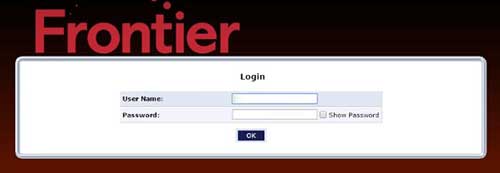
STEP 3 – Enter the username and password
When asked, enter the default username and password in the required fields.

If you haven’t changed them earlier you can use the ones on the label on the router. Otherwise, use the custom ones you have created.
STEP 4 – Click OK, Login or Apply
Depending on the router brand you are using you will have to click the OK, Login or Apply button after you enter the username and password.
If the login details are correct for your router, you will be redirected to the Frontier router admin homepage. There you can make the changes we have mentioned at the beginning of this article.
Important Notes
– The IP consists of numbers only so make sure not to type any letters like “l” or “O” instead of the numbers “1” and “0”.
– The username and password are case sensitive so pay attention to that.
– If the device is not connected to the network the Frontier router login will fail.
If you have followed the steps given in this article closely, we are sure you have managed to login to your Frontier router by now. You can now make all the changes you need. If you are worried that you can mess something up, then it is recommended to take notes of all the changes you make so you can revert back after a problem occurs, or simply backup your current router settings and restore them if necessary.

Hey, I’m David. I’ve been working as a wireless network engineer and a network administrator for 15 years. During my studies, I also worked as an ISP field technician – that’s when I met Jeremy.
I hold a bachelor’s degree in network engineering and a master’s degree in computer science and engineering. I’m also a Cisco-certified service provider.
In my professional career, I worked for router/modem manufacturers and internet providers. I like to think that I’m good at explaining network-related issues in simple terms. That’s exactly what I’m doing on this website – I’m making simple and easy-to-follow guides on how to install, set up, and troubleshoot your networking hardware. I also review new network equipment – modems, gateways, switches, routers, extenders, mesh systems, cables, etc.
My goal is to help regular users with their everyday network issues, educate them, and make them less scared of their equipment. In my articles, you can find tips on what to look for when buying new networking hardware, and how to adjust your network settings to get the most out of your wi-fi.
Since my work is closely related to computers, servers, and other network equipment, I like to spend most of my spare time outdoors. When I want to blow off some steam, I like to ride my bike. I also love hiking and swimming. When I need to calm down and clear my mind, my go-to activity is fishing.
