An access point is sort of a centralized hub on your network that lets various wireless devices access network resources. It helps increase the coverage of the Wi-Fi network and allows more devices to be connected to the network, which is especially useful to companies with a large number of employees.
As you can see, an access point has a pretty serious task to do, and it doesn’t come as a surprise that you would like one of the best devices out there for that job: the Google Nest Wi-Fi router.
So, today, you’ll learn whether you can use the Google Nest Wi-Fi router as an access point, as well as a step-by-step guide on how to add an access point to your Google Home network!

CONTENTS
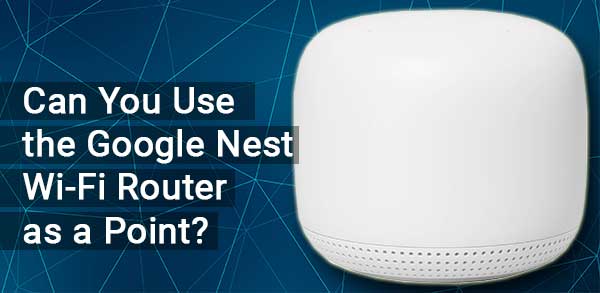
Can You Use the Google Nest Wi-Fi Router as a Point?
Yes, you can! However, this option will not allow you to make the most of the amazing range and speed of the Google Next router. Still, you’ll be able to have a great access point to your wireless network system.
If you don’t have an internet connection and you want to use one Google Nest Wi-Fi router as an actual router, you’ll have to first set it up.
On the other hand, in case you’re just looking to add the Google router as a point, you can go ahead and skip the first part of the article. The second portion shows you how to add the Google Nest router to your network as an access point.
1. Set Up the Google Nest Wi-Fi Router
The first part of the process of setting your Google Nest Wi-Fi Router up as a point is to install and configure the device. Once you’re certain that everything is working properly, you can then configure the Google Nest router as a point.
Step 1: Configure the Google Home App
You’ll begin this task by downloading the Google Home app. Google made sure that most of the setup process can be conducted via the app, which is why it’s essential that you have it on your phone. The application is available on both iOS and Android mobile devices.

In case it’s your first time using the application, you’ll have to set up a home. To do that, you should open the app and click on Add +. Then, you can choose the Create a Home option and follow the steps laid out in the app.
Step 2: Turn the Router On
Next, you should find an optimal place for your Google Nest router and connect it to your modem via the Ethernet cable. This cord should go into the WAN port of your router.
After that, you’ll have to plug the router into the electrical socket. You should then give your device a couple of minutes to properly turn on.
Once the light on the router starts flashing white, your device is ready to go.
Step 3: Create a Wireless Network
After you power the router on, you’ll have to go into the Google Home app once again and go to Add +. Then, you should click on Set up the device and choose New device. Next, choose a home and select your Google Next router.
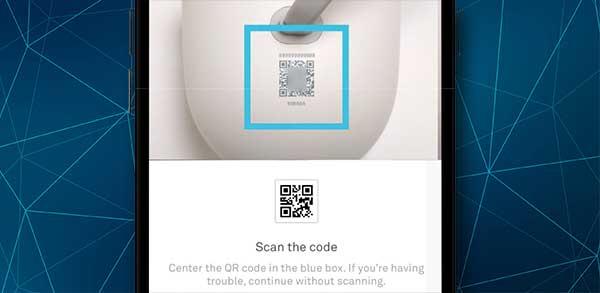
The app will then ask you to scan the QR code. The code can be found at the bottom of your router. If you are unable to scan the QR code, you can choose to continue without scanning.
In that case, you’ll need to manually enter the setup key, which is at the bottom of the router. After that, you should create a new room for the router or choose from the existing ones. You will also be able to set up a name and a password for your new Wi-Fi network.
2. Set Up the Access Point
If you have a network and you’re just trying to add the Google Nest Wi-Fi Router as an access point, this part of the article is for you. When you add your Google Nest Wi-Fi to an existing network, it usually automatically starts acting as a point. Therefore, you’ll simply have to set up the Google Nest device, and you’ll be good to go.
You should begin this process by going to your Google Home app. Then, click on Add + and choose Set up device. After that, you’ll have to click on New device and choose a home if the app asks you to do that. Next, you’ll need to select the Google Nest device you want to use as a point and click on Next.
Recommended reading:
- Does Google Nest Wi-Fi Work with AT&T U-Verse? (Setup Guide)
- Does Google Nest Wi-Fi Work with CenturyLink? (Installation and Troubleshooting Guide)
- Does Google Nest Wi-Fi Work with Spectrum? (Step-by-Step Installation Instructions)
- Does Google Nest Wi-Fi Work with Verizon FIOS?
The app will ask you to scan the QR code from the bottom of the router. In case you can’t do that, you can simply type the setup key. The key is also on the bottom of the device.

You should now have a configured point on your home network. You can add more points in case you need them by repeating this whole process.
To check whether everything is working properly, it’s best that you perform a mesh test. You’ll do that by going to the Google Home app and tapping on Wi-Fi. Then, you should click on Wi-Fi devices and choose the Points option. After that, you’ll just have to tap on Test mesh, and the app will test the connection out for you.
There are three different messages that can appear after the test: Great, OK, and Weak. If your connection is weak, you might have to move the Google Nest Wi-Fi router around and perform the mesh test again.
Final Thoughts
Having an access point system in place will help you increase the wireless coverage and ensure that many devices connected to your network have a stable and strong connection.
Access points are especially useful for companies. That is why it’s essential that you purchase a high-quality device that will help you make the most of this system.
The Google Nest Wi-Fi router can be a great option. In addition, it’s pretty easy to set up. Simply follow our steps, and you’ll have a new access point installed on your network in no time!

Hey, I’m Jeremy Clifford. I hold a bachelor’s degree in information systems, and I’m a certified network specialist. I worked for several internet providers in LA, San Francisco, Sacramento, and Seattle over the past 21 years.
I worked as a customer service operator, field technician, network engineer, and network specialist. During my career in networking, I’ve come across numerous modems, gateways, routers, and other networking hardware. I’ve installed network equipment, fixed it, designed and administrated networks, etc.
Networking is my passion, and I’m eager to share everything I know with you. On this website, you can read my modem and router reviews, as well as various how-to guides designed to help you solve your network problems. I want to liberate you from the fear that most users feel when they have to deal with modem and router settings.
My favorite free-time activities are gaming, movie-watching, and cooking. I also enjoy fishing, although I’m not good at it. What I’m good at is annoying David when we are fishing together. Apparently, you’re not supposed to talk or laugh while fishing – it scares the fishes.
