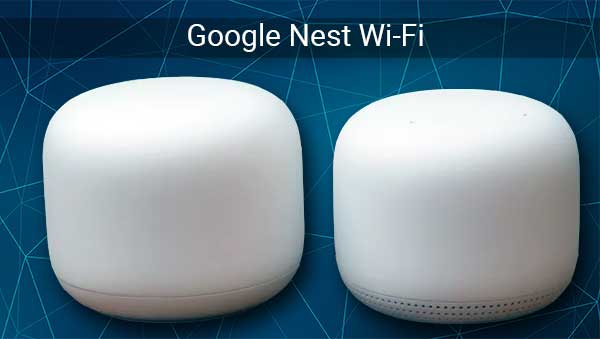
When you’re wondering how to set up Google Nest Wi-Fi with an existing router, this means you’ve already made a very good decision of getting Google Nest Wi-Fi. However, it seems that you’re not quite there yet.
That’s why we decided to speak about what Google Nest Wi-Fi is and how it works, how to set it up, and how to set it up with an existing router. After reading this article, you shouldn’t have any issues setting up your Google Nest Wi-Fi system.
CONTENTS
What Is Google Nest Wi-Fi?

When you start browsing the internet for alternatives to your traditional router, you probably come across some great recommendations involving Wi-Fi extenders, boosters, high-tech routers, mesh networks, etc.
Well, Google Nest Wi-Fi is one of those alternatives, and it’s a great one. In fact, it is a wireless system that works across your entire home. This means that when you set it up, you have Wi-Fi coverage everywhere on the premises.
How Does Google Nest Wi-Fi Work?
So, Google Nest Wi-Fi is essentially a mesh network with some additional features. A mesh network works by using one unit that acts as an original router that provides internet access and a wireless signal to other units in the system.
The other units are connected to each other and the router. Basically, all parts of the mesh network communicate with each other when necessary. The main router provides wireless access to the closest node, and that node provides it to the next one, etc.
Recommended reading:
- Does Google Nest Wi-Fi Support Gigabit Internet? (Everything You Wanted to Know)
- Does Google Nest Wi-Fi Work with AT&T U-Verse? (Setup Guide)
- Does Google Nest Wi-Fi Work with CenturyLink? (Installation and Troubleshooting Guide)
- Does Google Nest Wi-Fi Work with Spectrum? (Step-by-Step Installation Instructions)
Google Nest Wi-Fi uses the router and the Nest Wi-Fi points to provide you with the best connection. Another thing is that you can use the Nest points to play music because they have speakers, and you can issue commands using Google Assistant.
How to Set Up Google Nest Wi-Fi?
The best thing to do before you start setting up the Google Nest Wi-Fi system is to ask your ISP (Internet Service Provider) to provide a modem only. Gateways can be complicated, and it’s easier to set up Google Nest Wi-Fi with a modem. To properly set it up you need to:
- Plug the modem into an outlet and make sure that you have internet access.
- Next, you need to download Google Home on your device.

- Set up your home in Google Home.
- Now, you need to place your router in a higher central position in your home.
- Don’t forget that it needs to be connected to a modem.
- You need to connect the Google Nest Wi-Fi router to the modem using an ethernet cable. There’s a WAN port on the router.
- Then, you need to plug the Google Nest Wi-Fi router in. You’ll notice a white LED which means the router is ready for setup.
- Go to the Google Home app and tap on Add +.
- Once you do that, tap on Set up device and New device.
- When you choose a home, you need to choose your Google Nest Wi-Fi router.
- Using a QR scanner, scan the code on your device. It’s at the bottom of the Google Nest Wi-Fi router.
- You can create a new room for your router in the Google Home app.
- Then, all you need to do is set up an SSID (network name) and password.
- Finally, the router is going to start broadcasting the Wi-Fi, and you can connect to it using your device.
How to Set Up Google Nest Wi-Fi With Existing Router?
Currently, almost anything can connect to anything else. Therefore, connecting Google Nest Wi-Fi with an existing router is not that complicated. However, it’s not as simple as replacing an existing router with a Nest Wi-Fi router.
If you’re going to use Google Nest Wi-Fi, we strongly recommend not connecting it to an existing router as it might affect functionality and connectivity. Nevertheless, if you decide to do it anyway, here’s how to set up Google Nest Wi-Fi with an existing router.
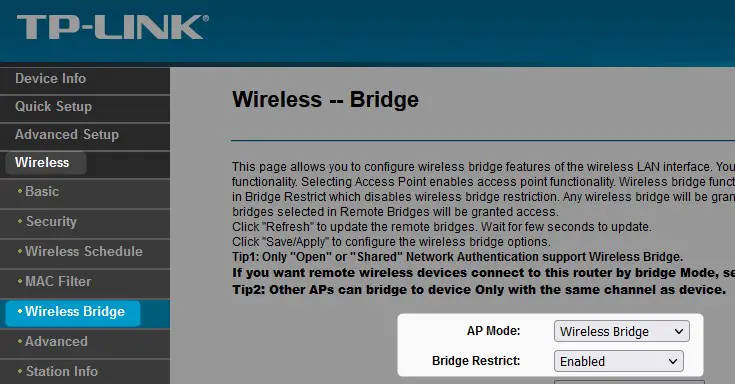
First, the thing you need to do is disable the routing function of the router. To do this, you need to connect your router to your laptop using an ethernet cable. Then, you need to go to your router login page and use your credentials to enter the settings. Here are the steps:
- Type the IP address of your router into the address bar of your browser. It’s usually 192.168.0.1 or 192.168.1.1. Hit Enter to access the page.
- Log into the settings page and go to the section usually called Wireless.
- Note that the name of the section largely depends on the brand of the router you have in your home. It can also be DHCP, Routing, Firewall, or something else entirely.
- There’s going to be an option to change the mode of your router from NAT (Network Address Translation) to Bridged.
- Once you change it, click on Save, and the router is going to automatically restart.
When you put your router in Bridge Mode, the router stops performing network address translation. It can no longer establish a network, but it can give you internet access, and that’s how Google Nest Wi-Fi can become the new router.

Basically, what happens is that you make your router just a bridge between a new router and the modem. Then, the only thing you need to do is follow the same procedure as you would for setting up Google Nest Wi-Fi instead of an existing router.
Conclusion
Now you know how to set up Google Nest Wi-Fi with an existing router by using Bridge Mode. If possible, we recommend you skip the existing router and just replace it with the Wi-Fi mesh network system. Especially if it doesn’t even have an option to become a bridge.
Finally, even if a router has the Bridge Mode option, there’s no point in using it, because you only get an extended modem. So, set up your Google Nest Wi-Fi mesh networking system and reap the benefits of a seamless connection throughout your home.

Hey, I’m Jeremy Clifford. I hold a bachelor’s degree in information systems, and I’m a certified network specialist. I worked for several internet providers in LA, San Francisco, Sacramento, and Seattle over the past 21 years.
I worked as a customer service operator, field technician, network engineer, and network specialist. During my career in networking, I’ve come across numerous modems, gateways, routers, and other networking hardware. I’ve installed network equipment, fixed it, designed and administrated networks, etc.
Networking is my passion, and I’m eager to share everything I know with you. On this website, you can read my modem and router reviews, as well as various how-to guides designed to help you solve your network problems. I want to liberate you from the fear that most users feel when they have to deal with modem and router settings.
My favorite free-time activities are gaming, movie-watching, and cooking. I also enjoy fishing, although I’m not good at it. What I’m good at is annoying David when we are fishing together. Apparently, you’re not supposed to talk or laugh while fishing – it scares the fishes.
