Hitachi doesn’t need any introductions as far as Smart TVs are concerned. The Japanese/Turkish company produces top-quality units at affordable prices.
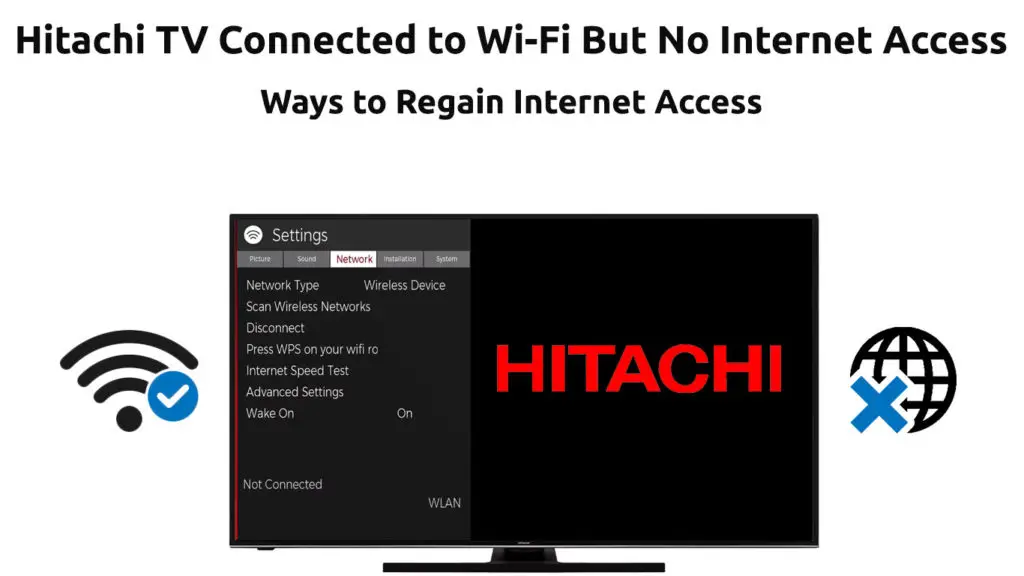
But just like any other electronic, Hitachi TVs are prone to various malfunctions. Some customers have complained that their Smart TVs connect to Wi-Fi, but they cannot access the internet to stream their favorite channels.
If you are experiencing the same issue, follow our tips to troubleshoot and fix your Hitachi Smart TV.

CONTENTS
Check Your Internet Connection
The first step to fixing your Hitachi TV that can’t access the internet is to check your wireless network. Do not interfere with your Smart TV or router before trying this step. The problem might originate from your ISP’s end rather than your television or Wi-Fi router.
Try connecting other devices to your wireless network to test your internet connection. Start with your smartphone or laptop to confirm your network is okay. If these devices are working as expected, your telly or router could be the issue. If not, you need to contact your ISP to verify if there’s a service outage and when they’ll fix it.
Disable Demo Mode
If you recently bought your Hitachi Smart TV, chances are that it is still in demo mode. Salespersons activate demo mode to show potential customers a list of TV’s features. As such, the TV will display several pop-ups highlighting its vital features.
Unfortunately, if your TV is still in demo mode, it may connect to Wi-Fi but won’t access the internet. To troubleshoot and fix connectivity issues, consider disabling demo mode (this applies to older Hitachi TV models).
Follow these steps:
- Press the Home button on your remote control
- Go to Settings
- Set the input mode to TV
- Press Menu
- Go to Setup
- Select Auto-Setup
- Search for E-Pop Demo and turn it off
- Exit the Menu
- Reboot your TV
- Check if your TV can access the internet
Power Cycle Hitachi TV
If your Hitachi Smart TV still cannot access the internet, consider power cycling it. Power cycling your TV will help refresh its memory and dispel any residual charge causing connectivity issues.
Fortunately, the process of power cycling a Hitachi TV is fast and straightforward. You do not have to be an electrician or a TV technician to perform this hack. Simply:
- Turn off the TV
- Unplug the power cord of your TV from the wall outlet
- Press and hold the TV’s power button for at least 30 seconds (This step will drain any residual charge)
- Release the power button
- Wait for at least 1min
- Turn on your Hitachi Smart TV
- Check if your TV can access the internet
Restart Your Router
Sometimes the problem could be with your router rather than your Smart TV. If this is the case, consider restarting your router right away.
In most cases, rebooting your router will refresh it and help restore your internet connection. It is one of the quickest and easiest ways to fix connectivity issues.
Here are the steps:
- Unplug the power cord of your router from the wall outlet
- Wait for at least 30 seconds
- Plug the power cord back into the wall outlet
- Allow your router to boot (rebooting might take about 2 minutes)
- Reconnect your TV to the router
- Check if your Hitachi TV can access the internet
Reset Your Router
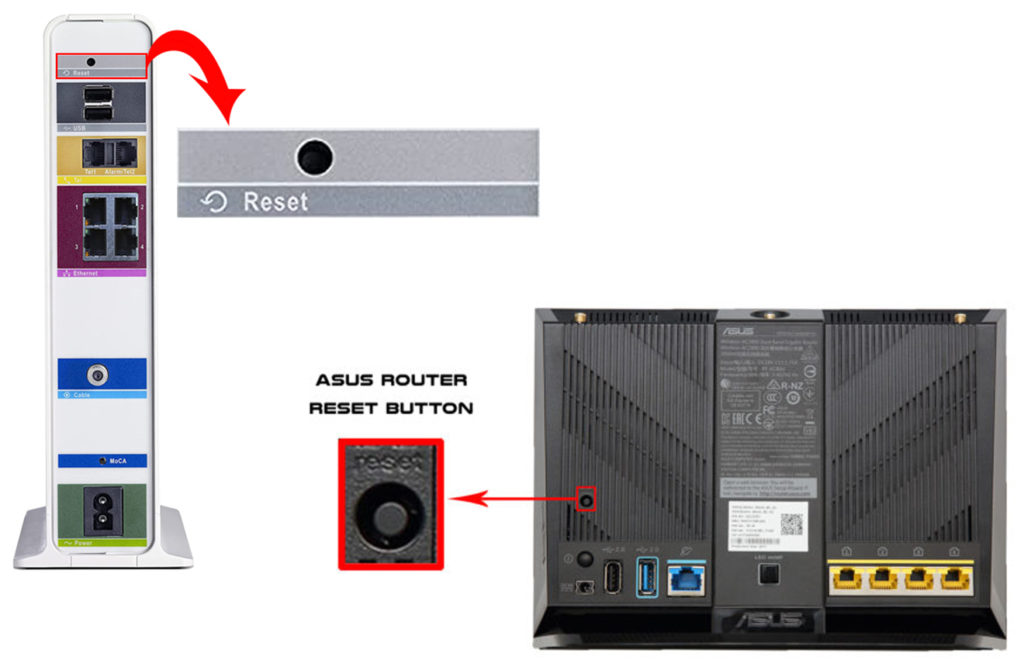
If restarting your router doesn’t solve the problem, consider resetting it instead. A reset is very much different from a reboot. The process restores your router to default settings, meaning you may have to configure your network afresh.
You can reset your router using two different methods. These include:
Method 1 – Use the reset button
Many router models have a reset button that allows you to reset the device within seconds. Press and hold this button for about five seconds before releasing it. The router will reset to default settings, allowing you to set up your network afresh.
Method 2 – Use pinhole
Some routers have a pinhole located at the back of the device. Press the pinhole for a few seconds using a sharp pin until the indicator lights blink.

Reset Wi-Fi on Hitachi TV
Another quick way to fix a Hitachi Roku TV that won’t access the internet is to overhaul and reset your wireless network. You only need to confirm you have an active connection before attempting this fix.
Here are the steps:
- Turn on your router and Hitachi TV
- Press the Menu button on your remote control
- Go to Settings
- Select System and Press Ok
- Select Advanced Systems Settings
- Move down to Network Connection Reset and select Reset Connection
- Your Hitachi Roku TV will restart and you will have to connect to your Wi-Fi network
- Enter your Wi-Fi password when prompted
- Check if your TV can access the internet
How to Reset Wi-Fi on Hitachi Roku TV
Change DNS Settings
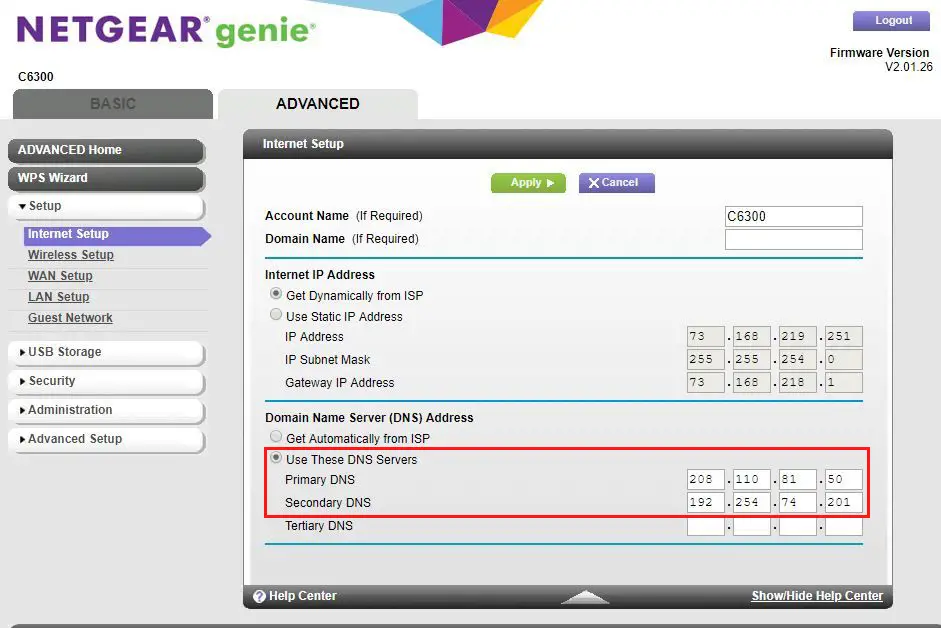
Incorrect DNS settings and conflicting IP addresses can cause your Hitachi Roku TV not to access the internet even if it is connected to Wi-Fi. Although changing DNS settings might seem complicated, the process is surprisingly easy. You will have to change the primary and secondary DNS server in your router’s settings since Roku doesn’t have DNS settings.
- Log in to your router
- Look for LAN Setup or Internet Setup and look for DNS server addresses (primary, secondary tertiary)
- Enter 8.8.8.8 as the primary DNS address and 8.8.4.4 as the secondary DNS address
- Press OK to apply changes
- Check if your Hitachi Smart TV can access the internet

Change the Date and Time on Hitachi TV
Your Hitachi Smart TV might not access the internet because of inappropriate time settings.
Setting the correct time zone and the accurate date and time can help restore your internet connection.
Here are the steps:
- Press the Home button on your remote control
- Go to Settings > System
- Select Time
- You can select the time zone manually or automatically, but you can’t adjust the clock.
- Click OK to apply and save changes
- Reboot your TV
- Check if your TV can access the internet
If you still can’t access the internet and your clock is showing the wrong time, you can try resetting your Hitachi Roku TV or updating it by following this path Settings > System > System Update. Alternatively, you can access one of the secret Roku menus by using the following button combo – Home button x5, FF button x3, RW button x2. When the secret menu opens, select Software Update.
Factory Reset Hitachi Roku TV
If you’ve tried most of the above steps and nothing seems to work, performing a factory reset could be the ultimate option. This step will erase all your data, including downloaded apps, restoring your Smart TV to default settings.
Recommended reading :
- Hisense TV Connected to Wi-Fi But No Internet Access (11 Ways to Fix It)
- LG TV Connected to Wi-Fi But No Internet Access (Troubleshooting Guide)
- Why Does My Samsung Smart TV Disconnect from Wi-Fi?
However, this fix is worth trying since it will restore your network settings and allow your TV access to the internet.
Follow these steps to factory reset your Hitachi TV (older models):
- Turn on your Hitachi Smart TV
- Press the Menu button on your remote control
- Go to Settings
- Select Storage and Reset
- Select Factory Data Reset
- Click Data Reset to erase everything
- Enter your TV’s security PIN
- Press OK to confirm factory reset
- Your TV will reboot automatically
- Check if your TV can access the internet
Follow these steps to factory reset your Hitachi TV (Hitachi Roku TVs):
- Press the Menu button on your remote control
- Go to Settings
- Select System and Press Ok
- Select Advanced Systems Settings
- Select Factory Reset and then Factory Reset Everything. You will have to enter a 4-digit code to confirm that you want to reset your Hitachi Roku TV.
Alternatively, you can use the same secret Roku menu as described in the previous step (Home button x5, FF button x3, RW button x2). When the secret menu opens, select Factory Reset.
Conclusion
Other hacks that you can try to fix your Hitachi TV that won’t access the internet include replacing your router and using a wired connection.
Your TV might have issues accessing the web because of a damaged wireless adapter or a malfunctioning router.
Servicing the damaged adapter or router could be pricey, so using an Ethernet cable is another good and viable idea.

Hey, I’m Jeremy Clifford. I hold a bachelor’s degree in information systems, and I’m a certified network specialist. I worked for several internet providers in LA, San Francisco, Sacramento, and Seattle over the past 21 years.
I worked as a customer service operator, field technician, network engineer, and network specialist. During my career in networking, I’ve come across numerous modems, gateways, routers, and other networking hardware. I’ve installed network equipment, fixed it, designed and administrated networks, etc.
Networking is my passion, and I’m eager to share everything I know with you. On this website, you can read my modem and router reviews, as well as various how-to guides designed to help you solve your network problems. I want to liberate you from the fear that most users feel when they have to deal with modem and router settings.
My favorite free-time activities are gaming, movie-watching, and cooking. I also enjoy fishing, although I’m not good at it. What I’m good at is annoying David when we are fishing together. Apparently, you’re not supposed to talk or laugh while fishing – it scares the fishes.
