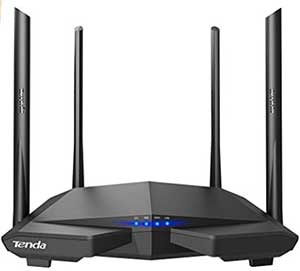
Even though Wi-Fi routers have been around us for more than a decade, many people still think that setting up a wireless router is a complex task. Yes, it can be tricky in certain situations, but, for the most part, it is a process that requires very little time and effort. Tenda routers are fairly easy to set up and configure with quite a simple and intuitive Admin panel. So, let’s dive into it.
CONTENTS
The hardware side of the setup process
As you may or may not know, a wireless router is a network device you need in order to allow Wi-Fi internet access for multiple devices. For the router to work, it needs to be plugged into a power socket and connected to the modem via Ethernet, a.k.a. LAN cable.

Therefore, once you unpacked your Tenda router, find a suitable place for it with an available power socket and within reach of the Ethernet cable, you’ll use to connect to the modem.
If you look at the backside of the Tenda router, you will notice multiple ports where you can plug in the Ethernet cable. One of them will be in a different color (blue) and separate from the others. Plug one end of the Ethernet cable into that blue port and the other end into the modem. When you’ve done this, power up the router and wait for it to boot up (if you’re not sure, leave it for a couple of minutes. Up to five).
Tenda router settings and how to get to them
All the settings and tools on the router are accessed through the admin panel. There are two ways to get to the panel: You will need a computer, mobile, or any other device that has a web browser installed. At this point, you can either get another Ethernet cable and connect the PC or laptop to one of those LAN ports on the back of the router or use Wi-Fi.
Since everyone has a device with Wi-Fi, let’s use that as an example of how to get to the admin panel.
Lift the router and take a look at the sticker on the bottom of the router. The sticker contains many essential pieces of information you’ll need to access the admin panel. Look under ‘default SSID’ and ‘default IP address’ Memorize them or write them down.

The default SSID is the name of the wireless network Tenda router creates by default (e.g., Tenda_58FD0). You’ll need that piece of information to know where to connect in areas with multiple Wi-Fi networks. You’ll be able to change that SSID later into something less generic.
A Default IP address is a way to get to the login screen and access the admin panel. Different manufacturers may use different default IP addresses, but for Tenda, it should be 192.168.0.1 or 192.168.1.1.
Now you have everything you need.
Go to the Wi-Fi settings of your mobile and scan for the available networks. You will see the SSID from the sticker popping up on the list. Tap on it to connect.
Leave the Wi-Fi settings and open your web browser (i.e., Google Chrome, Mozilla Firefox, or whatever you might be using on your mobile). Now enter the default IP address (192.168.0.1) into the address bar.
By entering this IP address, you will open a quick setup page. The router will automatically detect the type of internet connection you have with your Internet Service Provider (ISP) and ask for specifics if needed (e.g., username and password if you have PPPoE or IP, subnet, gateway, and DNS if you have Static IP). Suppose your connection to ISP uses dynamic IP, which is most common. In that case, you won’t have to change anything in the internet connection part of the screen.
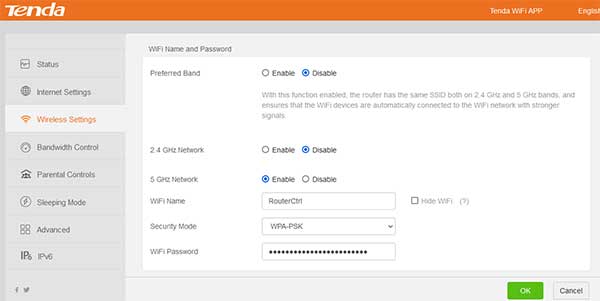
Below this section on the same screen, you will note the Wi-Fi settings. You can rename the Wi-Fi network into something more recognizable for you and create a network password. We suggest you do both and tap on the ‘OK’ on the bottom of the screen.

You will need to reconnect to the Wi-Fi network. This time, look for the name that you created if you did so. Also, enter the password.
You could, theoretically, leave it at this, and you’ll be able to use Wi-Fi and connect to the internet. However, there are multiple tools and security settings within the admin panel you should consider checking out.
Essential tools and settings on the Tenda router
When you connect to the Wi-Fi network you created using the new SSID and the password, retype the default IP address and enter the Tenda Admin panel.
On the left side of the screen, you’ll notice a column of options grouped into several sections, i.e
- Status
- Internet settings
- Wireless Settings
- Bandwidth Control
- Wireless repeating
- Parental controls
- Advanced
- Administration
Let’s briefly explain each of them and underline the most important ones. We’ll start from the bottom.
Administration -VERY IMPORTANT!
Unlike some other manufacturers, Tenda routers will allow access to the admin panel without entering the administrator username and password. However, it would be best to create the login password as soon as you install the router and connect it to the internet. Anyone knowing the default IP address can access your router settings and give you a big headache if you don’t.
Other than this crucial setting, you set up or change some other advanced stuff like MTU (data package size), clone MAC address, set up max WAN speed, define DHCP IP address range, reset the router, reboot, update, etc. We don’t recommend messing with those unless you know what you are doing but creating a login password is a must!
Advanced
Advanced settings are there for very advanced users. We don’t recommend changing anything there before making sure you know what you are doing. You can block or allow only specific devices by using their unique MAC address, forward ports, assign static IP addresses to specific devices, etc.
Parental controls
Parental control is another fantastic tool for anyone who needs better control over the sites people can or can’t access via a Wi-Fi network.
For example, here, you can limit your kid’s mobile phones, tablets, and laptops to use the internet for two hours on the weekdays and four on the weekends. You can also block some sites for each device or denylist all sites except the ones you choose.
Wireless repeating
Suppose you already have a router, and Tenda will be used as an additional one. In that case, you can set it up to be used in AP, repeater, or WISP (Wireless Internet Service Provider) mode.
Bandwidth control
Under this section, you can limit the download and upload speed for each individual device connected to the router. This option can come in handy when you have to make sure one or more of your devices have to have higher speeds, so you can give them more by tuning down the other, not so important, devices.
Wireless Settings
As the name suggests, here, you can find wireless-related settings. You can turn the Wi-Fi on and off, change the network name and password, make a separate network for guests or different groups of users, schedule the network’s time off, and enable or disable a quick WPS connection. You can also specify the Wi-FI standard you’ll use and how wide will be the frequency range you’ll use in case of high congestion.
Internet settings
Here is where you can choose the type of your internet connection (PPPoE, Dynamic IP, Static IP) and enter relevant parameters to make it work
Status
It shows you the type of internet connection, the number of devices connected to the router, the amount of data passed through the router, etc.
SUMMARY
Setting up a Tandem router is pretty straightforward. After connecting the router to the modem and power socket, please turn it on and wait for it to boot up.
Go to the wireless settings on your mobile and find the default SSID (Tenda_SOME_LETTERS_AND_NUMBERS) and TAP to connect. Then open any web browser and type in 192.168.0.1 into the address bar.
You will open a quick setup page. Change the name of the network into something more recognizable and create the password. Also, enter the ISP parameters if required.
Save the settings and reconnect to the router using the new SSID and password you created.
Go to the ‘Administration’ section in the admin panel and create a log-in password to prevent others from entering the Admin panel. Browse other settings and define parental control and bandwidth profiles if needed.
Save the changes and exit.

Hey, I’m David. I’ve been working as a wireless network engineer and a network administrator for 15 years. During my studies, I also worked as an ISP field technician – that’s when I met Jeremy.
I hold a bachelor’s degree in network engineering and a master’s degree in computer science and engineering. I’m also a Cisco-certified service provider.
In my professional career, I worked for router/modem manufacturers and internet providers. I like to think that I’m good at explaining network-related issues in simple terms. That’s exactly what I’m doing on this website – I’m making simple and easy-to-follow guides on how to install, set up, and troubleshoot your networking hardware. I also review new network equipment – modems, gateways, switches, routers, extenders, mesh systems, cables, etc.
My goal is to help regular users with their everyday network issues, educate them, and make them less scared of their equipment. In my articles, you can find tips on what to look for when buying new networking hardware, and how to adjust your network settings to get the most out of your wi-fi.
Since my work is closely related to computers, servers, and other network equipment, I like to spend most of my spare time outdoors. When I want to blow off some steam, I like to ride my bike. I also love hiking and swimming. When I need to calm down and clear my mind, my go-to activity is fishing.
