TP-link routers are very popular due to their affordability and ease of use. Setting up and configuring a router might seem like a Herculean task at first glance, but it’s not that hard once you figure out a few basic things. So, let’s dive into it.
You will need to have internet service provided to you by Internet Service Provider (ISP), a modem, a router with a power supply, and two Ethernet cables for this operation.
CONTENTS
What is a router?
A router is a type of network equipment that serves as a gateway between your small office or home network and the rest of the internet. It receives data from different devices and directs them where they need to go. To make it work, you need to connect it to the modem using an ethernet cable. A modem is there to bring the internet signal to your home.
You can use the internet even without the router by plugging your computer directly into the available port on the modem. If you choose to do so, you will only have the internet on that computer and nowhere else. Since we all know you need to connect multiple devices such as mobile phones, tablets, laptops, desktop PCs, etc., the router is a must-have in every modern home. So, you always need a modem and Internet Service Provider.
The modem will get the internet signal into your property, while the router will be in charge of handling the traffic within the property. A router can not connect to the internet without a modem.
The hardware setup of the TP-Link router
A hardware setup is reasonably straightforward, and you can’t do too many things wrong here. First, you need to plug in the power adapter and press the power button to power it on. After that, use the Ethernet cable to connect the router with the modem. If you look on the router’s backside, you will see multiple ports where you can plug that Ethernet cable. The one you need to use will be separate from the others. Painted with a different color and labeled ‘internet.’ The other end of that Ethernet cable goes into the appropriate port on the modem.
When you do that, please wait until the router signals it receives the signal by lighting up a proper LED light. If you are not sure, wait for a few minutes and then use another Ethernet cable and plug it in a port labeled ‘1’ on the back of your router. The other end goes into your PC. Before you do this, make sure your PC is not connected to some other Wi-FI network if there is one available.
At this point, you should be able to access the internet on the computer connected with the cable. Open any browser and type some random address. If everything is set as it should be, your browser will open the website address you entered. Your other devices can now go online using Wi-Fi. Just select the default Wi-Fi network name shown in the WI-FI search (usually TP-LINK_2,4GHz_XXXXXX or TP-LINK_5GHz_XXXXXX) and type in the default wireless password. (written on the label on the back of your router).
These are all the steps needed for 99% of the users. You should be able to go online from your cable-connected computer, as well as to connect all your Wi-Fi devices. However, it is highly recommended to change the default network name, admin panel username, password, and wireless password for security reasons. Where and how will be explained in the following section. Also, suppose previous steps didn’t work, and you are not able to browse on your cable-connected computer. In that case, there are few additional actions you need to do to make it work.
Software configuration of the TP-link router
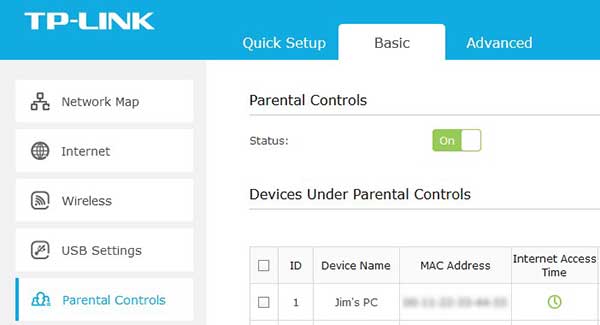
You could and should do a few things in a piece of software on a router called Admin panel. It contains different settings and options you might need, like parental control. It is where you can change your Wi-Fi network name and password and do other customization.
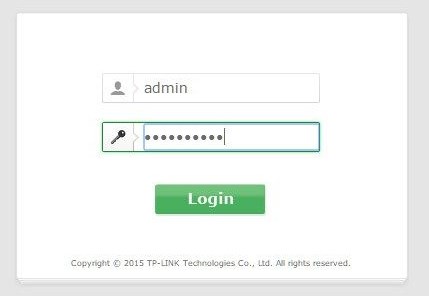
You can access the Admin panel by opening any internet browser on the connected computer. Type in ‘tplinklogin.net’, ‘tplinkwifi.net,’ or similar in the address bar (exact address is written on the back of your router).
A popup window will appear, where you must enter the default administrator username and password to proceed. You can find those written on the sticker on the back of your router. On the TP-Link routers, it is
username: admin
password: admin

Click OK, and this will allow you access to the Admin panel. Settings are grouped on the left side.
First, click on the ‘Quick setup.’
This section will allow you to choose a few basic options like the type of connection and Wi-Fi frequency you want to use. You can also change the default name of the Wi-Fi network and wireless password here. If auto-detect option doesn’t work, and you are not sure what kind of connection you have (dynamic IP, static IP, or PPPoE), contact your Internet Service Provider (ISP ) and ask for details. Follow the quick setup and click ‘Finish.’ This should do the trick.
To connect to the internet, select the default network name or the name you chose in the Wi-Fi search, type in the password, and you are done..
Parental control
There is one handy feature on the TP-link routers most people ignore or don’t know about. It’s called ‘Parental control.’ This feature allows you to select specific devices connected to your Wi-Fi network and limit their connectivity and/or access to a selection of websites or social media.

For example, you can allow your kid’s phone or tablet (or both) to access Youtube only two hours a day and prevent them from going on Facebook at all. Using parental control can be very useful if you want to stay in charge of how much time your kids spend online and where they can and can’t go.
Summary
For most people, configuring a router can appear more intimidating than it truly is. Before you start, make sure you have some ISP package and a modem.
Connect the router to the power supply and power it on. After that, plug one end of the ethernet cable into a separate, differently colored port on the back of the router (usually labeled internet or DSL). The other end goes into the modem.
Wait a few minutes for the LEDs on the router to stabilize. Now use another ethernet cable and plug one end into the router port labeled ‘1’. The other end goes into your computer.
Open the browser and test if you are online. If yes, connect other Wi-Fi devices using the default network name and password (written on the back of the router) or go to the admin panel to change default settings. You can access the Admin panel by typing the address written on the back of the router into the address bar. Use the computer that is connected by an ethernet cable when you do this. Both username and password are ‘admin’ (also written on the back of the router).
If you cannot go online at this point, contact your ISP. Find out what type of connection you need to use ( static IP, dynamic IP, or PPPoE) and the details you need to configure the router. Finish the setup and connect your Wi-Fi devices using the network name and password you chose.

Hey, I’m David. I’ve been working as a wireless network engineer and a network administrator for 15 years. During my studies, I also worked as an ISP field technician – that’s when I met Jeremy.
I hold a bachelor’s degree in network engineering and a master’s degree in computer science and engineering. I’m also a Cisco-certified service provider.
In my professional career, I worked for router/modem manufacturers and internet providers. I like to think that I’m good at explaining network-related issues in simple terms. That’s exactly what I’m doing on this website – I’m making simple and easy-to-follow guides on how to install, set up, and troubleshoot your networking hardware. I also review new network equipment – modems, gateways, switches, routers, extenders, mesh systems, cables, etc.
My goal is to help regular users with their everyday network issues, educate them, and make them less scared of their equipment. In my articles, you can find tips on what to look for when buying new networking hardware, and how to adjust your network settings to get the most out of your wi-fi.
Since my work is closely related to computers, servers, and other network equipment, I like to spend most of my spare time outdoors. When I want to blow off some steam, I like to ride my bike. I also love hiking and swimming. When I need to calm down and clear my mind, my go-to activity is fishing.
