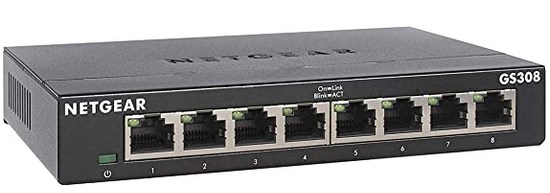
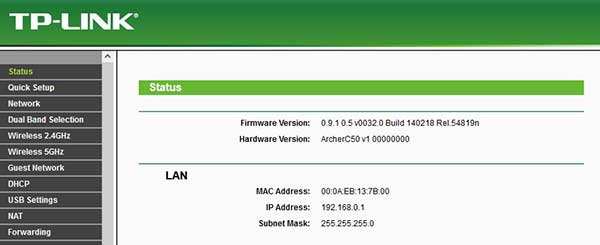
NOTE: In this article, we will talk about setting up an Ethernet LAN router. If you are looking for instructions on how to configure the Wi-Fi router, please click HERE. Modern switches for home and small office networks are mostly unmanaged, PnP (plug and play). All you have to do, once you set up the router, is to take one Ethernet cable, plug one end into the router and the other into the switch. Use the remaining ports on the switch for the devices you want to connect to the internet using an Ethernet cable.
If you want to bring the internet into your home or office, you will typically need a few pieces of network equipment. The first one is the modem. The modem is the gateway between your network and the rest of the internet. Nowadays, there are three of the most common modems for every kind of internet connection you might have. Cable, fibre-optic, and DSL. The type of modem you’ll need depends on your ISP (Internet Service Provider) and the available infrastructure.
Once you get the internet signal into the space you want to hook up to the network of all networks, you’ll probably want to use it on more than one device. At this point, you’ll need to buy the router, connect it to the modem and set it up to suit your needs.

CONTENTS
What is a network router?
A network router is a type of network device that forwards data packages between networks.
It complicated to understand?
Let’s explain using a post office analogy.
Every device on your network, such as a tablet, a laptop, a PC, etc., is like a home or business in your city, town, or village. It has an address. Every time you are connected to the internet from one of those devices, it sends and receives data. Those data are sent and received in small data packages, like letters. And each of them has an address they need to go to. The router acts as a post office. All those packages arrive at the router and get forwarded to the next router (post office) if they are going away from a network, or delivered to the specific device on your network. Not having a router is like not having a post office. No one is there to redirect and send the letters where they need to go.
Now let’s see how you can access the settings and configure the router.
There are three ways to do this:
- Local or direct access.
- Remote using a command line
- Remote using web GUI
Local or direct access to the router
As the name suggests, if you want to make changes to the router this way, you’ll need physical access to the router and a special cable called a rollover cable. You plug one end of the cable into the console port on the router and the other end into the PC. There is a way to forbid remote access to the router settings, making this the only option if you want to be extra safe. Please note that if you opt for this type of access, you’ll need to download and install a terminal emulator program such as PuTTy, HyperTerminal, TeraTerm, or similar. These programs are necessary to input changes to the config file on the router. Those programs are mostly free and can be found and downloaded using a simple Google search. However, to make them work, you’ll need to configure them as well, so they can find and display router settings in their window.
This is the safest way, but don’t use it unless you are absolutely sure you know what you are doing.
Remote using a command line
This is a method where you can access the router through the network. There are two methods for these connections, called Telnet and SSH. They provide the same functionality as direct access, but you don’t have to plug your PC into the router. In other words, you can be somewhere across the world and make changes to the router using command lines. This has to be enabled in the router settings, and the preferred method of connecting is through SSH because it is encrypted. This is also a method you should leave to professionals unless you know what you are doing.
Remote using web GUI
Now we come to the most user-friendly option for setting up the router. It is through the web browser, using the graphic user interface. It is simple, and most settings will be explained within the admin panel on your screen.

What is a network switch?
A network switch is a type of networking equipment that allows fast cable communication between multiple devices connected to it. There are two main types of switches; unmanaged and managed.
Unmanaged switch
An unmanaged switch is a simple plug-and-play device with all the settings done in the factory. All you have to do is plug in the devices you want to connect using Ethernet cables, and that is it. It will work.
Just one thing. If you want to get top speeds out of your switch, read the maximum speed in the specs and get the matching Ethernet cables. In other words, if your switch allows speeds of up to 1Gb/s or higher, then buy an Ethernet cable labelled cat5e for 1Gb/s or cat6 for higher rates and improved reliability.
Managed switch
This type of switch doesn’t come preset, and its settings can be adjusted to your needs using the same methods you use to set up the router. However, they are primarily used for large networks and businesses where there is a need for fine-tuning speeds and access to each individual device. Again, if you are not tech-savvy, stick with the simple solution.
How to set up the router?
There are three types of connection to the ISP: PPPoE, dynamic IP and static IP.
Regardless of the type, to set up the router, you’ll need to go to the Admin panel or enter the changes manually. We recommend using a web browser and a GUI (Graphic User Interface).
The Admin panel is accessed through a web browser from a computer connected to the same network. You’ll need to know the IP address of the router and the administrator’s username and password. Both can be found on the back of the router, printed on the sticker. Type in the IP address (usually something like 192.168.1.1 or 192.168.0.1 or 192.168.100.1) into the browser address bar and press enter. This will take you to the login page where you will need to enter your username and password to proceed.
Recommended reading:
- How to Setup TP-Link Wi-Fi Extender?
- How to Setup Xiaomi Wi-Fi Extender?
- How to Setup a Modem and Router?
Once you enter the admin panel, look for the internet or WAN settings and the “internet connection type”. Choose the one you have (ask your ISP if you’re not sure).
If your provider uses Static IP, they will give you a sheet of data you will need to enter into the router’s admin panel. You will be given a WAP IP address, subnet mask, gateway, and DNS server IP address.
Type them in and save the settings.
If it is PPPoE, the ISP will provide you with a username and password. In some cases, you will also get a service name. Enter them and save the settings.
The third, and most common, option is dynamic IP. If that is the case, choose it and the ISP will provide the rest. Save the settings and enjoy.
How to set up the switch?
Like we mentioned earlier, in most home and small office applications, you’ll use unmanaged switches. Small, simple, plug-and-play devices. All you have to do is to take the Ethernet cable and connect the switch to one of the ports on the router. All other devices will connect to the switch using the other ports and separate cables. And that is it.

Hey, I’m David. I’ve been working as a wireless network engineer and a network administrator for 15 years. During my studies, I also worked as an ISP field technician – that’s when I met Jeremy.
I hold a bachelor’s degree in network engineering and a master’s degree in computer science and engineering. I’m also a Cisco-certified service provider.
In my professional career, I worked for router/modem manufacturers and internet providers. I like to think that I’m good at explaining network-related issues in simple terms. That’s exactly what I’m doing on this website – I’m making simple and easy-to-follow guides on how to install, set up, and troubleshoot your networking hardware. I also review new network equipment – modems, gateways, switches, routers, extenders, mesh systems, cables, etc.
My goal is to help regular users with their everyday network issues, educate them, and make them less scared of their equipment. In my articles, you can find tips on what to look for when buying new networking hardware, and how to adjust your network settings to get the most out of your wi-fi.
Since my work is closely related to computers, servers, and other network equipment, I like to spend most of my spare time outdoors. When I want to blow off some steam, I like to ride my bike. I also love hiking and swimming. When I need to calm down and clear my mind, my go-to activity is fishing.
