Wi-Fi technology has truly redefined how people connect to the internet and access the web.
You no longer need to run unsightly wires and cables along your walls or install bulky equipment to access the internet in your home or office.
But as much as Wi-Fi networks allow for wireless connections, they have their fair share of shortcomings.
For instance, unless you install a Wi-Fi extender, you may encounter connectivity issues and dead zones in your space if you are too far from the router.
This guide explains how to log in to a Wi-Fi extender network to ensure adequate internet coverage and access in your space.
CONTENTS
What is a Wi-Fi Extender?
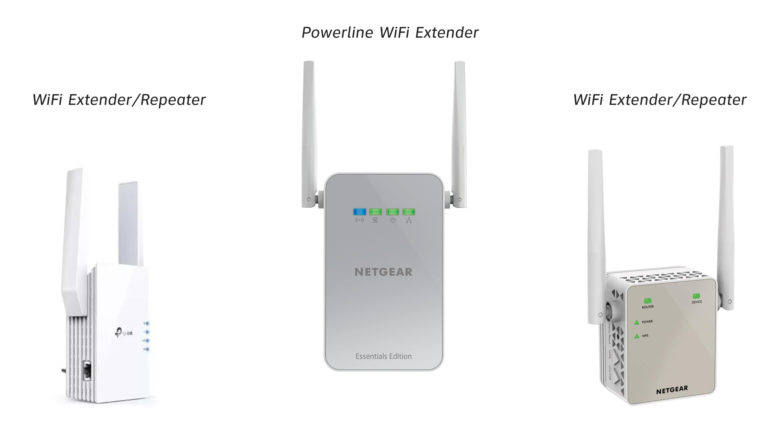
A Wi-Fi extender, also known as a range extender, is a piece of networking hardware used to increase internet coverage within a designated area.
As you may already know, Wi-Fi has a limited range not exceeding 150 feet indoors and 300 feet outdoors, depending on the selected frequency band.
As such, the device extends the range of a wireless signal from a Wi-Fi router to connected devices, effectively eliminating dead zones and ensuring adequate coverage.
It essentially acts as a bridge between the router and connected Wi-Fi devices outside the range of the Wi-Fi router’s signal.
How Does a Wi-Fi Extender Work?
A Wi-Fi extender works by connecting to an existing Wi-Fi network before creating a virtual second network for Wi-Fi devices to connect.
It acts as an access point, allowing you to connect to your wireless network even when far from the main Wi-Fi router.
Wi-Fi signals often weaken as you move farther away from the main Wi-Fi router, leading to drops and connectivity issues.
Recommended reading:
- Why Does My Wi-Fi Turn on Automatically in The Morning? (Best Ways to Prevent Wi-Fi from Turning on Automatically)
- Are Wired and Wi-Fi Considered One Network? (Wired & Wi-Fi Networks Compared)
- Does My Cell Phone Use Data When Connected to Wi-Fi? (Stop Your Phone from Using Cellular Data when Connected to Wi-Fi?)
While re-positioning the router can help solve these issues, installing a Wi-Fi extender is one of the best ways to extend the range of Wi-Fi signals within your home or office.
The extender communicates with the central router, picking up signals before creating a second Wi-Fi network with a different SSID.
Keep in mind the Wi-Fi extender does not strengthen your router’s signal but broadcasts its own Wi-Fi signal throughout the home.
The extender receives internet signals from the router but broadcasts its new Wi-Fi signals in your space.
Wi-Fi Extenders Explained
How to Set Up a Wi-Fi Extender?
You must set up your Wi-Fi extender before logging into the new network created by the device.
Setting up a Wi-Fi extender can be complicated if you do not know what to do or where to begin.
Here are the steps on how to go about it:
- Plug in your extender in the wall outlet in the same room as your router
- Ensure the extender is as close as possible to the main router
- Power up the router and the extender
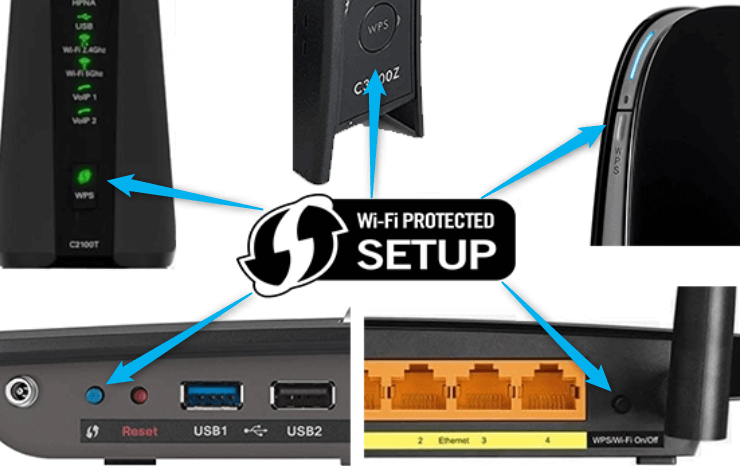
- Look for the WPS button on the router
- Look for the WPS button on the extender
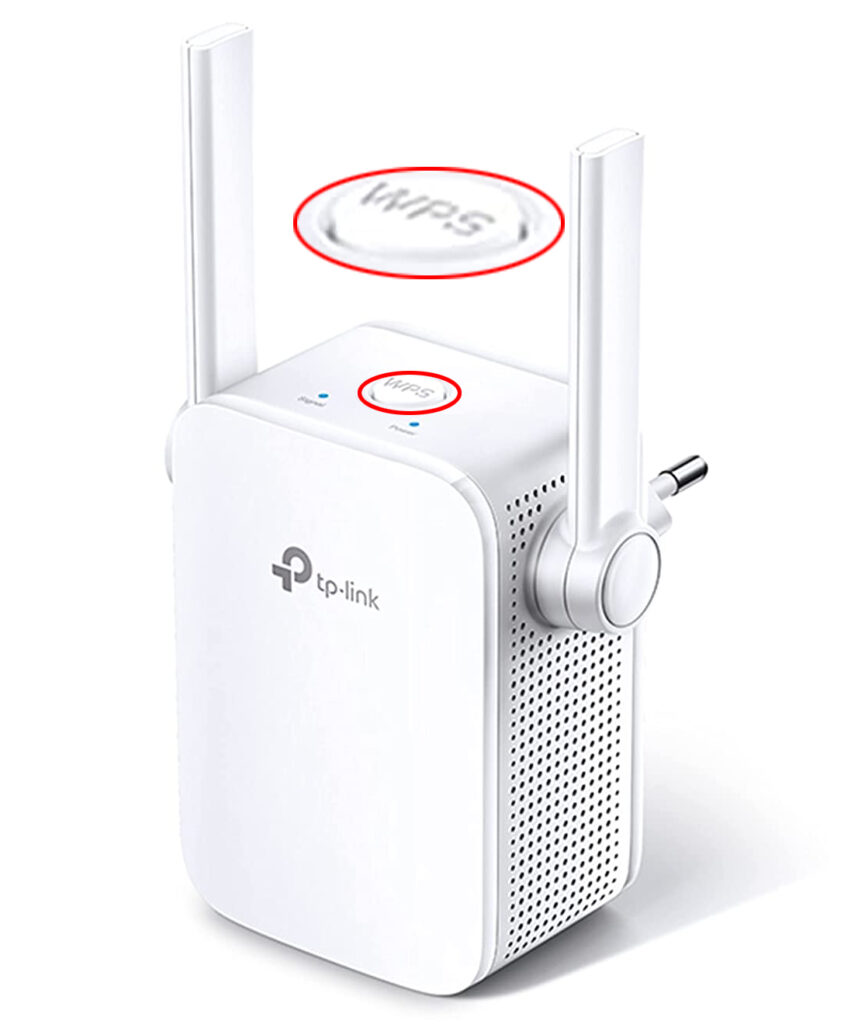
- Press the WPS button on the extender and press the corresponding button on the router within 2 minutes
- Relocate the extender to an area experiencing connectivity issues
If your Wi-Fi extender or router does not have a WPS button, you can set it up by downloading its app from the manufacturer’s site and following the on-screen instructions.
Most Wi-Fi extender manufacturers have smartphone apps with detailed instructions for installing networking products like boosters, repeaters, and extenders.
Setting Up a TP-Link Extender
How to Login to a Wi-Fi Extender Network?
Once you set up your Wi-Fi extender, you must log in to the created network to access the internet.
Fortunately, the procedure is similar to joining any wireless network, but you must know your Wi-Fi extender’s SSID name and password.
The Wi-Fi extender’s SSID name will be almost identical to the main router’s but with an EXT at the end.
For instance, if your router’s SSID name is HOME, the extender will have a unique SSID name like HOME_EXT.
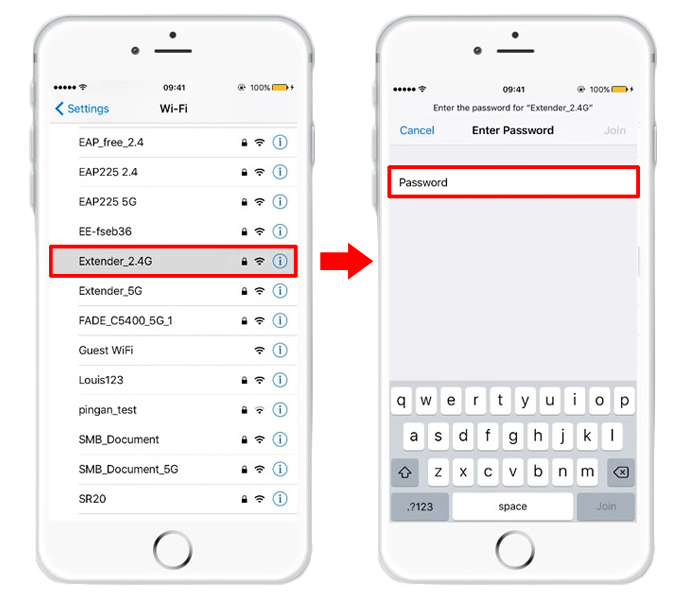
Follow these steps to log in to the Wi-Fi extender network:
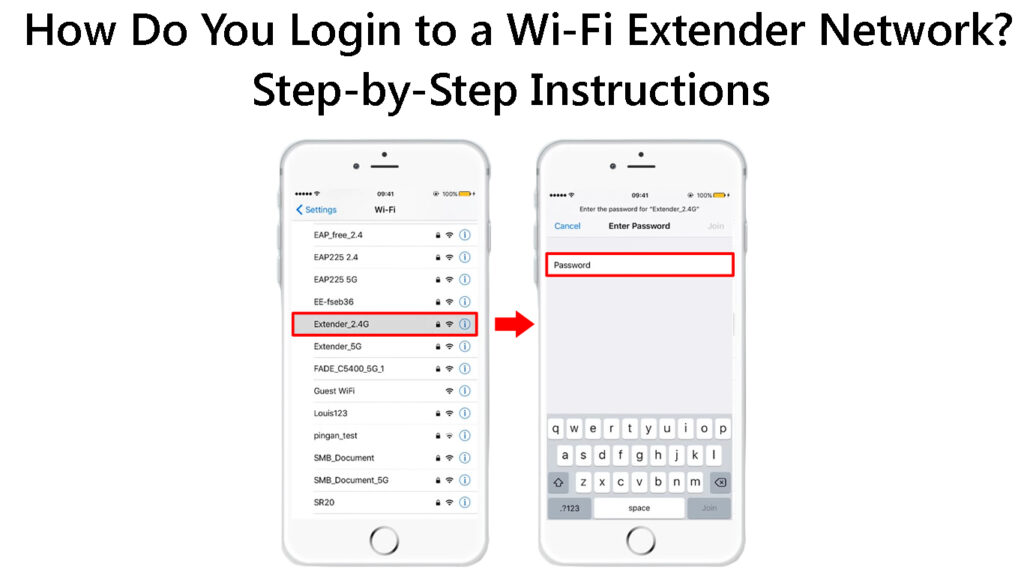
- Go to your phone’s settings
- Go to Wireless & Internet
- Go to Wi-Fi
- Tap the slider next to Wi-Fi to turn it ON
- Search for nearby Wi-Fi networks
- Tap the SSID name of your Wi-Fi extender
- Enter the Wi-Fi extender password to join [the password is usually identical to the host Wi-Fi network]
Some Wi-Fi extenders have an Ethernet port, meaning you only need to plug one end of an Ethernet cable into the extender and the other end into your PC to connect to the network.
You can change the SSID name and password of your Wi-Fi extender network using the following steps:
- Connect your PC or smartphone to the main router’s network
- Launch your preferred browser from your device
- Enter the network’s default IP address, usually 192.168.0.1
- Enter your login credentials
- Click Status to view connected devices
- Find your Wi-Fi extender’s IP address
- Disconnect your device from the main router
- Connect your device to the extender network
- Launch a web browser on your phone or PC
- Enter the Wi-Fi extender’s IP address
- Enter the default login credentials [leave the username blank and enter admin in the password field]
- Click Wireless Settings or Basic Settings
- Change the Wi-Fi SSID and password
- Thereafter, click OK or Save to apply the changes
Conclusion
A Wi-Fi extender can greatly increase your network coverage by eliminating dead zones.
By following the above steps, you will be able to log in to your Wi-Fi extender network and enjoy uninterrupted internet connectivity.

Hey, I’m Jeremy Clifford. I hold a bachelor’s degree in information systems, and I’m a certified network specialist. I worked for several internet providers in LA, San Francisco, Sacramento, and Seattle over the past 21 years.
I worked as a customer service operator, field technician, network engineer, and network specialist. During my career in networking, I’ve come across numerous modems, gateways, routers, and other networking hardware. I’ve installed network equipment, fixed it, designed and administrated networks, etc.
Networking is my passion, and I’m eager to share everything I know with you. On this website, you can read my modem and router reviews, as well as various how-to guides designed to help you solve your network problems. I want to liberate you from the fear that most users feel when they have to deal with modem and router settings.
My favorite free-time activities are gaming, movie-watching, and cooking. I also enjoy fishing, although I’m not good at it. What I’m good at is annoying David when we are fishing together. Apparently, you’re not supposed to talk or laugh while fishing – it scares the fishes.
