
Did you hear about the term “metered Wi-Fi” but have no idea what it means? Chances are, you are already familiar with the concept! Today, we’re explaining the meaning of metered Wi-Fi, do you need the feature enabled on your computer, as well as how to turn it on or off!

CONTENTS
What is a Metered Network?
A metered connection is linked to the way your service provider charges you for your internet plan. The majority of providers won’t track users’ data and will charge their users the same amount every month. However, certain providers offer plans that require tracking the amount of data customers use and charging them based on the data used. That is a metered connection.
This term often refers to the setting in Windows computers that carries the same name. It allows you to set limits for your data usage and helps you avoid extra charges.
Metered Wi-Fi Explained
Should You Set a Metered Wi-Fi on Your Computer?
If your service provider is charging you based on your data usage, setting your Wi-Fi to metered on your computer is really important. Your device will warn you when you get close to your limit, which will help you avoid wasting data on irrelevant activities. It will also save you from data overage charges.
On Windows devices, Wi-Fi networks are set to non-metered by default. Thus, you’ll have to manually turn this feature on if you need it. On the other hand, mobile broadband networks should be automatically set to metered on your Windows computer. So, you won’t have to turn the feature on.
Once you set the connection to metered, you may want to set the actual limits for your device. If you’re using your mobile’s personal hotspot, you should think about the limits you want to set. That’s because you will be sharing the available data with another device which will also use up the available data without you controlling it. So, we would recommend you set the limit to around 20% lower than what the actual cap is.
How to Set a Connection to Metered in Windows 10
Firstly, you should navigate to the settings of your computer. You can find the Settings section in the Start menu by clicking on the Gear icon. Alternatively, you could type settings in the search box. Once you’re in the settings of your device, you’ll need to click on Network & Internet. Then, you should find the Wi-Fi section and choose Manage known networks.
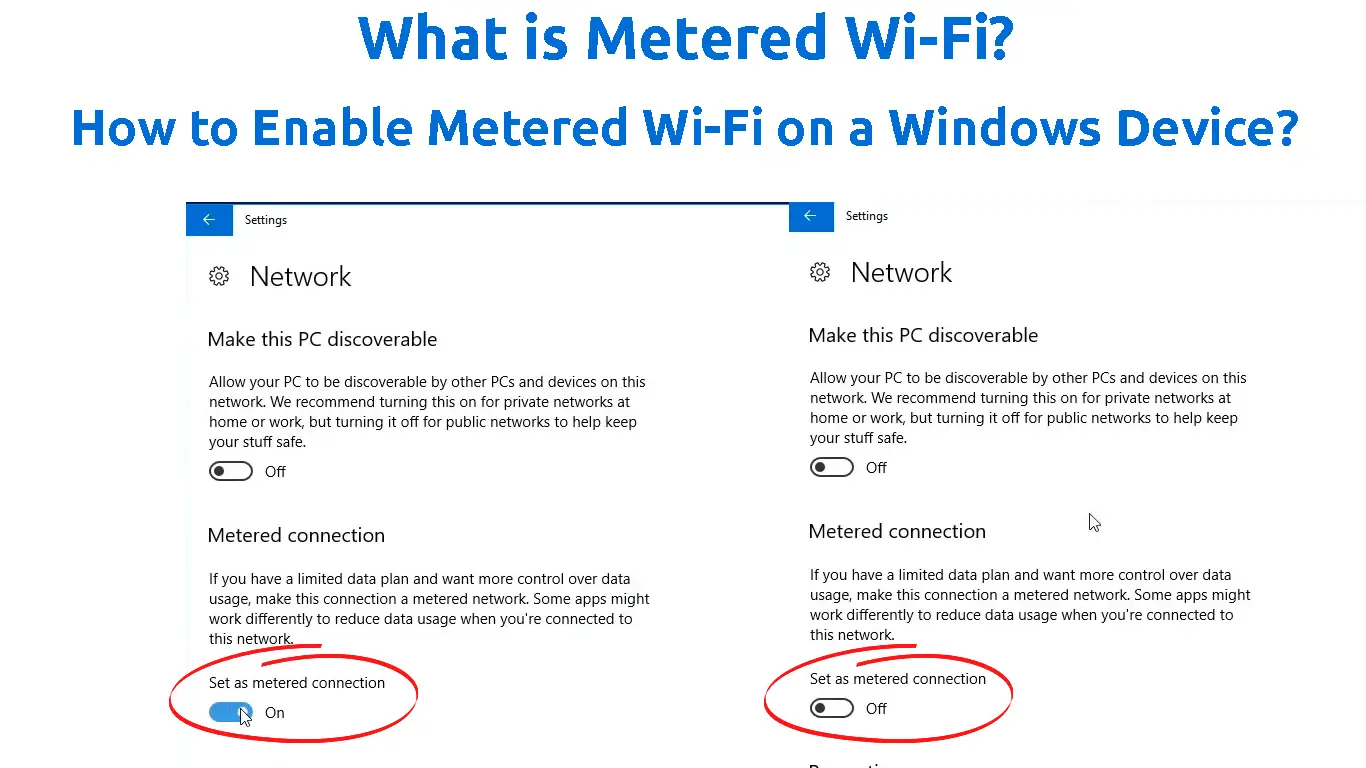
Your computer will then display a list of Wi-Fi networks your device previously joined. When you find the network you want to set as metered, you should click on it. A hidden menu will appear enabling you to access the properties of the network. Once you’re in the properties, you should scroll down until you see the Metered connection section. There, you’ll be able to toggle the metered connection feature on or off.

Another step you should take is to set data limits. That way, your device will know your data caps and help you avoid additional charges. You can set data caps by going back to the Network & Internet part of the settings and choosing Status. There, you can click on the name of the network you joined and choose Data usage. You can then click on Enter limit to set up the specs of the data limit as well as choose the limit type. You’ll apply the settings by clicking on Save.

How to Enable/Disable Metered Connection in Windows 10
How to Set a Connection to Metered on Windows 11
You’ll begin the process of setting your Wi-Fi to metered by going to the settings of your Windows 11 computer. Then, you’ll need to choose the Network & Internet option and navigate to Wi-Fi. After that, you should select the network you’re currently connected to and choose to turn on a metered connection.
In case you want to set an Ethernet connection to metered, you’ll need to visit the Ethernet section instead of the Wi-Fi portion of the Network & Internet menu. Then, you’ll have to select the network you joined. You’ll then be able to turn the metered connection on.
The process is nearly the same if you want to set up a cellular network to metered. You should visit the Cellular section and then find the option that allows you to turn the metered connection on.
To complete the process, you should set a data limit on your network. Once you get near the limit, your Windows device will warn you about your usage.
To do that on a Windows 11 computer, you should again navigate to the settings of the device and choose Network & Internet. The section you visit next depends on the type of network you joined. There, you’ll find the name of the network and check out its connection status. At the top, you’ll see the option Data usage. Once you click on it, you can enter the data limit and limit type. You’ll finish this process by choosing Save.
How to Enable/Disable Metered Connection in Windows 11
The Metered Connection Option is Greyed Out – Troubleshooting Tips
In most cases, you can easily set the Wi-Fi connection to metered. But, in certain circumstances, you won’t be able to change this setting. The Metered connection option will be greyed out and you won’t be able to click on it.
This happens when users can’t access the feature on a certain network. A Wi-Fi network owner, such as your company or an organization can set the metered connection that can’t be changed or disabled by network members. In that case, there is nothing you can do to change the settings of the network except to talk to the Wi-Fi owner and ask them for permission.
Is It Possible to Set a Metered Wi-Fi on a Mac?
Unfortunately, Mac users don’t have the metered connection option available. However, you can manually change certain settings that would allow for more control over your data usage.
For instance, you can turn off automatic app updates on the App Store. You’ll do that by going to System Preferences. Then, you should choose App Store and uncheck the Automatically check for updates option.
In addition, you can stop Mac iCloud sendoffs. That will prevent your Mac device from using the internet connection for sending data to iCloud. You should keep in mind that, if you disable this feature, you’ll have to send your data to other iCloud devices on your own to avoid losing it.
To stop the Mac iCloud sendoffs, you should click on the Apple icon and go to System Preferences. Then, you’ll need to go to the General tab. You’ll find a box next to the handoff between the Mac and your iCloud devices. You can uncheck it to turn the feature off.
In Conclusion
A metered Wi-Fi connection means that your data usage is measured and tracked. If your internet provider is charging you by the amount of data used, you may want to turn on this feature on your device. That way, you’ll have more control over your usage and even lower your internet bills!
You can follow the steps in this article to make sure that the feature is properly configured. If you have a Mac device, you won’t be able to change this setting for your network.

Hey, I’m Jeremy Clifford. I hold a bachelor’s degree in information systems, and I’m a certified network specialist. I worked for several internet providers in LA, San Francisco, Sacramento, and Seattle over the past 21 years.
I worked as a customer service operator, field technician, network engineer, and network specialist. During my career in networking, I’ve come across numerous modems, gateways, routers, and other networking hardware. I’ve installed network equipment, fixed it, designed and administrated networks, etc.
Networking is my passion, and I’m eager to share everything I know with you. On this website, you can read my modem and router reviews, as well as various how-to guides designed to help you solve your network problems. I want to liberate you from the fear that most users feel when they have to deal with modem and router settings.
My favorite free-time activities are gaming, movie-watching, and cooking. I also enjoy fishing, although I’m not good at it. What I’m good at is annoying David when we are fishing together. Apparently, you’re not supposed to talk or laugh while fishing – it scares the fishes.