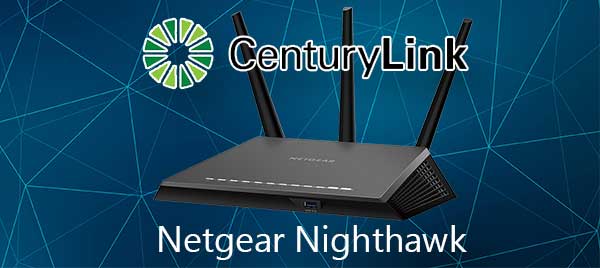
Assuming you have an appropriate Netgear Nighthawk model, then – Yes. The Netgear Nighthawk will work with CenturyLink internet service provider (ISP), and this article will show you how.
The CenturyLink ISP will be more than happy to rent or sell you their own certified equipment. However, that might not be the best solution for you for multiple reasons. Firstly, you may already have a similar or better performance unit, or you just want to use something else. Let’s be honest. There are some better modems and routers out there, the Netgear Nighthawk series being one of the more popular ones.
Now, before we go into the details on how to make your Nighthawk work with CenturyLink, there are a few things you need to figure out.
Firstly, you need to know what kind of internet service you are getting from CenturyLink. Is it DSL or fiber optic?

Depending on the answer to this question, you will need to check what model of Netgear Nighthawk you have or want to buy. If you use DSL, you will need a router/DSL modem combo unit, and if it is a fiber-optic connection, you’ll only need a router since there is nothing to modulate and demodulate. The signal is already digital. However, Netgear likes to complicate things a bit, so they named their entire array of routers Netgear Nighthawk. You’ll have to find out a specific model number to know what you have.
Recommended reading:
- CenturyLink DSL Light Red: Meaning and How to Fix It?
- CenturyLink Modem Blinking Blue: 6 Ways To Fix It
- No DSL Light on Centurylink Modem: Meaning and What to Do?
For example, Netgear Nighthawk AC1900 D7000 is a router/DSL combo unit, while Netgear Nighthawk AC1900 R6900P is a router.
Now that we got this out of the way let’s show you how to make your Nighthawk work with the CenturyLink service.
CONTENTS
How to Make Netgear Nighthawk Work with Cyberlink DSL
If you are a new CyberLink user, we recommend renting their equipment for one month to confirm everything is okay with the signal and the service. Once you are positive about that, configure the Nighthawk and return the CyberLink equipment to them.
Also, don’t use the Netgear app. To avoid frustrations, the setup process should be done with a PC connected to the Nighthawk using the ethernet cable.
To access the administration panel, open the internet browser and type in routerlogin.com. You will be asked for the default username and password (username: admin, password: password)
Login to the Netgear Nighthawk and then go to Advanced > Internet
On this page, select CenturyLink as Internet Service Provider.
Set transfer mode to VDSL (TPM) and DESL mode to VDSL2.
Choose ‘Internet’ from the drop-down menu below.
Check the boxes next to ‘Enable This Interface’ and ‘Use VLANID.’
Type in 201 as a value next to VLANID, and for priority, type in 0.
For “Does your internet connection require a login?”, choose Yes.
In the Encapsulation dropdown menu, choose PPPoE.
Enter your username and password you got from CenturyLink.
Connection mode needs to be ‘Always on,’ and Idle timeout needs to be 0.
Internet IP address – Get dynamically from the ISP
DNS – Get automatically from ISP
NAT – Enable
Router MAC address – Use default address
Click Apply
You are good to go!
How to Make Netgear Nighthawk Work with Cyberlink Fiber Optic

As we mentioned before, if you’re using a fiber-optic service from CenturyLink, all you’ll need is a router.
You don’t need to put CenturyLink gateway into the bridge mode, but eliminate it from your network.
CenturyLink uses one neat trick called 201 virtual LAN tagging to label all the traffic coming to and from your network. That is why you won’t be able to set your own router as a primary and have half-decent speeds or use it at all.
What you need to do is to unplug the CenturyLink gateway and put your new router in its place while enabling 201 VLAN tagging in the new router’s setting.
Depending on where you live, it might just be plug-and-play.
However, if CenturyLink is still using PPPoE in your area, you’ll have to do some setting up. You’ll know if they are using PPPoE if they give you a username and password to access the internet.
The setup process is similar to the one above.
During the setup process, use a wired connection. Connect your PC or laptop to your new router using an ethernet cable.
Open the internet browser and type in routerlogin.com. Enter default username and password (username: admin, password: password)
Login to the Netgear Nighthawk and then go to Advanced > Internet
On this page, select CenturyLink as Internet Service Provider.
Type in 201 as a value next to VLAN ID, and for priority, type in 0.
For “Does your internet connection require a login?”, choose Yes.
In the Encapsulation dropdown menu, choose PPPoE.
Enter your username and password you got from CenturyLink.
Connection mode needs to be ‘Always on,’ and Idle timeout needs to be 0.
Internet IP address – Get dynamically from the ISP
DNS – Get automatically from ISP
NAT – Enable
Router MAC address – Use default address
Click Apply
Be aware that some options and settings may not be in the same place, but they will have the same or similar names. Try to follow these steps and not miss any settings—especially VLAN ID since you won’t be able to use the internet without VLAN 201 tagging.
Summary
Changing CenturyLink router for one from the Netgear Nighthawk series has multiple benefits. Stronger, more reliable wireless signal and much higher Wi-Fi speeds are just a few of them.
CenturyLink will try to keep you as a user of their equipment, so they will try their best to hide from you how to make Netgear Nighthawk work with their service.
However, it is pretty straightforward once you know what their trick is.
Once you choose the proper model of Netgear Nighthawk for the type of internet service and set up your router to use 201 VLAN tagging, you won’t have any problems.
Just follow the instructions above, and you will enjoy the benefits of having a good quality router in no time.

Hey, I’m Jeremy Clifford. I hold a bachelor’s degree in information systems, and I’m a certified network specialist. I worked for several internet providers in LA, San Francisco, Sacramento, and Seattle over the past 21 years.
I worked as a customer service operator, field technician, network engineer, and network specialist. During my career in networking, I’ve come across numerous modems, gateways, routers, and other networking hardware. I’ve installed network equipment, fixed it, designed and administrated networks, etc.
Networking is my passion, and I’m eager to share everything I know with you. On this website, you can read my modem and router reviews, as well as various how-to guides designed to help you solve your network problems. I want to liberate you from the fear that most users feel when they have to deal with modem and router settings.
My favorite free-time activities are gaming, movie-watching, and cooking. I also enjoy fishing, although I’m not good at it. What I’m good at is annoying David when we are fishing together. Apparently, you’re not supposed to talk or laugh while fishing – it scares the fishes.
