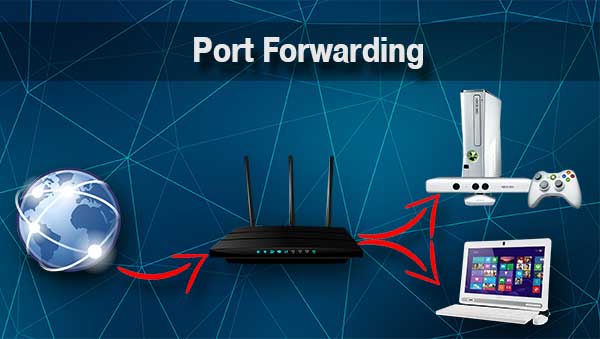
One of the most common reasons to trouble yourself nowadays with port forwarding is gaming. As a long-time passionate gamer myself, I used this NAT application multiple times over the years to allow various gaming consoles and video games to communicate with the servers.
It might look scary at first, but once you figure out what is what and get the hang of things, it becomes a routine job, even for the least educated users.
This article will provide you with essential background information about port forwarding, give you instructions on how to do it on a Sky router, and what to do if something goes wrong.
CONTENTS
What Is Port Forwarding and How It Works

As this can be difficult to understand for someone who is not into networking protocols and related topics, I will try to keep it simple so that anyone can comprehend.
Your router acts as a firewall between your network and the rest of the internet. It is a good thing since it protects you from hackers and blocks any suspicious traffic to and from your network.
Recommended reading:
- How to Connect Sky Box to Wi-Fi Without WPS Button? (Quick Setup Guide)
- How to Enable Sky Mobile Wi-Fi Calling?
- No Internet Light on Sky Router: Possible Causes and Quick Fixes
However, there are instances when you need your router to allow traffic to and from your devices, and you need to do it manually by opening specific ports for specific applications on specific devices. This operation is called port forwarding.
How to Do Port Forwarding on Sky Router
Step 1. Find Out Your Sky Hub’s IP Address
The default IP address should be 192.168.0.1, but it doesn’t have to be. If yours is changed, you’ll need to find out what it is to access the settings.
Windows users can open CMD (Command prompt app) by typing in the cmd into the windows search bar and pressing Enter. Once you open the CMD, type in the ipconfig and press Enter.
Scroll down to Default gateway. That is your Sky Hub’s IP address. Memorize or write it down.

Step 2. Access the Sky Hub’s settings
Open the internet browser on a connected device, preferably a PC. Then type in the Sky Hub’s IP address and press Enter. The Sky Hub menu will load.
Click on Advanced to identify the device you want to forward traffic to or Security if it is the same as the device you are currently using.
Type in your administrator username and password.
The default username is: admin
The default password is: sky (sometimes it’s your wifi password)
If you changed the defaults at some point, type in the current username and password. Some people change the default username and password and then forget what they set up. If you fall into this category, you’ll have to restore the Sky hub to the factory settings by performing a reset.
However, keep in mind that you’ll have to set up everything from scratch if you do this. On the other hand, you’ll be able to use the default username and password to access the settings.
Step 3. Identify a Device You Want To Forward Traffic To
Under the Advanced tab, go to the LAN IP Setup.
Click on Add under Address reservation.
You see the list of all devices currently connected to your network.
You need the device’s IP address you want to forward traffic to. It can be a PS4, Xbox, PC, or some other device.
Once you find the address and the device, check the radio button next to the device and then Add.
If the Sky Hub requests the restart, let it do it and then log back in by repeating Step 2.
This will reserve the IP address of the device you wish to forward traffic to, so it remains the same until you decide to change it.
Step 4. Port Forwarding
Load the Sky hub menu again and go to the Security tab.
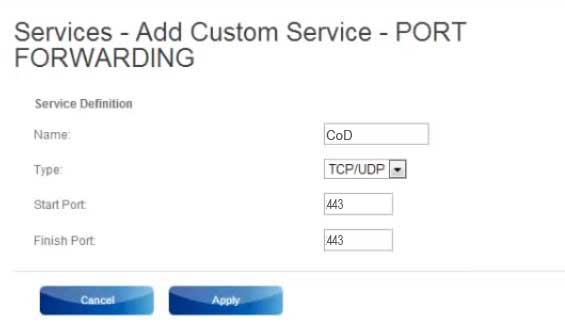
Click on Services, then Add Service.
Name the service so you can identify it later. For example, CoD if it’s a Call of Duty or PS4 if it’s for PS4.
Choose the type. It can be TCP, UDP, or combined.
Type in starting and finishing port. For example, 443 to 445. Suppose it is only one port, like 443, type in the same number into both fields.
Click Apply.

Step 5. Set the Firewall Rules
Click on the Firewall Rules option under the Security tab.
You will see two tables. Outbound services and Inbound services.
You need to tell your Firewall to allow traffic to and from your newly created service.
Click on Add under Outbound services.
This will load a new page. Open the drop-down menu next to the Services and select the one you just created.
Set Action to Allow always.
LAN users – Any
WAN users – Any
Leave IP addresses blank.
Click Apply.
Go to Inbound services and click Add.
Choose the service from the list.
Set the action to Allow always.
Now, at Send to LAN server field, you’ll need to type in the IP address of a device you are forwarding the traffic to. You found this IP address in Step 3.
Click Apply, then Apply again.
You’re done.
You can repeat this process for as many devices and different games and services you need. Look online for specific ports and type to know what to fill in.
What to Do If Something Goes Wrong
You can always go to Sky hub’s menu and disable and delete services that don’t work or give you troubles.
In a worst-case scenario, you’ll have to restore the Sky hub to the factory settings by inserting a pin or a needle into the reset hole on the back of the hub for 15-20 seconds. The factory reset will erase all your services and settings so you can start setting everything up from scratch.
Are There Any Risks Involved When Forwarding Ports
Making firewall exceptions can lead to security risks or loss of service. However, you should be able to fix things in most cases by performing a factory reset if nothing else works.
Summary
Port forwarding is an excellent NAT feature necessary to allow traffic to and from your network devices in specific applications. Whether it’s a PC, PlayStation, Xbox, or some other gaming console, or you simply want to create an FTP server on your computer, you’ll need to forward ports on your Sky hub.
Fortunately, it is a fairly simple process, and there is a pretty good video tutorial on how to do this process.
Just follow the link below.
How to Port Forward a Sky Hub for a Game Server (Minecraft) *WORKING 2022*

Hey, I’m Jeremy Clifford. I hold a bachelor’s degree in information systems, and I’m a certified network specialist. I worked for several internet providers in LA, San Francisco, Sacramento, and Seattle over the past 21 years.
I worked as a customer service operator, field technician, network engineer, and network specialist. During my career in networking, I’ve come across numerous modems, gateways, routers, and other networking hardware. I’ve installed network equipment, fixed it, designed and administrated networks, etc.
Networking is my passion, and I’m eager to share everything I know with you. On this website, you can read my modem and router reviews, as well as various how-to guides designed to help you solve your network problems. I want to liberate you from the fear that most users feel when they have to deal with modem and router settings.
My favorite free-time activities are gaming, movie-watching, and cooking. I also enjoy fishing, although I’m not good at it. What I’m good at is annoying David when we are fishing together. Apparently, you’re not supposed to talk or laugh while fishing – it scares the fishes.
