
Have you ever experienced lags and bad network performance while playing your PS4? Did you have situations when you were simply unable to use voice chat during the game session?
Did you ever perform an internet connection test and received a NAT type failed error?
If the answer is YES, you’ve come to the right place. NAT type can give you a lot of headaches. Fortunately, this problem is fixable in most parts of the world. We will provide you with a few effective solutions for this issue but first, let’s understand what is causing the issue in the first place.

CONTENTS
What is NAT?
NAT stands for Network Address Translation, and it is a method of enabling multiple devices with private IP addresses to use a single public IPv4 address to communicate with the internet. Although it was originally designed for other purposes, NAT’s predominant use is the IPv4 address pool preservation.
However, there is a secondary purpose for the NAT, and this is where your trouble comes from. NAT also acts as a firewall, allowing access only between the networks and devices under a set of rules defined by the NAT type.
How Many NAT Types Are There?
There are three NAT types with different levels of restrictions.
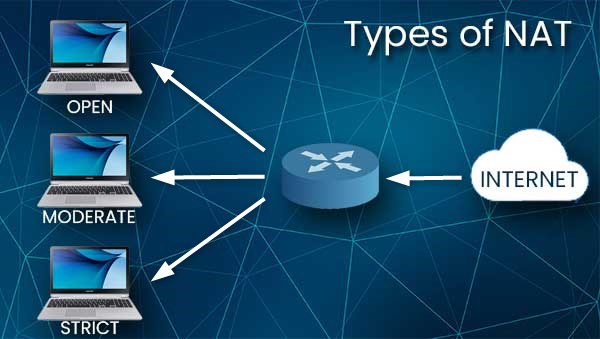
Type 1 – Open
This NAT type doesn’t put any restrictions on the traffic. When you’re using type 1, all incoming traffic will be passed through to your PS4. However, setting the NAT type to open presents the security risk that we will discuss in more detail a bit later.
Type 2 – Moderate
This NAT type places some restrictions regarding what ports will be open and what level of access will be allowed. As a general rule, if the NAT type on the other end is set to 1 or 2, you won’t have any problems.
Type 3 – Strict
This NAT type severely restricts all incoming data. It’s the default setting for most routers, and the source of your NAT type failed issue. It will allow connection only if the NAT type on the other end is set to type 1 – OPEN.
As you can see, you will experience the least amount of connectivity problems if you change your NAT type to 1, but this will expose you to all kinds of security risks since it will leave you completely exposed and unprotected from any hacker attacks. However, if you change the NAT type only for the PS4 and nothing else on the network, you shouldn’t be at any major risk. Alternatively, type 2 will work almost as well as type 1, but type 3 will almost certainly cause you problems.
How to Change NAT Type to Get the Best Possible Results?
You can do a few things to change and fix the NAT type failed problem, but you need to be comfortable tinkering with the PS4 and router settings.
Before you do anything else, find out your current network settings because you’ll need them to make this work.
Set the PS4 as Demilitarized Zone – DMZ
DMZ is a buffer zone in your network where you can assign one or more of your devices.
A device assigned in DMZ will have unfiltered communication with the internet, while the rest of your network will be protected behind the firewall.
There are two ways you can do this. One way is to randomly assign a static IP address to your PS4 from the PS4 settings and then go to the router’s control panel to assign that IP as DMZ.
The other proper way would be to find your PS4 MAC address, open the router’s admin panel while the PS4 is online, and reserve the IP address PS4 is currently using. Then you add those IP and MAC addresses to DMZ.
Let’s show you both ways to do this, starting from the top:
Go to the PS4 Settings, and then go to Network. Select View connection status.
Write down the information displayed next to the IP Address, Subnet Mask, Default Gateway, Primary DNS, and Secondary DNS.
Now that you have the pieces of information you need navigate Settings > Network > Set Up Internet Connection.
Select Use Wi-Fi or Use LAN depending on how you connected the PS4 to the router, choose Custom. For IP address settings, choose Manual.
Now enter the IP address following the default gateway information from View connection status, but change the last set of numbers to something between 130 and 150. For example, 192.168.1.135. Copy the rest of the information into the corresponding fields. Optionally, you can change the DNS servers into the Google public DNS by typing in 8.8.8.8 as a primary DNS and 8.8.4.4 as secondary. Later, you can perform a test to see if the DNS change makes any difference regarding the connection speed.
When you fill all the fields, click on Next.
Leave the MTU on Automatic
Do Not Use a proxy server.
Now check the Internet connection.
At this point, if the connection is successful, you’re done with the PS4 setup.
Switch to your phone or PC that is connected to the same router as the PS4. Open the internet browser and enter the same IP address as you did for the default gateway.
Use the administrator username and password for the router and enter the router’s Admin panel. You can find the default administrator username and password printed on the sticker at the back of the router.
Once you’re in the admin panel, browse through the options and try to find one labeled DMZ. Every brand of router uses a different user interface and layout so, if you can’t find what you’re looking for, google “how to find DMZ option in make and model.”
When you find the DMZ option, enable it and enter the IP address you assigned to PS4 in the manual settings (in our example, it was 192.168.1.135)
Save the settings and reboot the router if necessary.
The Proper Way to Add PS4 to DMZ
Open the PS4 menu, go to Settings > System> System information and write down the MAC address.

Take your phone or PC and open the internet browser. Type in the Default gateway address into the address bar and press enter. Use administrator credentials to log in to the router’s admin panel. Once you’re there, look at the status to find out the IP address your PS4 is using. Once you have that piece of data, look for the IP address reservation option. Location may vary from router to router, so make sure you have the manual with you, or you can research online where to find it. When you locate this option, click new and enter the IP address your PS4 is using and the MAC address you found in the System information.
After you’ve done this, find a DMZ option (location will also vary depending on the make and model) and add, now static, PS4’s IP address to DMZ.
UPnP
UPnP stands for Universal Plug and Play. It is a feature that enables free communication between all devices on your network but, you already guessed it, presents a major security risk. Enabling UPnP will turn your home network into a free-for-all so, if a hacker wants to do some bad things to you, there will be nothing to prevent him from doing what he wants.
To enable the UPnP, you’ll need to login to the router’s admin panel using the same method described above, locate this option and enable it.
Port Forwarding
Port forwarding is probably the most reliable method for changing the NAT type to OPEN for your PS4, but it will require the most work.
First, you’ll need to assign a static IP address to your PS4, just like you did with DMZ, but instead of adding that address to the DMZ, you’ll go to Port forwarding. Now, different games use different ports, so you’ll have to go online and research what ports to forward for each game you’re playing. For this example, we will use Call of Duty: Black ops 3.
Choose 3074 for the external port range and UDP for protocol. The internal IP address will be the one you assigned to the PS4.
CGNAT
If none of the above methods work, contact your ISP to see is there an extra NAT layer on their side. Some ISP’s implement an additional NAT layer called Carrier Grade NAT, and they will have to make some changes to enable you to OPEN NAT type for your PS4.
If you are located in China, none of this probably won’t work since the internet is heavily regulated for all users.

Hey, I’m David. I’ve been working as a wireless network engineer and a network administrator for 15 years. During my studies, I also worked as an ISP field technician – that’s when I met Jeremy.
I hold a bachelor’s degree in network engineering and a master’s degree in computer science and engineering. I’m also a Cisco-certified service provider.
In my professional career, I worked for router/modem manufacturers and internet providers. I like to think that I’m good at explaining network-related issues in simple terms. That’s exactly what I’m doing on this website – I’m making simple and easy-to-follow guides on how to install, set up, and troubleshoot your networking hardware. I also review new network equipment – modems, gateways, switches, routers, extenders, mesh systems, cables, etc.
My goal is to help regular users with their everyday network issues, educate them, and make them less scared of their equipment. In my articles, you can find tips on what to look for when buying new networking hardware, and how to adjust your network settings to get the most out of your wi-fi.
Since my work is closely related to computers, servers, and other network equipment, I like to spend most of my spare time outdoors. When I want to blow off some steam, I like to ride my bike. I also love hiking and swimming. When I need to calm down and clear my mind, my go-to activity is fishing.