Even though Wi-Fi networks are fast and convenient, they have a limited range of 150 feet and 300 feet indoors and outdoors, respectively.
When connected to Wi-Fi, you may experience weak signals and connectivity issues in certain spots in your home or office, leading to frequent lags and buffering.
If you have numerous Wi-Fi dead spots in your space, you can solve this problem by installing a Wi-Fi range extender.
A Wi-Fi range extender duplicates and extends your existing wireless network to hard-to-reach places, ensuring adequate coverage in your home or workplace.
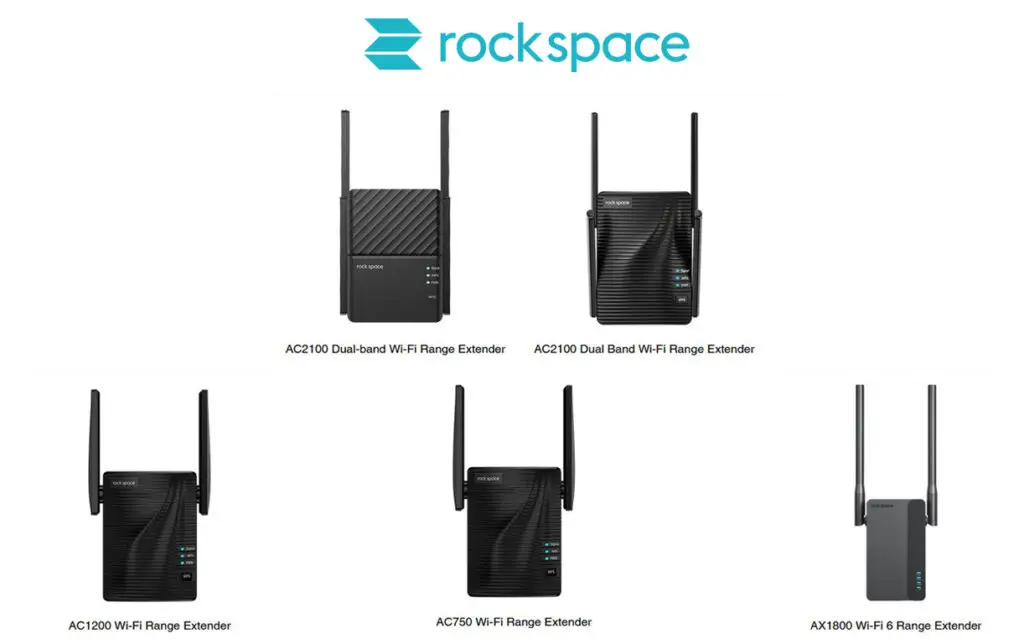
Rockspace Wi-Fi extenders are renowned for their fast connection speeds, wide router compatibility, broad network coverage, and advanced security features.

These dual-band range extenders can help improve your Wi-Fi coverage by eliminating wireless dead zones in your space.
They support the 2.4 GHz and the 5 GHz frequency bands for the best browsing, gaming, and streaming experiences.
Besides, they are easy to set up, only requiring a few minutes to go through the steps, as you will find out from this Rockspace Wi-Fi extender setup guide.

CONTENTS
How to Set Up a Rockspace Wi-Fi Extender
Even though Rockspace Wi-Fi range extenders have sophisticated designs and specifications, they are extremely easy to install.
But first, you need to ensure you have a router, computer, or smartphone connected to your wireless network before beginning the setup process.
Once you have all the requirements, you can set up your Rockspace Wi-Fi extender using two different methods.
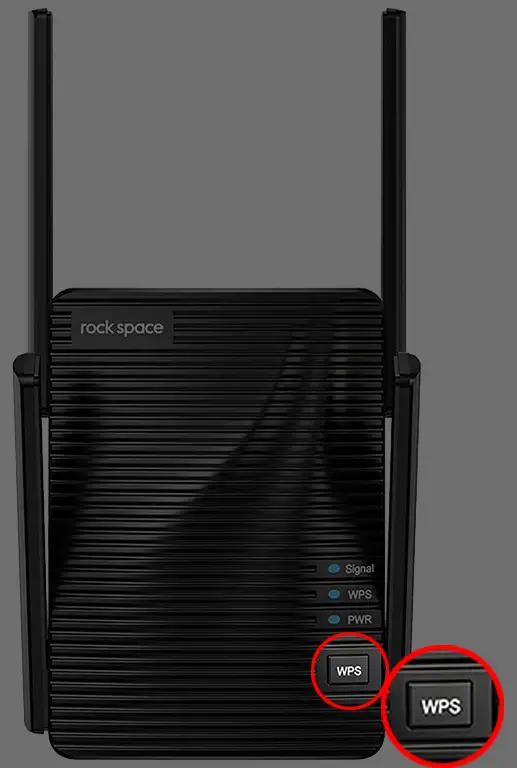
The quickest and easiest way to set up a Rockspace Wi-Fi range extender is via the WPS push button.
WPS or Wi-Fi Protected Setup is a security standard that allows Wi-Fi-enabled devices to connect to a secure wireless network without requiring a password.
The latest routers and Rockspace Wi-Fi range extenders have a WPS button on the front or back panel for a seamless setup. You will also need a router that supports WPS connections (router with a WPS button).
Here are the steps to set up your Rockspace Wi-Fi extender via the WPS button:
- Plug the router into a wall outlet and connect it to your modem
- Plug the Rockspace extender into a power outlet next to your router
- Wait for the Wi-Fi extender to boot (the Power LED will turn solid blue)
- Locate the WPS button on your router and press it
- Within 2 minutes, press the WPS button on your Rockspace Wi-Fi extender

- The extender’s WPS signal LED will start to blink
- Wait for the signal LED to stabilize and turn solid blue to indicate a successful connection
- You can now move your Wi-Fi extender to a different room with weaker coverage
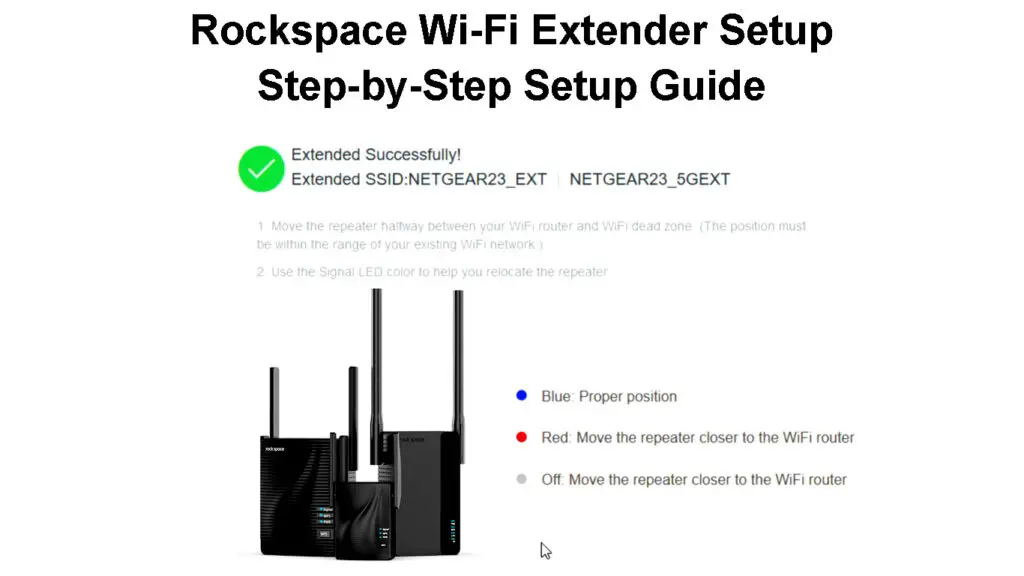
- Place the extender halfway between the router and the problem area – don’t put it in the middle of the dead zone.
- Wait for the signal LED to turn solid blue. If the LED doesn’t turn, relocate the extender closer to the router to improve the signal strength
Method 2 – Using a Web Browser
If your router or extender does not have a WPS button, you can still set up the Wi-Fi extender using a web browser.
For this method, you need a smartphone or computer.
Note: When using a smartphone, disable mobile data. When using a computer, unplug the Ethernet cable.
Here are the steps to set up your extender via a web browser:
- Plug the router into a power outlet and connect it to your modem
- Plug the Wi-Fi extender into a power outlet next to your router
- Connect your PC or smartphone to the extender’s wireless network (Rockspace_EXT)
- Launch a web browser on your PC or smartphone if the login page doesn’t pop up automatically
- Type http://re-rockspace.local or 192.168.0.254 in the URL address bar
- Create your login password and confirm the password
- Tap/Click Next
- Select the Wi-Fi network you want to extend from the list of available wireless networks
- Enter the password of the Wi-Fi network you want to extend
- Set an SSID name for your Extended Network
- Wait for an “Extended Successfully” message
- Relocate the extender and place it halfway between the router and the problem area
- Wait for the signal LED to turn solid blue. If the LED doesn’t turn, relocate the extender closer to the router to improve the signal strength
Setting Up a RockSpace Wi-Fi Extender via the WPS Button
Connecting to a Rockspace Wi-Fi Extender
After setting up your Rockspace Wi-Fi extender, you can connect your wireless devices to the newly created network.
You only need to:
- Open Wi-Fi settings on your smartphone or PC
- Find your new network with the _EXT or _5GEXT added to your primary network’s SSID name
- Tap the extender’s network name
- Enter the login password created during the setup (via the web browser method)
- For the WPS button method, the default password is the same as that of your existing network
Fix Rockspace Wi-Fi Extender Connection Issues
Even after successfully setting up your Rockspace Wi-Fi range extender, you might still experience connection issues.
Here are a few tips to help you troubleshoot and fix Rockspace extender connection issues:
1. Connect to the Extender’s Network
You might be experiencing weak signals or connection issues because your device is connected to the wrong network.
Ensure you connect your device to the extender’s network rather than the primary router for a smooth Wi-Fi experience.
Find your new network with the _EXT or _5GEXT added to your primary network’s SSID name.
2. Restart Wi-Fi Extender
Your Rockspace Wi-Fi extender might develop connection issues because of working for long hours.
A simple reboot can help refresh the system and fix any Wi-Fi connection issues emanating from the extender.
To reboot your Wi-Fi extender:
- Unplug the extender from the power outlet
- Wait for at least 30 seconds
- Plug the extender back into the wall outlet
- Wait for the LED lights to stabilize
- Try to connect to the extender’s network
3. Reset Wi-Fi Extender
If rebooting the extender does not solve the issue, consider performing a reset.
A reset will erase all custom configurations and restore the extender to default settings, meaning you may have to set up the device afresh.
- Plug the extender into a power outlet
- Locate the reset button at the back panel of the extender
- Using a sharp pin or straightened paper clip, press and hold the reset button for eight seconds
- Allow the extender to reboot automatically
- Check if you can connect to the extender’s network
How to Reset a Rockspace Wi-Fi Extender
4. Reset Your Router
If everything fails, consider resetting your primary router to restore it to default factory settings.
Even though resetting the router might give you a hard time configuring your extender, it can help solve connection issues affecting the entire network.
- Plug the router into a power outlet
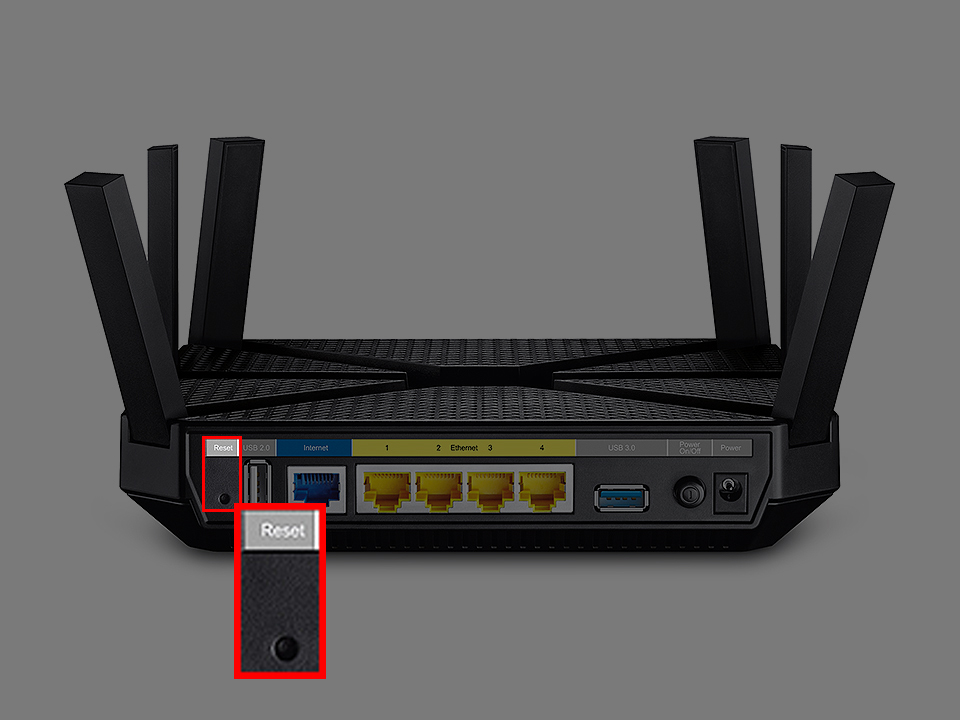
- Locate the reset button at the back panel of the router

- Using a paper clip or a sharp pin, press and hold the reset button for five seconds
- Allow the router to reboot automatically
- Configure your router and Wi-Fi extender afresh
Rockspace Wi-Fi Extender Connection Issues – Troubleshooting Tips
Conclusion
You shouldn’t have significant problems setting up your Rockspace Wi-Fi range extender from scratch.
After all, Rockspace extenders have one of the most straightforward and uncomplicated setup processes.
If you encounter issues, use our proven tips to set up your Rockspace Wi-Fi range extender.
Rockspace AC1200 Wi-Fi Extender Review

Hey, I’m Jeremy Clifford. I hold a bachelor’s degree in information systems, and I’m a certified network specialist. I worked for several internet providers in LA, San Francisco, Sacramento, and Seattle over the past 21 years.
I worked as a customer service operator, field technician, network engineer, and network specialist. During my career in networking, I’ve come across numerous modems, gateways, routers, and other networking hardware. I’ve installed network equipment, fixed it, designed and administrated networks, etc.
Networking is my passion, and I’m eager to share everything I know with you. On this website, you can read my modem and router reviews, as well as various how-to guides designed to help you solve your network problems. I want to liberate you from the fear that most users feel when they have to deal with modem and router settings.
My favorite free-time activities are gaming, movie-watching, and cooking. I also enjoy fishing, although I’m not good at it. What I’m good at is annoying David when we are fishing together. Apparently, you’re not supposed to talk or laugh while fishing – it scares the fishes.
