You expect seamless online browsing and fast speeds when you connect your Mac to a Wi-Fi network. However, sometimes, you may encounter network issues that limit the amount of work you carry out online.
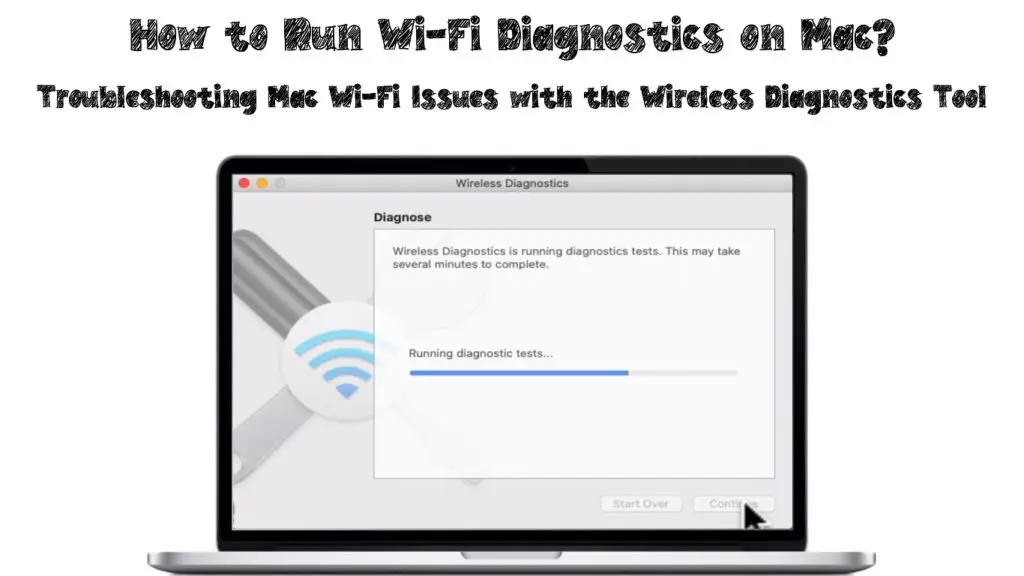
Macs usually have a built-in Wi-Fi diagnostic feature that allows users to run diagnostics on their Wi-Fi network. Running the diagnostics will help you identify and correctly fix the issues affecting your network.
If you have problems accessing the Internet after successfully connecting to your router, try running diagnostics on your Mac. That way, you will quickly and easily fix issues with your connections.
CONTENTS
What Entails the Diagnostics Tool on Different Versions of Mac?
Different versions of Mac use different ways of accessing the diagnostics program within the device. However, the diagnostic utility tool in all macOS versions will work the same to analyze and solve your network’s issues.
While checking the network and providing solutions, the diagnostics tool can perform other functions to improve network performance. The functions will also depend on your macOS version.
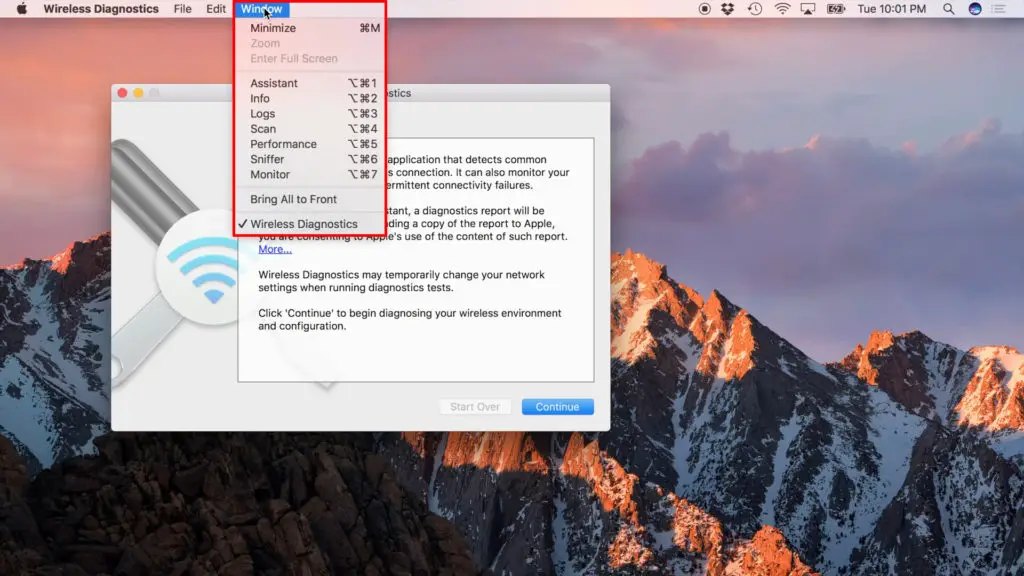
Some of the extra functions from the windows in the diagnostics utility tool include:
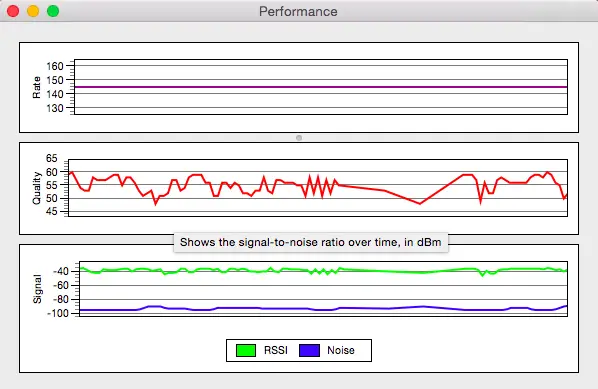
Performance
It will provide graphs on real-time information such as signal strength, signal quality, and noise. The performance function may show some additional details like data transmission rates depending on the version.
Monitor
It is available for OS X Yosemite versions and later versions. It’s quite similar to the performance feature. The feature allows the Mac to monitor all of the information related to your network for a complete diagnosis.
You can leave this feature running in the background for continuous monitoring.
Info
The info tab allows an overview of the network’s information, seen as a summary of all details about the network.
Scan
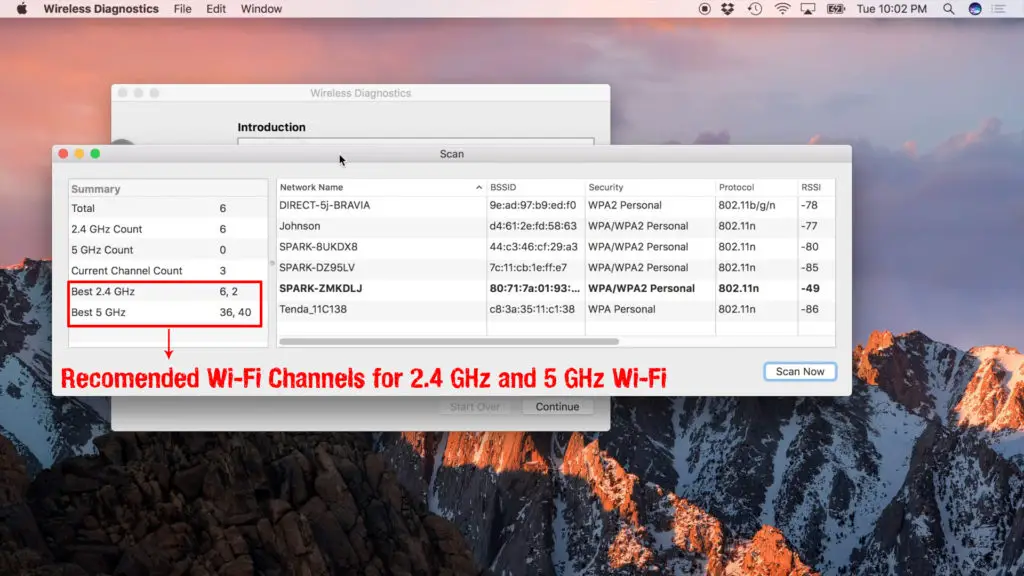
It is known as Wi-Fi Scan on the Mavericks version and allows scanning for Wi-Fi networks in your area. It shows each network’s details, such as signal strength, noise security, and channel.
The Mavericks and later versions suggest the best Wi-Fi channels for the 2.4 GHz and 5 GHz Wi-Fi to use in your network. You can follow these instructions and avoid network congestion, especially if multiple devices connect to the network.
Logs
The feature allows you to store all the network activity on your Mac, which you can save and access.
Sniffer
The feature is known as Frame Capture in the Mavericks version. It allows you to capture any data sent over your network from or to your Mac.
You can also save the data your device receives from other networks that you can access. However, you will need third-party applications like Wireshark to open the files containing the data you save in the network.
How to Run Wireless Diagnostics on Different Versions of Mac?
Running Wi-Fi Diagnostics on macOS Big Sur through macOS High Sierra
Use the following steps:
- Ensure you quit all open windows first before you start
- Connect to the network you are running the diagnostics on
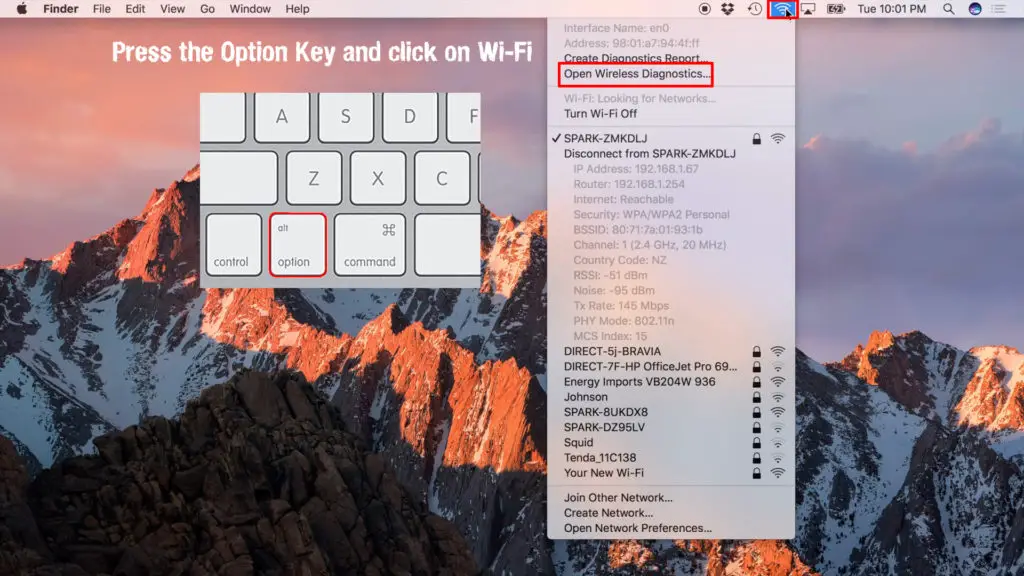
- Press the Option key (Alt) and click the Wi-Fi icon simultaneously
- From the menu, select the Open Wireless Diagnosis option
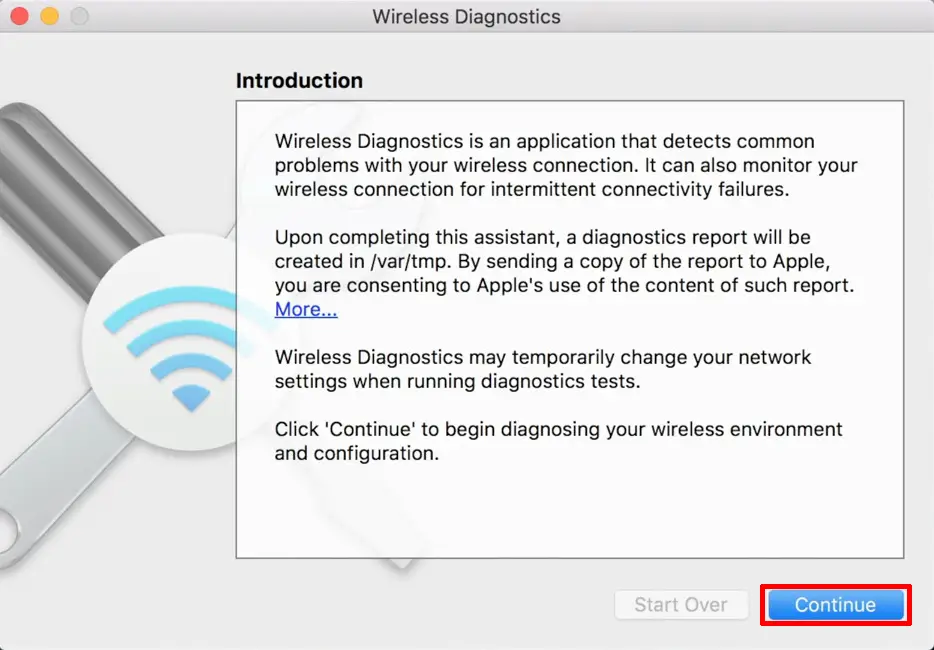
- An information screen will appear, then select the Continue button to start the diagnostics
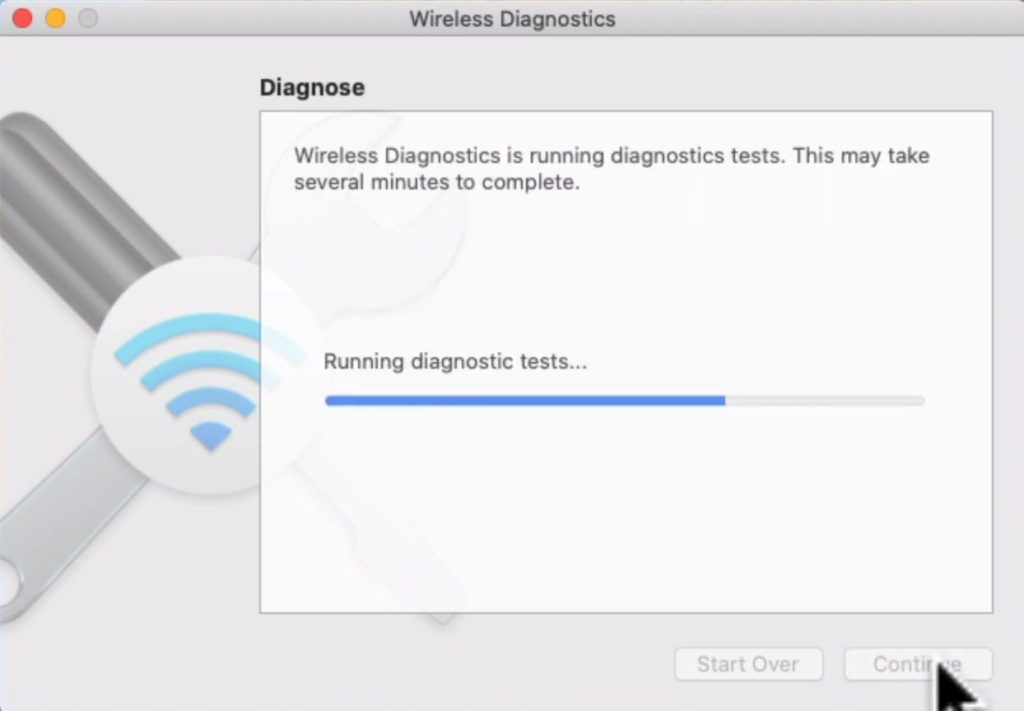
- The screen will show Running Diagnostic Tests, which takes a few minutes or longer depending on the network connection
- Select the Monitor My Wi-Fi Connection option if you are experiencing some problems
- The diagnostic tool will now generate a report
- Afterward, select the Continue to Summary to view information on the analysis
- The report will be in a filename starting with Wireless Diagnostics, ending with tar.gz, found in the /var/tmp folder
Running Wi-Fi Diagnostics on OS X Mountain Lion and OS X Lion
The following steps will open the Wi-Fi Diagnostics tool:
- Go to the Systems menu and select the Library option
- Then, select the CoreServices option to launch diagnostics
- The diagnostics page will open, and four functions will appear: Monitor Performance, Capture Raw Frames, Turn on Debug Logs, and Record Events
- Select the function you would prefer, then click on the Continue button
- Additionally, you will see a signal strength graph and noise level graph on your screen
- Try moving items that may cause noise within the network and try adjusting the router to improve the signal strength
- If you want to access the monitor performance log, click on the Continue button
- Select the save log to Finder option, then select Report
- The report will be saved to your desktop in a compressed format
Running Diagnostics on macOS Sierra through the OS X Mavericks
For OS X Mavericks, the diagnostics tool may appear different from those in later OS versions. The Window menu will direct you to the Utilities tab, which will open the windows containing other functions.
The tabs under the Utilities window will match the ones found in OS X Yosemite and later versions. Use the following steps to launch diagnostics on macOS Sierra through OS X Mavericks:
- Click on the Wi-Fi icon on the menu bar and press the Option key simultaneously
- Select the Open Wireless Diagnostics option
- Alternatively, go to the Systems menu and select the Library option. Then, select the CoreServices menu and select the Applications option to launch diagnostics
- The diagnostics page will show a brief explanation of what activities will take place, then click Continue
- Enter your Mac admin username and password, then click on the OK button
- After running the diagnostics, you will see any network issues on the screen with instructions on fixing the issues
- You can select the Monitor my Wi-Fi Connection to get early warnings when an issue occurs
Mac Wi-Fi Diagnostics Explained
Conclusion
It’s much harder to carry out online tasks when facing network and Wi-Fi issues. Your Mac might connect to your network, but the connection will be poor, and the speed will be inadequate.
The first thing to do in such a situation is run the Wi-Fi diagnostics to analyze your network and identify network issues. You will also receive the best solutions to fix your network’s problems. We hope this post helped you understand the purpose and learn how to use the Wireless Diagnostics tool.

Hey, I’m Jeremy Clifford. I hold a bachelor’s degree in information systems, and I’m a certified network specialist. I worked for several internet providers in LA, San Francisco, Sacramento, and Seattle over the past 21 years.
I worked as a customer service operator, field technician, network engineer, and network specialist. During my career in networking, I’ve come across numerous modems, gateways, routers, and other networking hardware. I’ve installed network equipment, fixed it, designed and administrated networks, etc.
Networking is my passion, and I’m eager to share everything I know with you. On this website, you can read my modem and router reviews, as well as various how-to guides designed to help you solve your network problems. I want to liberate you from the fear that most users feel when they have to deal with modem and router settings.
My favorite free-time activities are gaming, movie-watching, and cooking. I also enjoy fishing, although I’m not good at it. What I’m good at is annoying David when we are fishing together. Apparently, you’re not supposed to talk or laugh while fishing – it scares the fishes.
