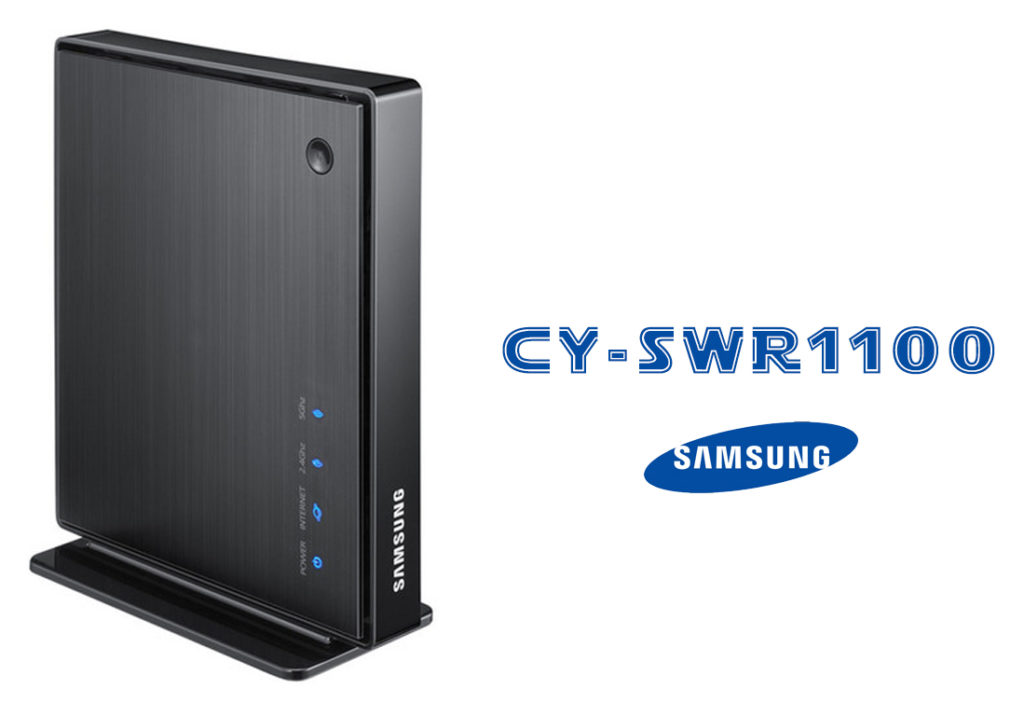
Over the past few decades, Samsung has been one of the most innovative companies in the tech world. From their smartphones to their TVs and now even with wireless internet routers for homes, people everywhere trust and rely on Samsung products. But when it comes to logging in to your Samsung router, maybe you need some help. Our tutorial will walk you through the Samsung router login and setup process. The tutorial applies to older Samsung wireless routers, like CY-SWR1100. To set up some of the newer Samsung models (ET-WV series), you have to use the Samsung Connect app.
Here are some simple steps to get you started on the Samsung Router Login:
Step #01
Open up your web browser of choice, type in 192.168.0.1 into the address bar, and press enter/return on your keyboard once finished typing. You should now see the Samsung router login page.

Step #02
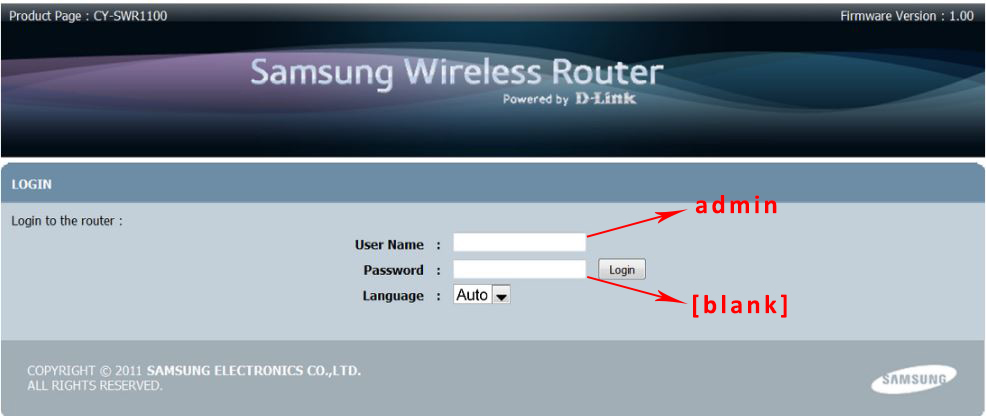
After clicking enter/return, look around and try to find where to input your username and password information needed when logging in to any router user interface. This is typically found at the top right-hand side of the screen although sometimes this can vary depending on what brand or version of the software that particular router has installed.
Once located double check that both boxes are empty, and then type in “admin” (without quotations) into the username box and leave the password box empty. Then, press enter/return on your keyboard or click on Login.
Step #03
After successfully inputting the “admin” username and password, you should be able to see your router’s web user interface. From here, you can go through the initial setup or change all kinds of advanced settings.
Our router’s web UI looks like this:
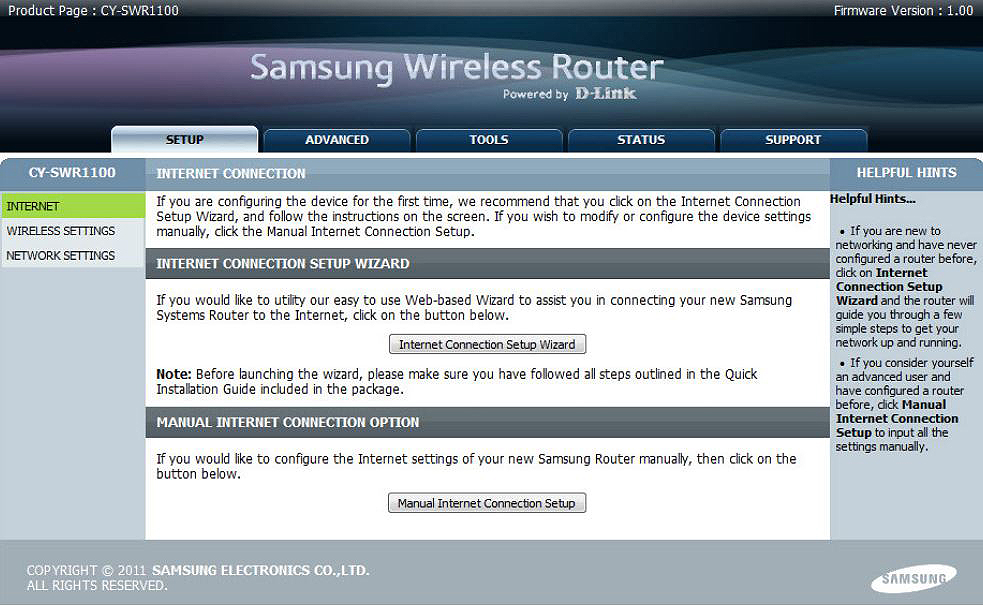
So, once you enter the router’s web UI, the SETUP page will appear. Our setup process is divided into three sections – INTERNET SETUP, WIRELESS SETTINGS, and NETWORK SETTINGS.
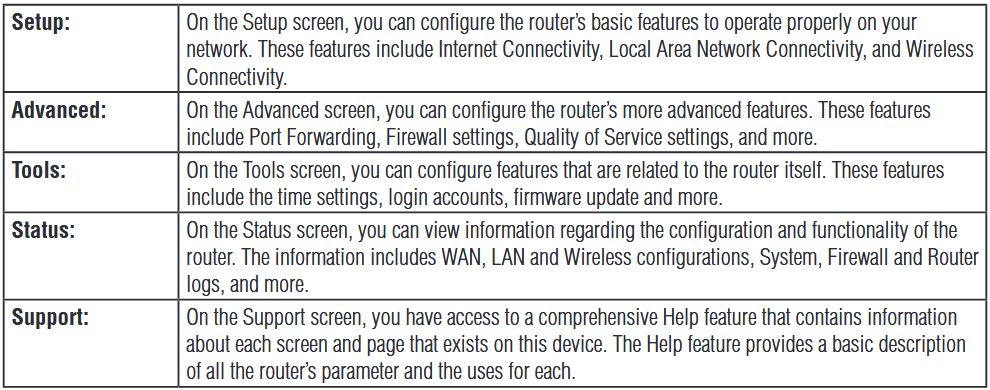
Other tabs (ADVANCED, TOOLS, STATUS, SUPPORT) will allow you to change/adjust various other router and network settings after you perform the initial setup.
Tip: If by any chance, you do not see this web UI, you may need to “refresh” the page (by pressing F-12) or try using another browser. It is important that your web browser has full access to all router-related settings in order for them to display correctly on the screen.
Step #04
Let’s first set up our internet connection. You have two options – you can run the Setup Wizard (step-by-step auto settings) or you can enter all the settings manually. We recommend using the Wizard because it’s more convenient.

Once you click on the Wizard button, you will have to go through 4 steps – set your router’s password (in case you want to change the default username and password), select time zone, configure your internet connection, and save/connect.

INTERNET CONNECTION SETUP – STEP 1

INTERNET CONNECTION SETUP – STEP 2 (SELECT TIME ZONE)
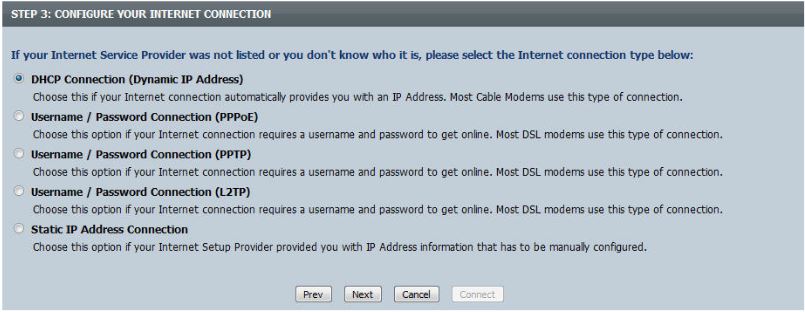
INTERNET CONNECTION SETUP – STEP 3 (CHOOSE YOUR CONNECTION TYPE)

INTERNET CONNECTION SETUP – STEP 4 (CLONE MAC ADDRESS AND SELECT HOSTNAME)

INTERNET CONNECTION SETUP – STEP 5 (CONNECT)
Step #05
Now that we have successfully finished the internet connection setup, let’s move on to the wireless connection settings. Once again – you can choose between the Setup Wizard and Manual Setup. Let’s select the Wizard.

You will, again, have to go through the step-by-step setup process – you will have to enter the names (SSID) for your wireless networks (2.4G and 5G), and you will have to create wi-fi passwords for each network. You can let your router create passwords for your networks automatically, or you can do it on your own. You can also assign the same password to both networks, or you can choose different passwords for 2.4G and 5G.
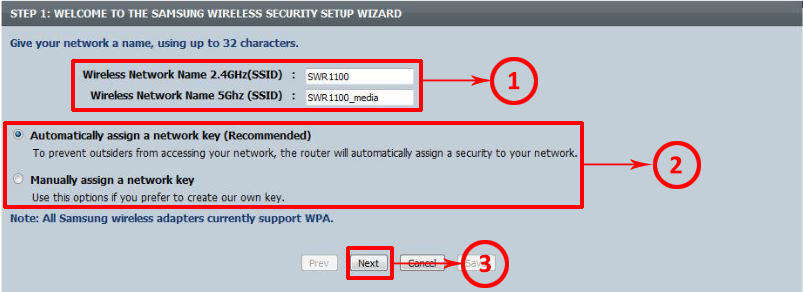
WIRELESS CONNECTION SETTINGS – STEP 1 (ENTER THE NAME FOR EACH NETWORK AND CHOOSE HOW YOU WANT TO ASSIGN PASSWORD – AUTOMATICALLY OR MANUALLY)
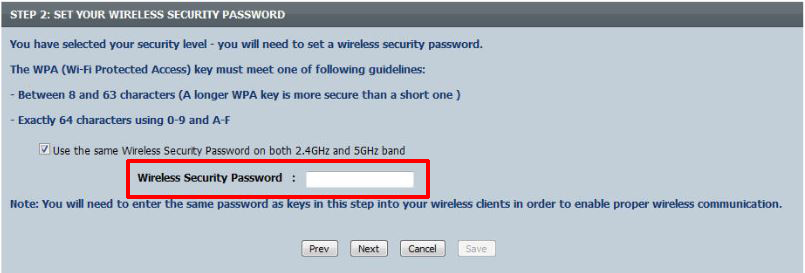
WIRELESS CONNECTION SETTINGS – STEP 2 (IF YOU DECIDED TO ENTER THE PASSWORD MANUALLY, YOU WILL NOW HAVE TO ENTER YOUR PASSWORD)
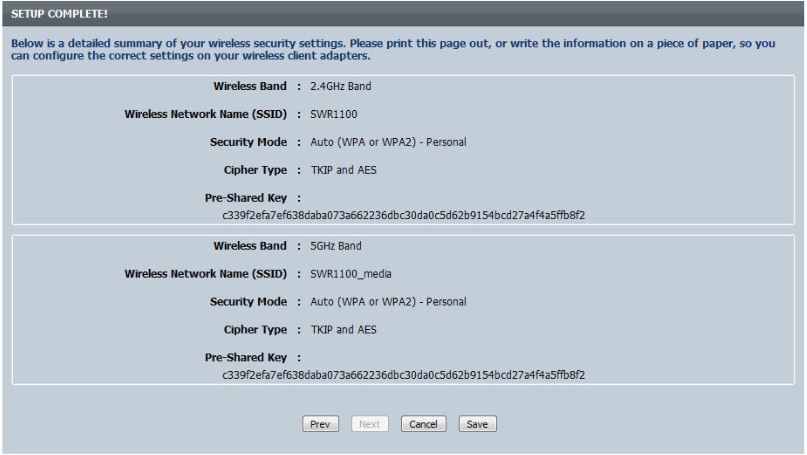
WIRELESS CONNECTION SETTINGS – STEP 3 (SAVE YOUR SETTINGS)
When you save the settings, you will have to wait a few seconds for those changes to take effect, and you can then move on to the next step.
Step #06
Our final step is setting up the network. This is an optional step – you can skip it if you don’t want to make any changes. So, if you want to skip this part, just click on Save Changes, log out, and you can start using your router.
Recommended reading:
- How to Access Router Settings from Phone
- How to Setup a Network Switch and Router
- How to Update Router Firmware [A Complete Guide]
Through the NETWORK SETTINGS, you can change your router’s default IP if you want, adjust the DHCP server settings (adjust the DHCP pool and DHCP lease time), or assign a static IP to some device.
Step #07
You have finished the initial setup. Enjoy using your router.
We hope you’ve enjoyed our blog post and If so, please share it with other people who may be interested in the topic by clicking on one of the social media buttons found at the bottom of this page. Thank you for reading!

Hey, I’m Jeremy Clifford. I hold a bachelor’s degree in information systems, and I’m a certified network specialist. I worked for several internet providers in LA, San Francisco, Sacramento, and Seattle over the past 21 years.
I worked as a customer service operator, field technician, network engineer, and network specialist. During my career in networking, I’ve come across numerous modems, gateways, routers, and other networking hardware. I’ve installed network equipment, fixed it, designed and administrated networks, etc.
Networking is my passion, and I’m eager to share everything I know with you. On this website, you can read my modem and router reviews, as well as various how-to guides designed to help you solve your network problems. I want to liberate you from the fear that most users feel when they have to deal with modem and router settings.
My favorite free-time activities are gaming, movie-watching, and cooking. I also enjoy fishing, although I’m not good at it. What I’m good at is annoying David when we are fishing together. Apparently, you’re not supposed to talk or laugh while fishing – it scares the fishes.
