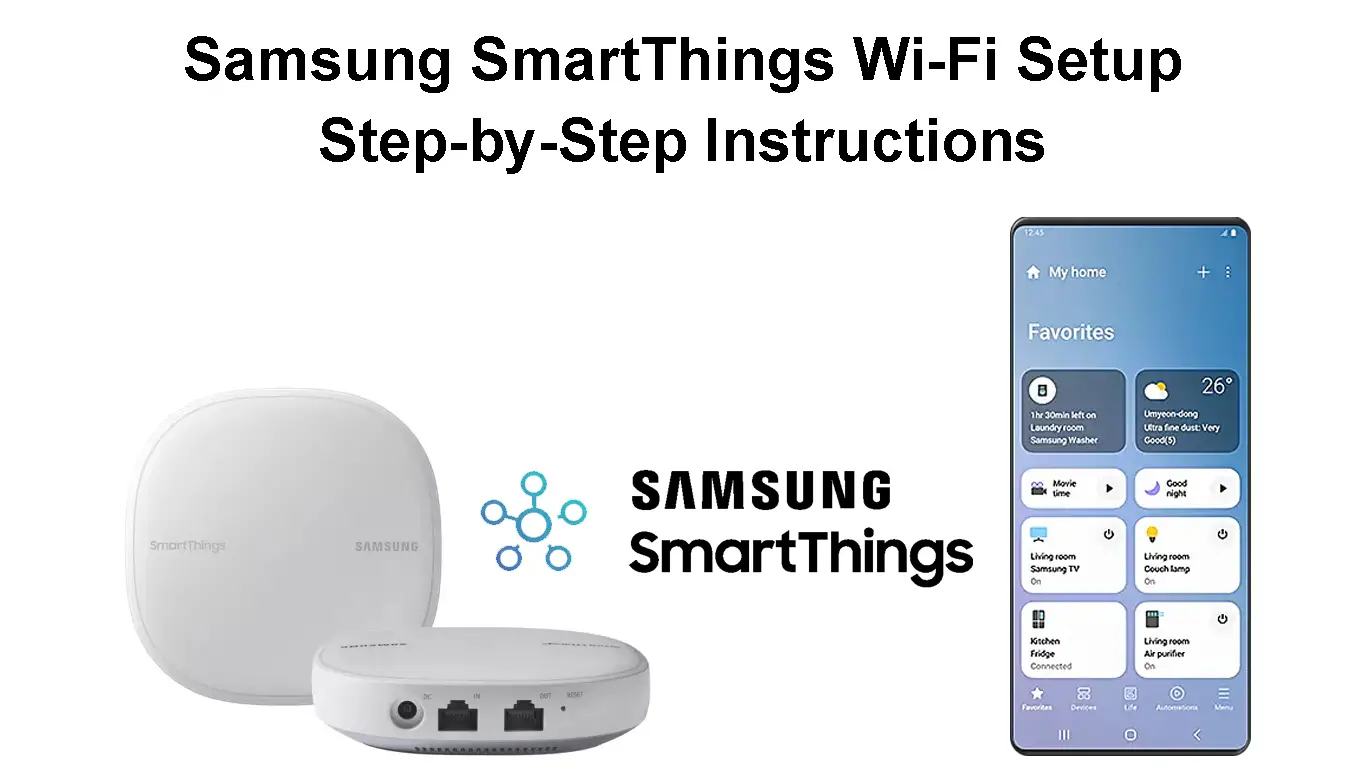
Mesh networks and Internet of Things (IoT) devices usually go hand in hand to facilitate an efficient smart network environment. When you combine the two aspects, i.e., a mesh network and IoT devices, the result is a network that has versatile features and adequate signal coverage throughout the home. That means you can control a smart light bulb in another room while you watch TV in the living room without a fuss.

Samsung Smartthings Wi-Fi is a mesh network with a smart hub that allows you to control smart devices from different manufacturers. All settings and connections can be made from an app on your phone, further improving the user experience.
Below are instructions on how to set up the Smartthings Wi-Fi routers and how to use the cool controls you will have access to.
CONTENTS
About Samsung SmartThings Wi-Fi
Samsung Smartthings Wi-Fi is a mesh network router that doubles as a Smart hub for controlling smart devices. Essentially a Smartthings Wi-Fi unit uses Samsung’s Smartthings smart home technology and Plume’s mesh networking features.

The Smartthings Wi-Fi units are sold in a pack of three or individually; therefore, you can get one if you wish to broadcast Wi-Fi over a small surface area. Alternatively, you can purchase more units to increase the Wi-Fi coverage; however, the max recommended number of Smartthings Wi-Fi units on a network is five. Therefore, you can have one unit as the primary router and the other four as additional points for large households.
Introducing Samsung SmartThings Wi-Fi
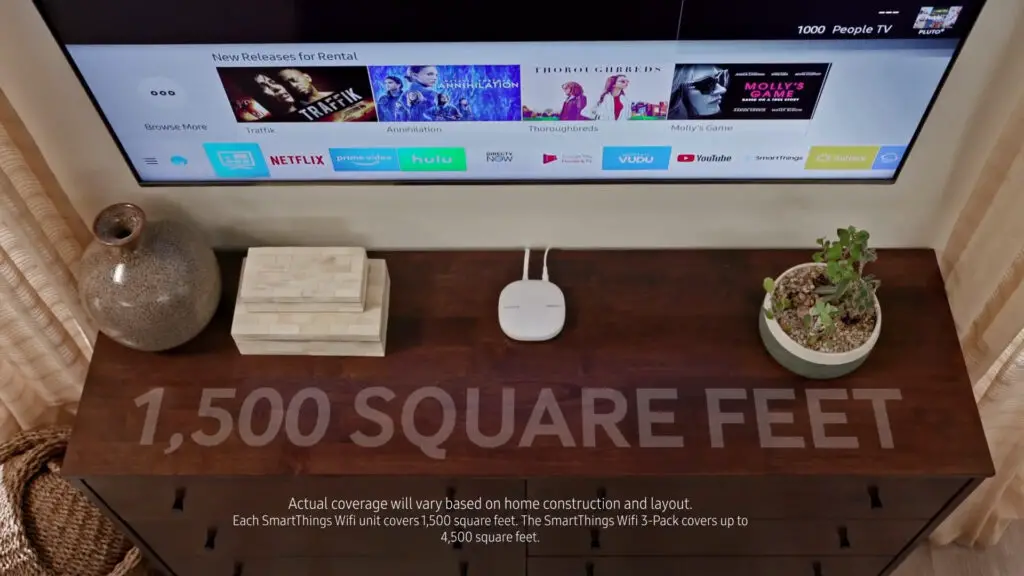
Each unit can theoretically broadcast a Wi-Fi signal over 1500 square feet or 140 square meters. Theoretically, because the broadcast range varies depending on the units’ environment, the signal range will decrease if there are obstructions like thick walls. Three units will cover up to 4,500 square feet.
Once set up, the units will use Artificial Intelligence to analyze your network usage and optimize it. The mesh network also uses Plume’s cloud to store data about your network usage to improve your network’s use over time. Therefore, using the data it receives, your network will offer more bandwidth to important devices in different rooms.
Additionally, you can use the Smartthings Wi-Fi Hub feature to connect to smart devices in your home. You can easily control the devices from the Smartthings app, prioritizing important devices at different times.
First Things First
Setting up a Samsung Smartthings Wi-Fi hub requires the user first to have the Samsung Smartthings application. The app is free on Google Play, Galaxy Store, and App Store. Instructions on the application are easy to navigate since they are direct, giving the best experience setting up the hubs.
Not only does the app help set up your Smartthings hubs, but it also helps connect your smart devices to the network. Once you activate the feature, you can connect other smart devices in your home, including smart bulbs and doorbells. There are a wide variety of compatible smart devices that your Smartthings app can readily work with.

Compatible Brands
Before setting up, ensure that you have all the right devices in the package. Ensure you have the right number of hubs as indicated in your purchase, an Ethernet cable, and an adapter. However, some products or accessories may vary depending on your service provider or location.
You must log in to your Samsung account to use the Samsung Smartthings app. If you do not have a Samsung account, ensure you create one as you install the Smartthings application.
SmartThings Wi-Fi – Unboxing and Basic Info
How to Set Up Samsung Smartthings Wi-Fi
After confirming that every accessory is in order, setting up the Samsung Smartthings Wi-Fi hub is not an uphill task. Use the following steps to navigate your way around the Smartthings application during the initial setup procedure:
- Use the Ethernet cable to connect the hub to the modem in your house.
- Connect the Ethernet cable from the LAN port on your modem to the WAN port (IN) port of your primary Wi-Fi hub.
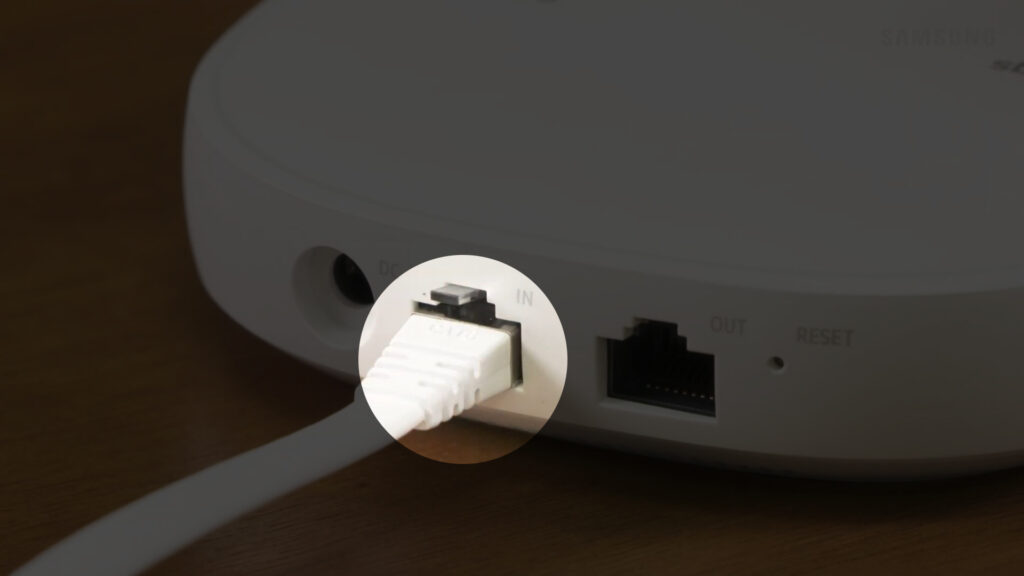
- Then, connect the power adapter to the Wi-Fi hub and a power outlet to switch it on. You will know it is on if it flashes Green.
- Launch the application on your mobile device, which will automatically prompt you to activate your mobile device’s Wi-Fi and Bluetooth features. Ensure you are within the 5m or 15 feet range.
- Once these features are on, open the SmartThings app. The app will detect the hub automatically – select the ADD NOW option.
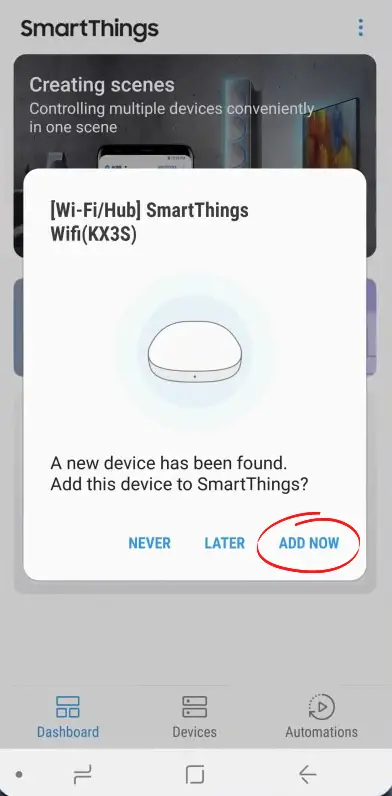
- If it doesn’t detect it automatically, from the dashboard on your mobile device, select the Add device option with the + sign from the Devices tab.
- Select the Smartthings option from under the All brands tab.
- Then, scroll down to the SmartThings Wi-Fi after that.
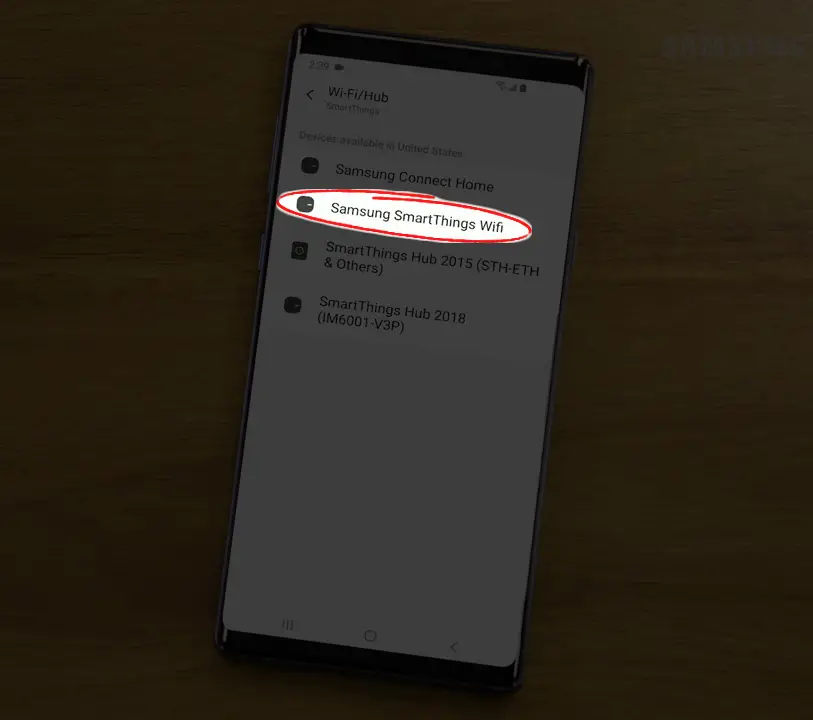
- Then, select the Set up new Wi-Fi network option since it is an initial setup procedure.
- Then, choose where you would like to add the hub within the house.
- From the drop-down menu, choose which room you are adding the hub to.
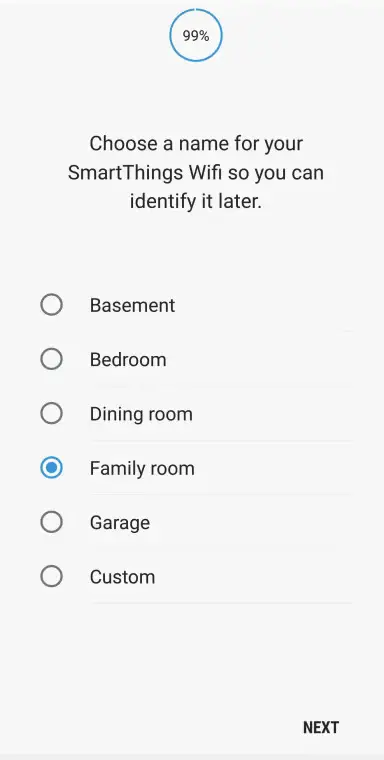
- Touch on the Next button to select the wallpaper color to assign to the new room, then select Save.
- Select Next to follow the on-screen instructions for turning your hub on.
- Wait for the hub to blink red and green before proceeding as shown on your mobile device.
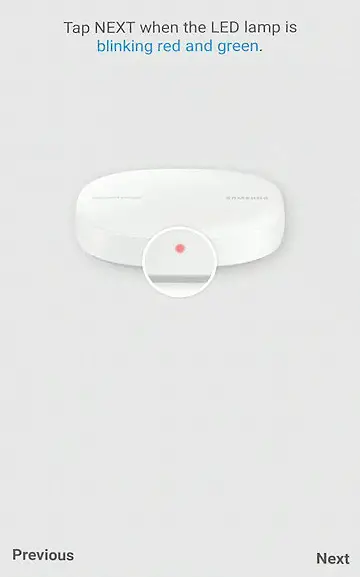
- Wait until your hub connects to your modem before reviewing your end-user license agreement.
- Check the user agreement box and select the Next option.
- Now, name your home network and provide a secure password for the network.
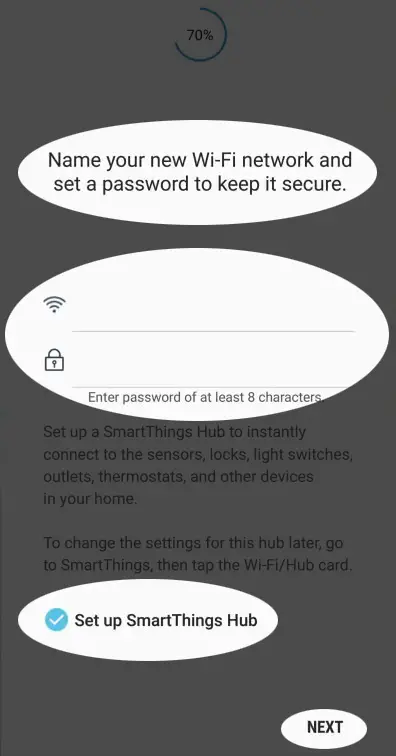
- Wait until the setting up process is complete.
- You can choose to add more hubs to the network at this point to extend coverage or select Done if you don’t want to add more hubs at the moment.
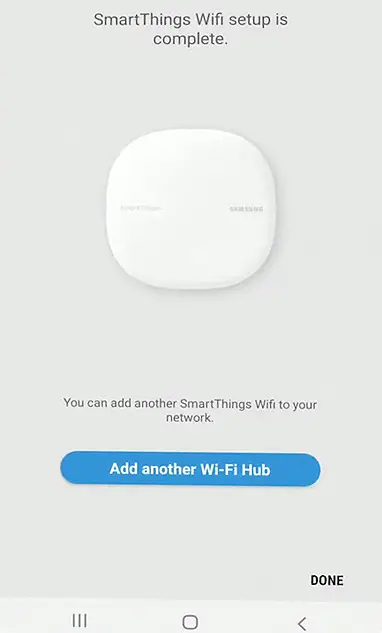
- Select the Next button to allow Plume to optimize your Wi-Fi network.
- At this point, you can choose to connect other smart devices.
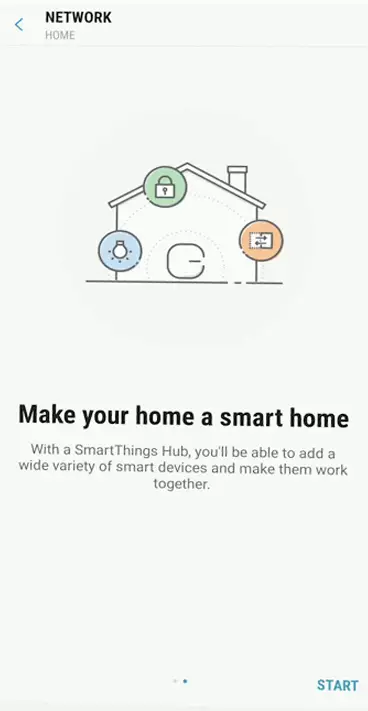
- Allow your smart devices to connect to your Wi-Fi network, if possible.
- Follow the on-screen instructions to allow your device to download the Plume app to optimize your Wi-Fi network.
- Thus, the setting up procedure is now complete
SmartThings Wi-Fi Setup – Step-by-Step
If you want to add another hub later, ensure you are within the connection range during setup. Always use the Ethernet cable to connect the primary hub to the modem.
How to Set Up other Compatible Devices
Aside from the Samsung SmartThings Wi-Fi hubs, you can control a smart home through your SmartThings application. Different companies are compatible with the SmartThings hub, including voice assistants such as Alexa and Google Assistant.
Also, you can control the devices through the application, including prioritizing important devices.
You can add different devices to your SmartThings hub through the SmartThings using the following instructions:
- Launch your SmartThings app and go to the Devices tab and select the home icon.
- From the dashboard, select the Add device option.
- Under the By brand tab, select Smartthings.
- Select which compatible device you would like to add, for example, motion sensors.
- Select which SmartThings model number belongs to you from your on-screen options.
- Then, select the location you are in, followed by where your smart device is found within the house.
- Follow the on-screen instructions to complete the device’s connection since each gadget has different instructions.
- Select the Done option to complete your setup procedure.
Indicator LED Lights on the Hub and Their Meaning
The LED lights that blink when connecting the SmartThings Wi-Fi hub to the network will show whether the connection is successful or not.
A red and green blinking light during setting up shows that the hub is preparing to connect to the network. The blinking lights will resolve to a solid green which shows that the connection is successful.
A red blinking light will indicate issues with the hub.
A blinking blue light indicates no LAN connection between the hub and modem; thus, it cannot obtain an IP address. Therefore, you should replace the Ethernet cable or check whether the cable is connected to the right ports.
On the other hand, solid blue light, which appears for more than five minutes, indicates poor connection within the network.
A blinking magenta light indicates that the hub is receiving and downloading firmware updates, which is normal. Also, a solid blue color appearing for less than five minutes may indicate the hub is downloading firmware. A solid magenta light means that the hub is applying the firmware update, and you should not disconnect the hub.
A green blinking light on the hub means the hub is searching for a device to connect to the network. The blinking light is normal, especially during the initial setup process, and it will stop after the connection. A double-blinking green light occurs when the Z-Wave Exclusion Mode is active within the network.
How to Troubleshoot the SmartThings Hub
Sometimes, the hub may have glitches, just like any other device within a Wi-Fi network. Therefore, there are different ways to troubleshoot your device and restore it by clearing out bugs. The initial step should always be to cut power to the hubs to restart them. If the issues become persistent, you can try more robust solutions.
Some of the other ways you can use to troubleshoot your hub include:
Reset your hub directly from the device:
- Unplug your hub from its power source.
- Use a pin or a sharp tool to hold down on the Reset button found next to the hub’s ports.
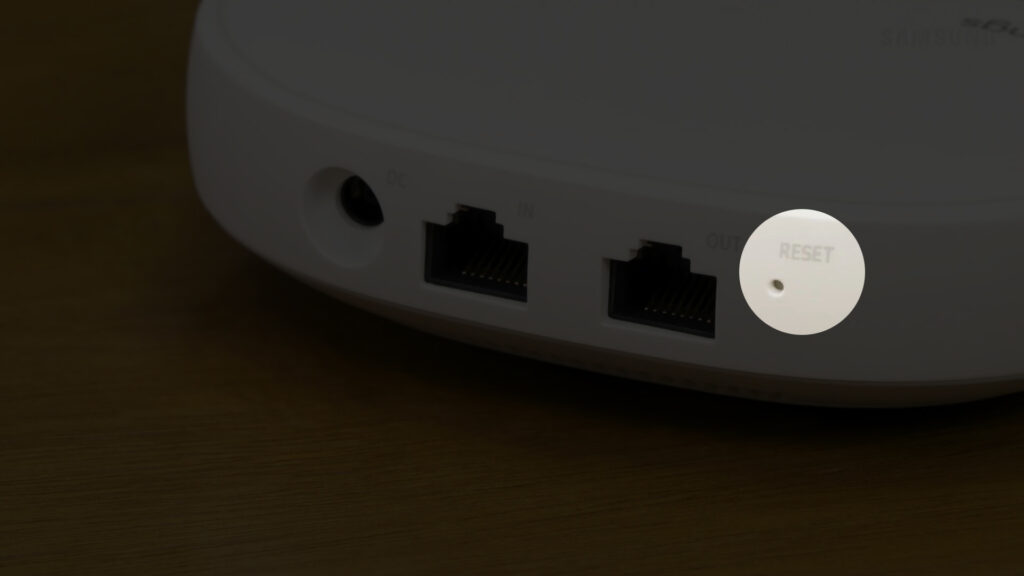
- Hold down the button as you reinsert the hub into its power source.
- Watch as the LED light changes from a blinking yellow to a solid yellow color.
How to Factory Reset Your Samsung SmartThings Wi-Fi Hub
Reboot or factory reset your device:
- Go to the SmartThings app and select the Devices tab.
- Then, choose the Home icon to select the location of the hub you would like to reboot.
- Select the Network Status option, then choose the Wi-Fi hub option.
- From the More options section, choose either Reboot device or Factory reset.
- Tap on REBOOT for a reboot on your device or RESET for a factory reset.
- Connect the device back to the network in case it disconnects after the procedure.
Conclusion
Many opt for mesh Wi-Fi systems since they can serve very large households without losing the network connection. With the introduction of Samsung SmartThings Wi-Fi, you can have wide network coverage in your house. You will no longer have dead zones affecting your productivity by adding hubs to your network.
Additionally, Samsung SmartThings Wi-Fi allows the integration of smart devices, such as locks and cameras, through the Smart Hub feature. With Plume’s help, you can easily optimize and control all your devices. We hope this article helped you set up your Samsung SmartThings Wi-Fi.

Hey, I’m Jeremy Clifford. I hold a bachelor’s degree in information systems, and I’m a certified network specialist. I worked for several internet providers in LA, San Francisco, Sacramento, and Seattle over the past 21 years.
I worked as a customer service operator, field technician, network engineer, and network specialist. During my career in networking, I’ve come across numerous modems, gateways, routers, and other networking hardware. I’ve installed network equipment, fixed it, designed and administrated networks, etc.
Networking is my passion, and I’m eager to share everything I know with you. On this website, you can read my modem and router reviews, as well as various how-to guides designed to help you solve your network problems. I want to liberate you from the fear that most users feel when they have to deal with modem and router settings.
My favorite free-time activities are gaming, movie-watching, and cooking. I also enjoy fishing, although I’m not good at it. What I’m good at is annoying David when we are fishing together. Apparently, you’re not supposed to talk or laugh while fishing – it scares the fishes.

