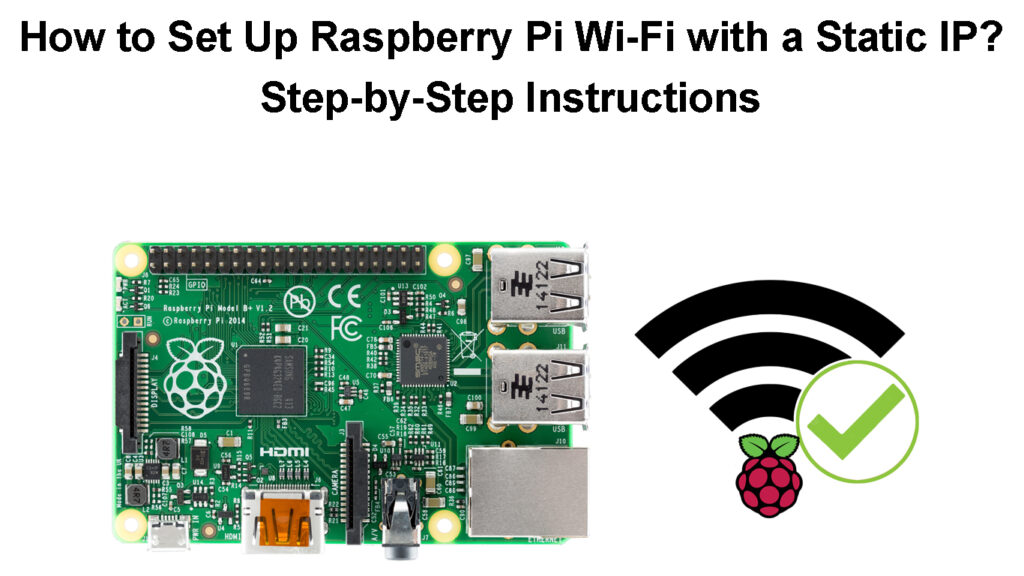
A Raspberry pi (RPI) is a tiny single-board computer initially meant to help learners learn about coding, especially those from disadvantaged areas. The device is said to be a single-board device because all its components are housed on a single circuit board, contributing to its inexpensive nature.
The device was made available to the general public by the Raspberry pi foundation in 2012, and since then, a series of models have been released, each with its unique features.
Raspberry Pi Explained
Generally, all models have basic similarities, like having internet connectivity through Wi-Fi or Ethernet and various input and output ports. Over the years, people have conducted enthralling projects using the Raspberry Pi thanks to its ability to run various Operating Systems and complete various tasks effortlessly.
Some of these projects require you to set the Raspberry Pi to use a static IP address, especially when one needs to access the device on a network remotely. Therefore, this article focuses on setting up your Raspberry Pi to use a wireless static IP address.

CONTENTS
How to Set Up a Raspberry Pi
Before you embark on setting up the Raspberry Pi, you will need the following:
- A Raspberry Pi.
- A Micro SD card (preferably 8GB or higher) and a Micro SD card reader/adapter.
- A Wi-Fi adapter if you are using earlier versions of the Raspberry Pi that do not support Wi-Fi connectivity.
- A monitor/TV, keyboard, and mouse.
- A Windows/macOS device and a working internet connection.
- A USB power supply, preferably the official Raspberry Pi power supply. The Raspberry 4 model B and Raspberry 400 use a USB C cable, while all the others use a micro-USB cable.
Setting Up the Raspberry Pi
Once you have all the requirements, the next step is downloading the Raspberry Pi OS (formally known as Raspbian). You can download the Raspberry Pi OS imager for Windows, macOS, or Ubuntu from the Raspberry Pi website.
Insert the SD card into the SD CARD reader/adapter and format it if it has been used before. You can skip the formatting step if the SD card is brand new.
Next, run the downloaded file on your desktop as an administrator. You can do this by locating the downloaded image file, right-clicking on it, and selecting Run as administrator.
Then click Install in the pop-up window and wait as the program installs on your device.
Ensure the Run Imager checkbox is ticked, then click Finish to complete the installation.
A new window will pop up, and on it, select Choose OS. You can erase the SD card from here by scrolling and selecting the ERASE option. Then, click Choose Storage and select the SD card. Finally, select the WRITE option. A pop-up notification will appear asking you to confirm your option, select YES, then Continue once it is done erasing.
Select the ERASE option on the Raspberry Pi imager to change the options from erasing to selecting a preferable OS to install.
Choose the Raspberry Pi Linux OS (the first OS option in the list). You can also choose other options like the Raspberry Pi OS (other) option to install the lite version if you do not intend to use the desktop environment.
After selecting the OS to install, click on the Settings gear under the WRITE option to access the advanced menu.
This will allow you to configure settings such as naming your Raspberry Pi, enabling SSH, configuring the default user, and registering a Wi-Fi network you want the RPI to connect to upon booting and updating your local settings. The advanced settings menu is also useful when setting up the Raspberry Pi headless.
Once you are done, click Save, then WRITE to copy the setup file to the micro-SD card and insert it in the Micro SD slot on the RPI. Finally, connect the Raspberry Pi to an HDMI monitor, USB keyboard, and Mouse (Ensure to use quality HDMI cables).
If you intend to use a Bluetooth mouse and keyboard, connect them to the Pi before turning it on.
Raspberry Pi Initial Setup
Note: You can skip the Advanced Settings and update them later when the SD card is connected to the RPI. Also, you can use the Network Installation feature to download the RPI OS directly onto the Raspberry Pi when the device is connected via an Ethernet cable. This cuts out the need for a desktop/laptop; all you need is a micro-SD card, monitor, power supply, keyboard, mouse, and an ethernet connection.

Personal computer Kit for Raspberry Pi
Once you have these, simply connect them to the appropriate ports on the RPI, turn it on, and press and hold the Shift button, and the RPI OS imager installation will start. However, note that Network Installation only works by default on Raspberry 4 and Raspberry 400 if the system uses the latest supported bootloader.
Connect Raspberry Pi to Wi-Fi After First Setup
After setting up the RPI OS, the next step is to connect it to a Wi-Fi network. Suppose you initially used Advanced Settings to register your Wi-Fi network during the RPI OS installation. In that case, the device should connect to your Wi-Fi immediately after you turn it on.
However, you can still manually connect the Pi to Wi-Fi via the desktop or the Command line.
After successfully setting up the RPI and connecting it to a display device, the Pi will prompt you to conduct an initial setup if you did not use the Advanced Settings during setup.
The first prompt will be to put any Bluetooth keyboard and mouse connected to the Pi into pairing mode. The RPI will notify you that it is connecting to said Bluetooth devices, so you have to wait until you see that it has connected to all of them. This might take a while, so be patient.
If no Bluetooth devices are connected to the RPI, select Next, and you will be prompted to enter your location information, i.e., time zone, country, and preferred language.
Click Next, and the Pi will prompt you to create a user account, enter your preferred username and password, then select Next.
You will then be prompted to adjust the screen size as it can be impractical sometimes; select Next when done or if you are comfortable with the screen size.
Then the device will scan for available Wi-Fi networks, select one and enter the password. Once connected, the Pi will download and install any available updates, prompt you to restart it, select Restart, and wait for the system to reboot.
Set a Static Wi-Fi IP Address via Raspberry’s Terminal
A static IP address is handy in various instances, such as when you have a Network Attached Storage Device or when using the Pi as a server.
Setting Up a Static IP for Raspberry Pi Without Using Mouse, Keyboard, or Monitor
You can set the Raspberry Pi to use a static IP by modifying settings in its DHCPCD, which handles IP addressing within the system.
The procedure is as follows:
- Open the terminal and use the command hostname -I to access the Pi’s current IP information.
- Next, access the router’s gateway address by running the command ip r | grep default |
- Then run the command sudo nano /etc/resolv.conf to find the router’s current DNS address.
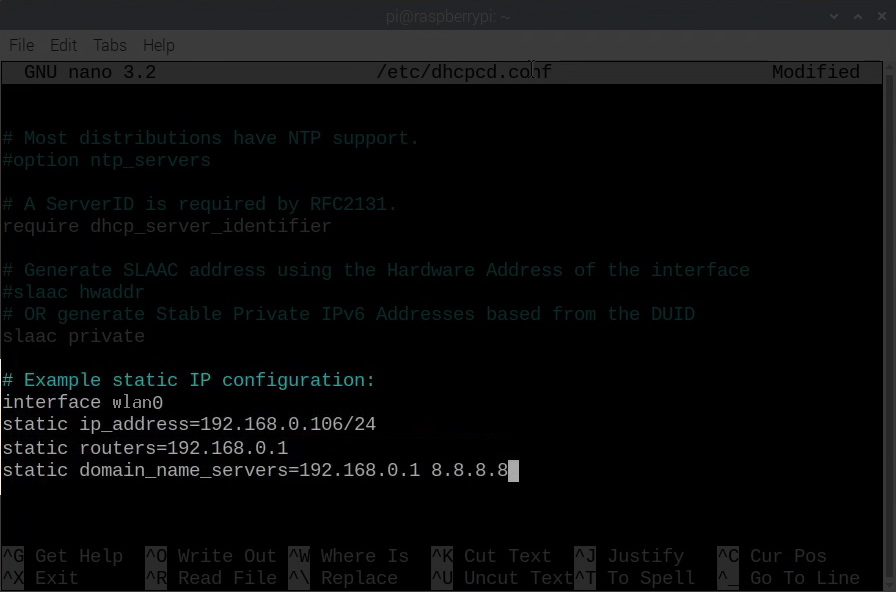
- Open the dhcpcd.conf file by running the sudo nano /etc/dhcpcd.conf command.
- Replace your current IP address with the desired static IP address by adding the following lines at the end of the file where the static IP example is found:
interface wlan0
static ip_address=enter your preferred static IP
static routers=enter your routers IP address
static domain_name_servers=enter your default DNS server). Alternatively, you can also add here your secondary DNS. Google’s DNS, for example (8.8.8.8).

- Save the file by pressing CTRL + O, then Y, and finally, Enter to exit the editor.
- Restart the dhcpcd service by running the sudo reboot command.
Your Raspberry Pi should now be using the static IP address you specified. You can verify this by running the hostname -I command and looking for the wlan0 interface.
How to Assign a Static IP to Your Raspberry Pi
Reserve a Static IP for Raspberry Pi from the Router’s End
Alternatively, you can reserve a static IP for the Raspberry Pi from the router’s DHCP server. This is a better option as it will ensure the Static IP remains unused and is only offered to the Pi.
When you set a static IP on Raspberry, the router does not know that the particular IP is supposed to stay unused. Therefore, it could offer the IP to another network device which can lead to connectivity issues when the Raspberry Pi connects to the router and finds the IP is already in use. Such instances lead to IP collisions and can result in both devices losing Wi-Fi connectivity.
However, you can select a Static IP for Raspberry Pi that is out of the router’s DHCP pool to avoid IP collisions.
Different routers have different procedures for reserving IP addresses; therefore, consult the router’s user manual for the appropriate procedure. But you can simply search for the DHCP reservation option, locate Raspberry’s MAC address, and then reserve an IP address.
Conclusion
When you have a Raspberry Pi, only your imagination can stop you from the number of projects you can conduct. From automating various processes to setting up IoT devices on a network. You can interact with other Raspberry Pi users to share ideas on projects you can conduct with a static IP on the Raspberry Wi-Fi.

Hey, I’m Jeremy Clifford. I hold a bachelor’s degree in information systems, and I’m a certified network specialist. I worked for several internet providers in LA, San Francisco, Sacramento, and Seattle over the past 21 years.
I worked as a customer service operator, field technician, network engineer, and network specialist. During my career in networking, I’ve come across numerous modems, gateways, routers, and other networking hardware. I’ve installed network equipment, fixed it, designed and administrated networks, etc.
Networking is my passion, and I’m eager to share everything I know with you. On this website, you can read my modem and router reviews, as well as various how-to guides designed to help you solve your network problems. I want to liberate you from the fear that most users feel when they have to deal with modem and router settings.
My favorite free-time activities are gaming, movie-watching, and cooking. I also enjoy fishing, although I’m not good at it. What I’m good at is annoying David when we are fishing together. Apparently, you’re not supposed to talk or laugh while fishing – it scares the fishes.
