Shaw offers several different routers to their customers. In order to access and customize the router settings it is necessary to know the Shaw router login steps.
In this article we will show you how to access the Shaw router web-based interface and what to do if the login process fails at some point. If you want to login now follow the steps described below. But first, let’s see what you are going to need before you login.

CONTENTS
Before You Login
Before you start following the steps described below it is recommended to take care of the following things. They will make the Shaw router login process pretty simple and most likely successful.
1. Get your smartphone or computer ready. You can also use a tablet.
2. Make sure you have access to the local network. You can use the wireless connection or the wired connection. This greatly depends on the device you are using. Generally, the wired connection is usually recommended. It is more stable than the wireless and, in some cases, you won’t be required to enter the admin username and password if you are connected using a wired connection.
3. You will need the Shaw router admin login details (the router’s IP address, and the admin username and password). You can find these below or printed on a sticker on the router.
What Are The Default Shaw Router Details?
Shaw users use several different routers. Find the one you are using at the moment and see what are the admin login details.
BlueCurve Gateway Fibre+ Gateway (XB6 & XB7)
Default router IP: 10.0.0.1
Admin username: admin
Admin password: password
Hitron Advanced WiFi modem (CGNM-2250)
Default router IP: 192.168.0.1
Admin username: cusadmin
Admin password: It’s the WiFi (Pre-Shared) Key printed router label
Cisco DPC3848V Advanced WiFi Modem
Default router IP: 192.168.0.1
Admin username: cusadmin
Admin password: It’s the WiFi (Pre-Shared) Key printed router label
Arris Advanced WiFi modem (SBG6782)
Default router IP: 192.168.0.1
Admin username: cusadmin
Admin password: It’s the WiFi (Pre-Shared) Key printed router label
Cisco 3848V and Cisco 3825
Default router IP: 192.168.0.1
Admin username: cusadmin
Admin password: It’s the Serial Number (S/N) printed router label.
SMC Wireless Modem
Default router IP: 192.168.0.1
Admin username: cusadmin
Admin password: It’s the WiFi (Pre-Shared) Key printed router label
How To Access The Shaw Router Settings?
The next four steps will get you to the Shaw router admin dashboard in no time. Since we have prepared everything already, the entire login process will be completed quickly. Let’s just go one step at a time.
STEP 1 – Check If The Device Is Connected
The device we have mentioned previously needs to be connected to the network in order to access the router settings successfully. It is always a good idea to check whether it is connected because if it isn’t the login process will fail at the beginning.
STEP 2 – Start The Web Browser
The device you are using already has a browser installed. It isn’t important which browser you are going to use. Just start the one you generally use and you are good to go.
STEP 3 – Enter The Shaw IP In The Address Bar
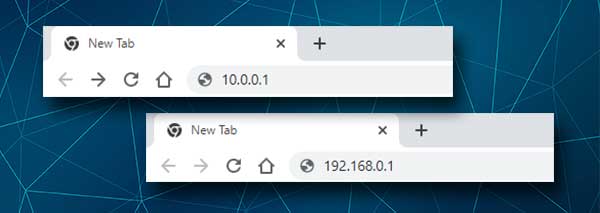
The browser’s URL/Address bar is at the top of the web browser. Enter the Shaw router IP address there and press the Enter/Go button on the device. The Shaw router login page should appear if the IP is correct.

If the IP is not the right one, the router login page won’t appear. Instead you can see an error message or a blank page. In that case retype the IP carefully, because there is a chance that you have mistyped the IP. If the same happens again, find the IP address by yourself by following this guide.
STEP 4 – Enter The Shaw Admin Login Details
When the Shaw router login page appears type the admin username and password given above. Press the Login button and the Shaw router admin dashboard should appear.
This means that you now have full admin rights to configure the router settings. You can configure the wireless network settings, secure your network from unwanted access, set up Parental Controls, set up Port Forwarding, upgrade the router firmware to the latest version and much more.
However, sometimes things don’t go as planned.
What To Do If You Can’t Login To Shaw Router?
Every now and then users complain that they can’t login to their Shaw router. Well, this happens but the good thing is that you can try some of the fixes presented below and you should login successfully by the end of this article.
Let’s see what you can do.
1. Check the connection between the router and the device
If you have connected your device using a wired connection you can check the Ethernet cable and whether it is properly and firmly connected to the right port. Also, try to connect the Ethernet cable to another LAN port and try to login again.
In case you are connecting wirelessly, check whether the device is connected to the right WiFi network, whether the wireless signal is strong enough and whether the device is still connected.
2. Change the device or browser
If you have the possibility, use another device to access your Shaw router settings. You can also try logging in from another web browser.
3. Restart your Shaw router
Restart your Shaw router and try to login again after it boots up again. This is a simple quick-fix solution that will help you resolve the problem most of the time.
4. Check the router IP and make sure you are typing it correctly.
You can follow this guide to find the router’s IP address. When you type it into the URL bar make sure to type it carefully and to type numbers and dots only. There should be no letters.

5. Check the admin username and password
The correct admin username and password are printed on the label on the router and you need to make sure to type them correctly. Mistyping the letters or typing a capital letter instead of a small one will make the login unsuccessful.
Recommended reading:
- How to Cancel Shaw Internet? (Step-by-Step Guide)
- My Shaw on Demand Is Not Working
- How to Change Shaw Wi-Fi Password?
Final Words
After you access your Shaw router settings successfully it is recommended to take note of the admin IP, username and password that have helped you login. You are going to need these the next time you want to customize the router settings.
Before you make any changes please create a backup of the current router configuration, so that you can restore the settings back if necessary.

Hey, I’m David. I’ve been working as a wireless network engineer and a network administrator for 15 years. During my studies, I also worked as an ISP field technician – that’s when I met Jeremy.
I hold a bachelor’s degree in network engineering and a master’s degree in computer science and engineering. I’m also a Cisco-certified service provider.
In my professional career, I worked for router/modem manufacturers and internet providers. I like to think that I’m good at explaining network-related issues in simple terms. That’s exactly what I’m doing on this website – I’m making simple and easy-to-follow guides on how to install, set up, and troubleshoot your networking hardware. I also review new network equipment – modems, gateways, switches, routers, extenders, mesh systems, cables, etc.
My goal is to help regular users with their everyday network issues, educate them, and make them less scared of their equipment. In my articles, you can find tips on what to look for when buying new networking hardware, and how to adjust your network settings to get the most out of your wi-fi.
Since my work is closely related to computers, servers, and other network equipment, I like to spend most of my spare time outdoors. When I want to blow off some steam, I like to ride my bike. I also love hiking and swimming. When I need to calm down and clear my mind, my go-to activity is fishing.
