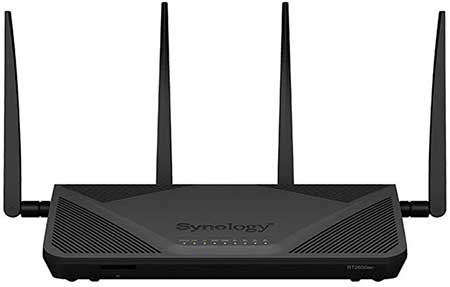
If you are looking for a fast, stable, and reliable internet connection Synology routers are the right choice. However, besides all of that, we need a secure connection as well and this is something we have to pay attention to. There are several security tweaks we can apply to our router configuration and in order to achieve that we need to learn the Synology router login steps.
The following article will show you how to do it properly and go through the basic router security settings that will make your wireless home network safe from unauthorized access.
So, let’s begin!

CONTENTS
What You Need:
- Synology wireless router
- Access to the network over WiFi or the Ethernet cable
- Device like a computer, smartphone or a tablet
- The Synology router admin login details
What Are The Synology Router Login Details?
In order to access the Synology router admin dashboard you are going to need the default login credentials or in case they have been changed before you will need the new, custom ones.
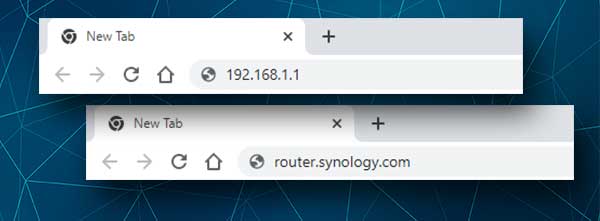
- Default IP address: 192.168.1.1 or use the local web address router.synology.com
- Default username: admin
- Default password: leave this field blank
Synology Router Login Explained
If you have prepared everything, the next few steps will be pretty easy.
STEP 1 – Connect To The Network
Unlock your device and connect it to the network. If you are using the wired connection, which is recommended, you need to directly connect the router and the device with an Ethernet cable. On the other hand, if your device can connect only through WiFi, you can connect wirelessly using the default WiFi name and password if you haven’t changed them already. If you have, then use the custom ones. This step is essential because if your device isn’t connected to the local network, you won’t be able to login to the router admin dashboard.
STEP 2 – Launch The Web Browser You Normally Use
We normally use a web browser to access the router admin dashboard. You can use any of the popular browsers today Chrome, edge, Firefox, Opera – just make sure it is up to date.
STEP 3 – Enter The Synology Router IP In The URL Bar

The default Synology router IP address is 192.168.1.1. Enter this IP in the browser’s URL bar and click the Enter key or tap Go on the screen, depending on the device you are using at the moment.
In case the login page doesn’t show up or you get an error message try entering the local web address router.synology.com instead of the IP address.
You can also check the default router IP as described in this article.
STEP 4 – Enter The Synology Admin Username And Password
When asked to enter a username and a password, use the default ones if you haven’t changed them.
The default username is admin, and you should leave the password field blank.
In case these details have been changed before, login with the custom ones.
STEP 5 – You Can Modify The Synology Router Settings Now
In the next step you should see the Synology Router Manager (SRM). This is practically a mini operating system that powers the Synology router and allows you to change different router settings starting from managing and securing the WiFi network, creating a separate Guest network, setting up Parental Controls, improving the network security further, upgrading the router firmware and so on.
Manage Your WiFi Network Using the Synology Router Manager (SRM)
The WiFI network name and password are generally set up during the initial setup process. Some people even choose to keep the default WiFi logins just because they always have them printed on a sticker on the router. However, we need to say that this is a security risk and these WiFi details have to be changed into something else.
The main reason for this is that the default WiFi name reveals the router brand you are using, which makes it easier for someone to find the default login details. So, changing the default WiFi name and password is something you need to do initially, or if you have already done it but want to change these WiFi details again here is how to do it.
Change The Wifi Name And Password On Synology Router
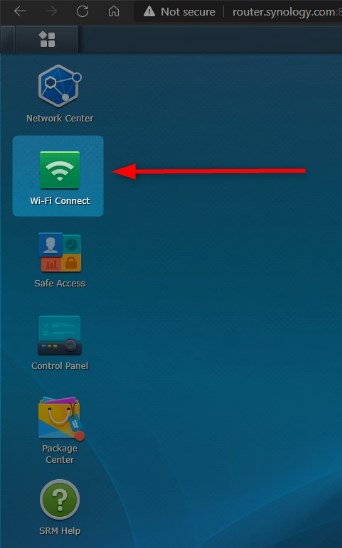
After you login to the Synology Router Manager, you will see several different icons on the right.
The one we need now is the green Wi-Fi Connect icon.

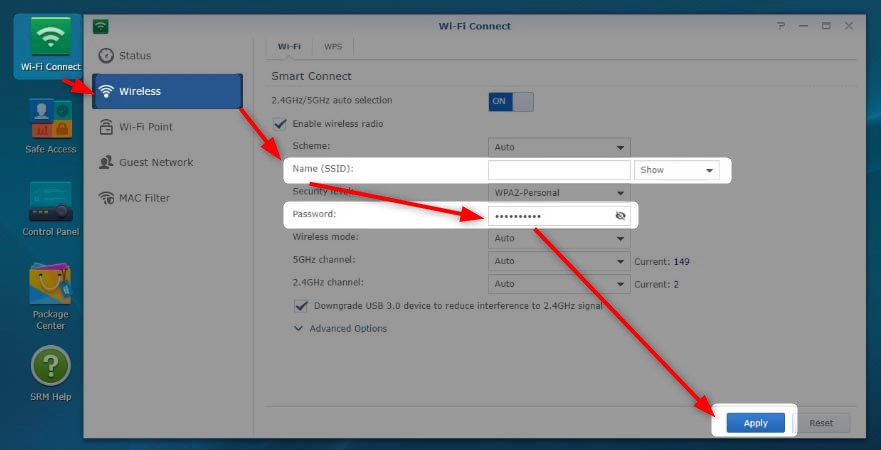
Click on this icon and in the new window click on Wireless in the menu on the left. You will see the wireless settings of the router.
Pay attention to the fields named Name (SSID) and Password.
These are the fields where we have to enter the new wireless network name and the new wireless password.
After you change these you should click the Apply button to confirm and save your changes.

NOTE: If you have used the WiFI connection to access the Synology router settings, you will most probably be disconnected from the network now. Just connect to the new WiFi name and use the new wireless password. After you connect, make sure to do this on all your other wireless devices that have been connected before.
Final Words
There are many things you can do using the Synology Router Manager (SRM). Now when you know how to login to your Synology router you can easily make all the necessary changes. But, like always we recommend creating a backup of the current router settings, just in case something goes wrong. But in case you don’t make a backup, resetting the router to default factory settings can be your way to fix things up and set up your network from the beginning.

Hey, I’m David. I’ve been working as a wireless network engineer and a network administrator for 15 years. During my studies, I also worked as an ISP field technician – that’s when I met Jeremy.
I hold a bachelor’s degree in network engineering and a master’s degree in computer science and engineering. I’m also a Cisco-certified service provider.
In my professional career, I worked for router/modem manufacturers and internet providers. I like to think that I’m good at explaining network-related issues in simple terms. That’s exactly what I’m doing on this website – I’m making simple and easy-to-follow guides on how to install, set up, and troubleshoot your networking hardware. I also review new network equipment – modems, gateways, switches, routers, extenders, mesh systems, cables, etc.
My goal is to help regular users with their everyday network issues, educate them, and make them less scared of their equipment. In my articles, you can find tips on what to look for when buying new networking hardware, and how to adjust your network settings to get the most out of your wi-fi.
Since my work is closely related to computers, servers, and other network equipment, I like to spend most of my spare time outdoors. When I want to blow off some steam, I like to ride my bike. I also love hiking and swimming. When I need to calm down and clear my mind, my go-to activity is fishing.
