
Hewlett-Packard is a well-established computer manufacturer. The company has been around for more than 80 years. Owning an HP laptop is something to be proud of for many computer buyers. One of the reasons people buy a laptop is its convenience, especially its wireless capability. This guide teaches you how to turn on wireless capability on an HP laptop.
But before we begin connecting to a Wi-Fi network for the first time, make sure you have two things:
- A laptop with a built-in Wi-Fi card (wireless adapter) – it’s used to send and receive signals from the router. In most laptops, it’s already built-in. If it’s not, you need to attach an external wireless adapter using a USB connection or other ports.
- Network name – if you have already set up your network at home or mobile Wi-Fi, you would have the name and security password. However, if you are connecting to a public W-Fi network, you’d need to get it from the provider.
Now, let’s begin with the methods to turn on your wireless network.
CONTENTS

First Time Wi-Fi Connection
If you’re connecting to a Wi-Fi network for the first time, you need to put in all the required configurations to establish the connection. Perform the following steps to enable your Wi-Fi connection:
- Turn on a physical switch on the laptop. Normally the button that enables Wi-Fi is located in the top row of the laptop’s keyboard. In some laptops, it’s placed on the side. Wherever the button is, you need to turn it on after starting your laptop.

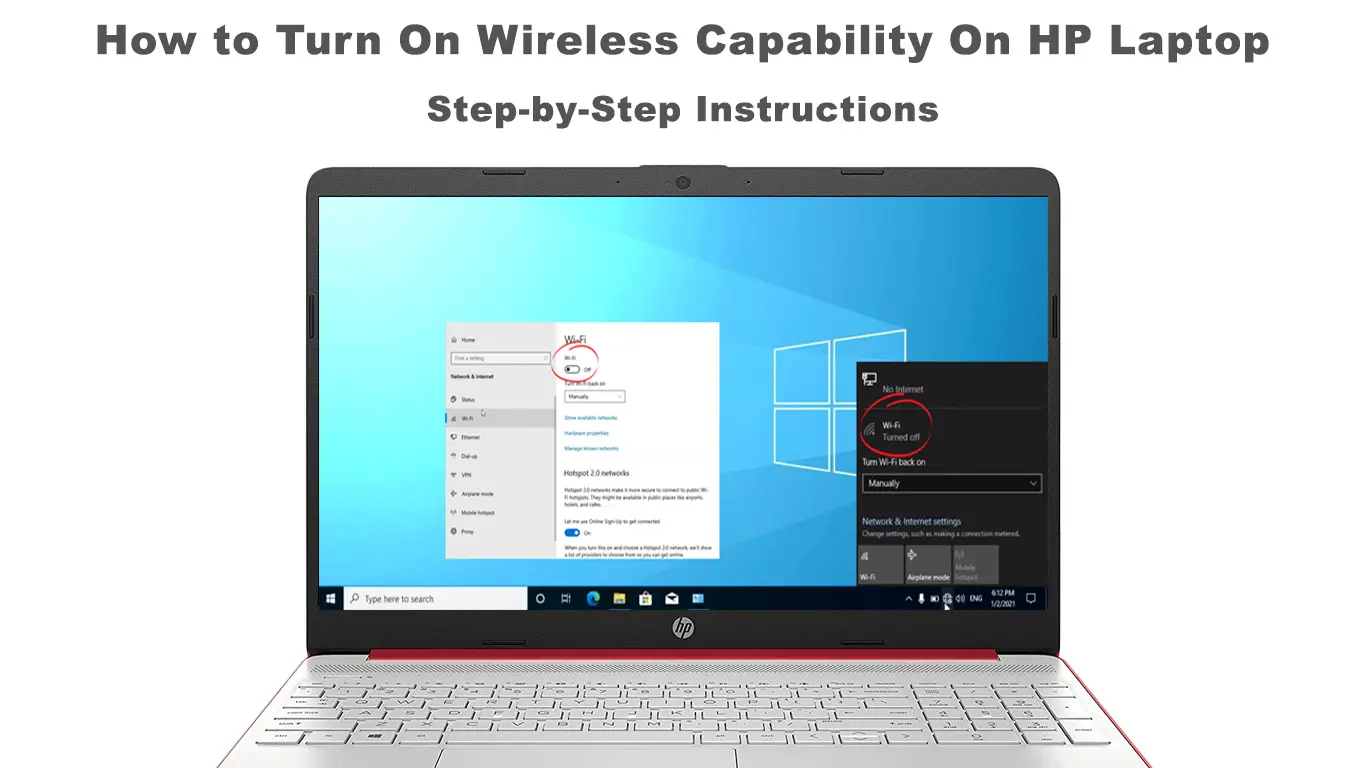
- Lookup for the Wi-Fi network icon in the lower toolbar at the bottom-right of the screen. Enable the Wi-Fi connection by clicking Turn On.
- If the Wi-Fi network icon is not there, go to the Start button.
- Type ‘hp wireless assistant in the search box.
- Select HP Wireless Assistant
- Enable the wireless network by pressing Turn On
- Now you will find the wireless network icon on the toolbar.
How to Enable Wi-Fi Using HP Wireless Assistant
- Right-click on the wireless network icon and select Open Network and Internet settings.
- Choose Network&Sharing Center.
- Under Change Network Settings, choose Set up a new connection.
- Select manual connection and press ‘Next’.
- Enter network security information as requested to set up the wireless network on the next screen.
- Check on the box ‘Start this connection automatically if you want the computer to do that once the Wi-Fi network is within range.
- Finally, click ‘Available wireless network’ to view a list of all networks available within the vicinity.
Re-engage to the Existing Network
Once you’ve set up your connection to a particular Wi-Fi network for the first time, your device will detect the network once it’s within range. Because you’ve selected the automatic connection earlier, the computer will do just that – automatically connect to the wireless network that’s close to the device.
In case you did not check the ‘Automatic Connection’ box, follow these steps to set up a connection:
- Firstly, the network must be within range.
- Turn on Wi-Fi by pressing the button on your HP laptop.
- Click on the wireless network icon at the bottom-right of the laptop screen. You will see a list of nearby wireless networks.
- Select a wireless network that you want and click on ‘Connect’.
- Enter the password as requested by the system.
- You’re now connected to the wireless network.
How to Manage Your Wi-Fi
There are times when you may need to modify your Wi-Fi network credentials, such as the name or password. Keep to the following steps to monitor your wireless Wi-Fi network:
- Click on the wireless network icon at the bottom-left of the screen.
- Then click Network & Internet settings.
- Select Network & Sharing Center.
- Select your wireless network.
- You will have options to manage and change settings and password, and click OK to confirm the Change.
Hardware Issues
If you can’t connect to any Wi-Fi network using our tips, your HP laptop may have some hardware issues that block it from connecting to the Wi-Fi network. Disconnecting and reconnecting the router and modems can fix bugs that could have developed. Follow these steps to fix this problem:
- Power off your laptop first.
- Pull out all the wires from the router and modem and unplug the power cord.
- Reconnect the router and modem after a five-second wait.
- Wait for all the lights to turn on and check out for blinking lights (usually red blinking light). If all the lights are steady green, your internet connection is fine.
- Lastly, turn on your HP laptop and see if you can get the wireless connection working.
Faulty Network Adapter
What allows your HP laptop to connect to your Wi-Fi is the network adapter (also called Wi-Fi card) that was preinstalled and connected to your motherboard. If you cannot connect to a Wi-Fi network, the reason could be a faulty network adapter.
You can perform a little bit of DIY to check if the network adapter is faulty or loose. Open up your HP laptop cover panels and look for the network adapter. Use a tiny screwdriver to remove it from the motherboard. Then, reconnect it so that it is firmly fixed. Now let’s see if you can get a Wi-Fi connection. If not, it means the network adapter is faulty and you need to replace it.
How to Replace/Upgrade Wi-Fi Card on Your HP Laptop
Block Unknown Devices from the Network
IT technology has been developing rapidly with no signs of slowing down, and so do hackers who are keeping up with the development despite better security measures. Hackers can always find ways to slip into your network, and it does not help if you have a lackluster approach to your system security measures. One of the bad things that hackers can do is block your computer’s wireless capabilities. Follow these steps to get rid of the unknown devices connected to your network:
- Click on the internet browser.
- Sign in to your router’s configuration panel using its default IP address.
- Select Devices Attached segment.
- Track down unknown devices from this section.
- Select the unknown devices and press Remove to discard those unknown devices.
You have successfully removed unknown devices and should be able to turn on your wireless capability again.
Final Thoughts
If you prefer knobs and dials on your device and have no choice but to use the laptop, you may have a pretty tough time trying to turn on wireless capability on an HP laptop.
However, we have laid down a straightforward, step-by-step guide to setting up a wireless connection for the first time. Nothing could go wrong if you strictly follow our instructions. Also, bear in mind that an HP laptop usually has a physical wireless network switch that you can easily miss.

Hey, I’m Jeremy Clifford. I hold a bachelor’s degree in information systems, and I’m a certified network specialist. I worked for several internet providers in LA, San Francisco, Sacramento, and Seattle over the past 21 years.
I worked as a customer service operator, field technician, network engineer, and network specialist. During my career in networking, I’ve come across numerous modems, gateways, routers, and other networking hardware. I’ve installed network equipment, fixed it, designed and administrated networks, etc.
Networking is my passion, and I’m eager to share everything I know with you. On this website, you can read my modem and router reviews, as well as various how-to guides designed to help you solve your network problems. I want to liberate you from the fear that most users feel when they have to deal with modem and router settings.
My favorite free-time activities are gaming, movie-watching, and cooking. I also enjoy fishing, although I’m not good at it. What I’m good at is annoying David when we are fishing together. Apparently, you’re not supposed to talk or laugh while fishing – it scares the fishes.