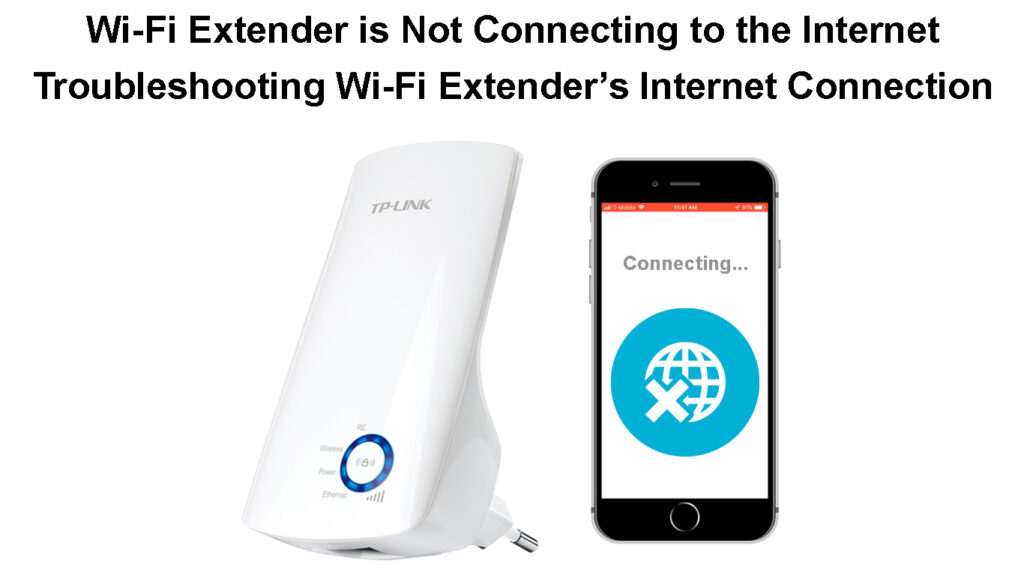
There are a couple of reasons why your range extender is not connecting to the internet. Before you start fixing the issue, you will have to find the culprit. Thankfully, we’ll help you with finding the source of the problem!

CONTENTS
Do You Have a Solid Internet Connection?
The Wi-Fi extender may not be the source of the issue you’re experiencing. That is why, before you start troubleshooting your extender, it might be wise to check the state of your internet connection. Your router may be facing internet problems you need to fix in order to establish the connection with the Wi-Fi extender. If you don’t have an internet connection or the signal is poor, here are some of the things you can try out.
1. Check Whether All of the Cables are Properly Inserted
A cord connected to your router may have become loose, which is why your router is not working properly and can’t connect to the Wi-Fi extender. You should check out the router and make sure that everything is properly inserted. You could even unplug every cord and plug them back in, just to be certain.
Alternatively, you might have a damaged cable that is not performing as effectively due to that damage. Damage is pretty common with older cables. So, you should inspect the state of all of the cords attached to the router. If you suspect that a cord is not in the best shape, you should buy a new one. Once you replace the cable in question, you can test out your internet connection.
2. Look at the Lights on the Router
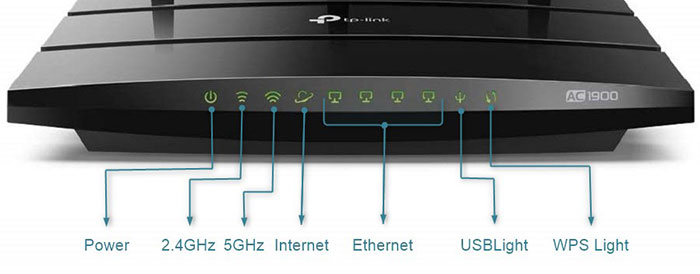
Are all of the internet and connection lights on the router turned on and stable? In most cases, your router’s lights will inform you whether there is an issue with an internet connection. You can consult the device’s manual to verify what all the lights and their different colors and states indicate.

The lights could notify you that there is a temporary break in the internet connection due to a malfunction or regular maintenance. In addition, they may indicate a potential bug within your router. You’ll need to remove this bug before you connect the router to the Wi-Fi extender.
3. Reset the Router
Resetting the router should remove bugs and other common issues users experience regarding their internet connection. Before resetting to factory defaults, you could try rebooting. You’ll reboot your device by first unplugging it from the power source. Then, you should leave the router off for a couple of minutes and plug it back in. You’ll need to wait until the lights on the router stabilize before attempting to use the internet.
If the issue persists, you may have to perform a factory reset on the router. This kind of reset will require you to set up your device all over again as it will revert the router back to its default settings. So, once you reset the router, you’ll need to go to its configuration page via your browser to set it up.
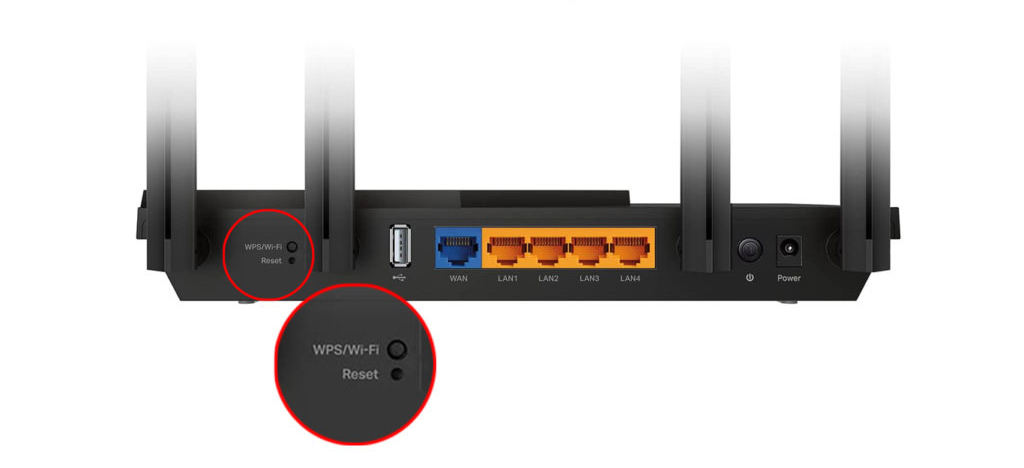
The factory reset button is located on the router. You’ll need a thin, sharp object to press it. You should keep pressing it for a few seconds, or until the lights on the device start flashing. It’s best to give the router a minute or two before you start configuring it.

Wi-Fi Extender Not Connecting to the Internet – Troubleshooting Tips
In case you have a solid internet connection, but your Wi-Fi extender still won’t connect, this part is for you! Let’s take a look at some of the steps that should help you fix the problem you’re experiencing.
1. Move the Wi-Fi Extender Closer to the Router
A good Wi-Fi booster could connect to the router from up to 400 feet of distance. However, weaker extenders won’t be able to receive the signal from that large of a distance. In most cases, your booster should not be more than 20 feet away from your router. That way, your extender will receive a good signal from the router and effectively extend it to other parts of your house.
If your Wi-Fi extender is more than 20 feet away from the router, you should move it a bit closer. Moreover, you should read its manual to double-check the recommended distance from the internet source. You may have to move the booster even closer.
How to Properly Set Up a Wi-Fi Extender
2. Remove the Obstacles Between the Devices
The wireless signal can become weaker if it has to bounce off of different objects to reach you. So, you should keep the space between you and the source of the internet connection free from any potential obstacles. The same goes for the space between the Wi-Fi extender and the router.
Large pieces of furniture and big appliances will affect the strength of the wireless signal. As a result, the signal that reaches the Wi-Fi extender can be too weak for the extender to transmit. What’s more, even if it does reach the extender, the connection will be practically non-existent by the time it gets to you. Therefore, your first step in the process of strengthening the signal will be removing any objects that may obstruct its normal function.
In addition, it’s important that you place both the router and the Wi-Fi extender properly to ensure the optimal internet connection. Your devices should never be on the floor, ceiling, or in a corner. Floors, ceilings, and walls will make the signal bounce off of them and become weaker. So, purchasing stands for your gadgets is a smart move.
Finding the Perfect Place for Your Router
Furthermore, certain appliances, such as your microwave and baby monitor, operate within a similar frequency as the 2.4 GHz band of your router. Thus, you may face issues with your internet connection while using some of these gadgets. You can try connecting the Wi-Fi extender once you’re finished with using these appliances.
Lastly, Bluetooth devices can also interfere with your Wi-Fi signal. That’s because the feature also operates on the 2.4 GHz frequency. Thus, you should turn off the Bluetooth feature on every device you’re not using at the moment.
Ways to Reduce Wi-Fi Interference
3. Divide the Connection Between Devices
Your router may already have too many devices connected to it. As a result, your Wi-Fi signal booster will not able to properly connect to it due to a poor signal.
Fixing this issue is pretty easy, but would require some planning on your end. You should make a list of every device connected to the router and consider connecting it to the Wi-Fi extender instead. You can divide the devices based on their distance from the extender and the router. Once you decide which gadgets will be connected to the Wi-Fi extender, you should disconnect them from the router. Then, you can try connecting the booster once again. When you do, you can then link the remaining gadgets to the extender.
4. Update the Firmware
Devices operating on outdated firmware won’t work as effectively. So, you’ll need to keep both your Wi-Fi booster and the router up to date at all times.
Moreover, a firmware update on your router may make it incompatible with older extenders. That is why you should always update the firmware on both of your devices at the same time.
How to Properly Set Up a NETGEAR Extender
In Conclusion
Before you start working on solving the issue with your Wi-Fi extender not connecting to the internet, you should check whether you even have an internet connection. In case you don’t, you’ll need to use the tips provided above to get the connection back. Then, you can try connecting your extender to the internet once again.
If your connection is good, you can be almost certain that the Wi-Fi booster is to blame for the problem you’re experiencing. Hopefully, our troubleshooting tips will help you get the extender back online in just a few minutes.

Hey, I’m Jeremy Clifford. I hold a bachelor’s degree in information systems, and I’m a certified network specialist. I worked for several internet providers in LA, San Francisco, Sacramento, and Seattle over the past 21 years.
I worked as a customer service operator, field technician, network engineer, and network specialist. During my career in networking, I’ve come across numerous modems, gateways, routers, and other networking hardware. I’ve installed network equipment, fixed it, designed and administrated networks, etc.
Networking is my passion, and I’m eager to share everything I know with you. On this website, you can read my modem and router reviews, as well as various how-to guides designed to help you solve your network problems. I want to liberate you from the fear that most users feel when they have to deal with modem and router settings.
My favorite free-time activities are gaming, movie-watching, and cooking. I also enjoy fishing, although I’m not good at it. What I’m good at is annoying David when we are fishing together. Apparently, you’re not supposed to talk or laugh while fishing – it scares the fishes.

