
Although the majority of devices today have wireless capabilities and can be connected to a wireless network, there are still some devices that can be connected to the network only using an Ethernet connection.
Let’s take your desktop computer for example. Can we connect it to Wi-Fi? Yes. Is it complicated? No.
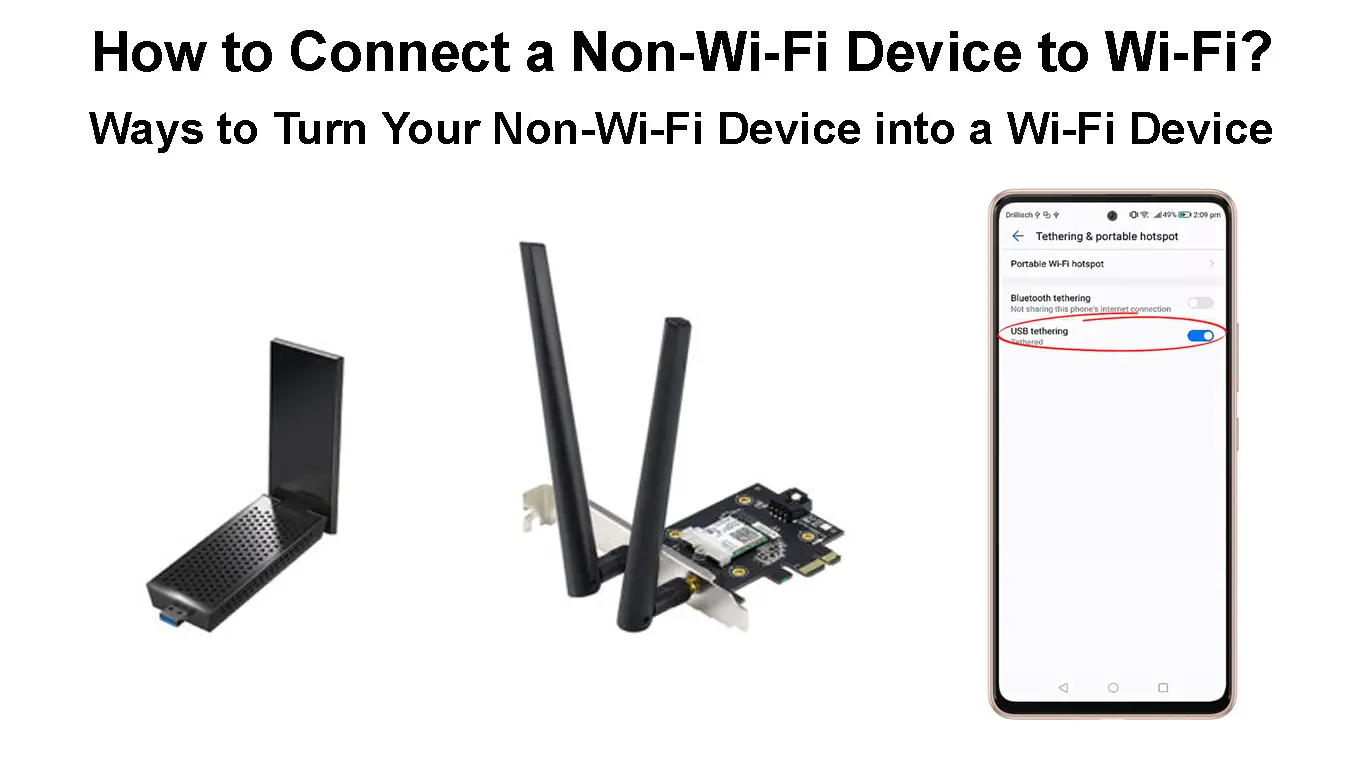
In this article, we are going to explain how to connect your non-Wi-Fi device, in this case, your PC, to Wi-Fi using your smartphone and a Wi-Fi USB adapter or a wireless PCI adapter.

CONTENTS
Can a PC Connect to Wi-Fi Without Ethernet?
As you already know, the answer is yes. It is not that difficult to connect your PC to your Wi-Fi. All you have to do is either get a USB Wi-Fi adapter, or a wireless PCI adapter, or use your smartphone.
Read more about these three options in the following paragraphs, and then choose the one that suits you the best.
So, let’s get started!
How to Connect a Desktop Computer to Wi-Fi?
When it comes to connecting your desktop computer to Wi-Fi, or if the built-in Wi-Fi adapter doesn’t work on your laptop, you have three options.
You can use a USB Wi-Fi adapter, a wireless PCI card (for desktop computers only), or your smartphone.
Use A USB Wi-Fi Adapter
Before we start, let’s see what a Wi-Fi USB adapter is. This is a device that allows you to connect a non-Wi-Fi device to a wireless network. They are pretty affordable, so if you want to connect your desktop computer to your Wi-Fi this should be the best and easiest way to do that.
To make this happen, you will need the following:
- A USB Wi-Fi adapter
- A desktop computer

The first thing to do here is to install the USB Wi-Fi adapter. In most cases, these are plug-and-play devices, and all you have to do is to plug the adapter into one of the USB ports and let your operating system download and install the right drivers.
After that, you need to click on the network icon in the taskbar, and you should see a list of available wireless networks.
Choose the one you want to connect to, enter the wireless password and that’s it.
However, sometimes when you plug the adapter into the USB port, nothing happens. In that case, you need to go to the manufacturer’s website and download the correct driver. After you download and install the driver, you will see the list of available wireless networks.
Click on the network you want to connect to and enter the wireless password.
Click on the Connect button, and you are done.
NOTE: Make sure that Connect automatically is checked before you click on the Connect button.
Ways to Turn Your Non-Wi-Fi Device into a Wi-Fi Device
Use Your Android Smartphone
Connecting your non-Wi-Fi device to your Wi-Fi network is also possible with the help of your Android phone.
- Get the USB charging cable and connect your smartphone to the desktop.
- Make sure that your smartphone is connected to your Wi-Fi network.
- Then unlock the smartphone, swipe down from the top of the screen, and click on the Settings icon.
- Now tap on Connections. Scroll all the way down to Mobile Hotspot and Tethering.
- Tap on it and then tap on USB Tethering to enable it.
- The network icon should change now, and you can test your internet connection.
How to Connect a Non-Wi-Fi Device to Wi-Fi Using Your Phone and USB Tethering
Although this is the cheapest option since you don’t have to buy additional hardware, it is not something you should use constantly. It is perfectly fine for temporary use, but if you want to use Wi-Fi constantly, your smartphone isn’t the ideal option.
Use A Wireless PCI Adapter
If you want to make your desktop computer capable of connecting to your Wi-Fi, you can also install a wireless PCI (or PCI-e) adapter. Although this solution is as affordable as the USB Wi-Fi adapter, it does require some technical knowledge. You will have to open your desktop case and install it directly on the motherboard.

The concept is pretty much the same as with the USB Wi-Fi adapter, you will have to install the drivers if your operating system doesn’t detect and install them automatically.
Once you install it successfully, click on the network icon and choose your wireless network from the list of available networks. Type in your wireless password when asked and click the Connect button. Make sure to check the Connect automatically checkbox.
Recommended reading:
- How to Find Out Who Is Using My Wi-Fi? (5 Ways to Check Who Is on Your Wi-Fi)
- Difference Between Wi-Fi and Internet (Are Wi-Fi & Internet the Same Thing)
- How to Connect to Airport Wi-Fi? (Two Easy Methods)
After that, your computer will connect automatically to your Wi-Fi network the next time you turn it on.
In terms of performance, it seems that a wireless PCI adapter is better than a USB Wi-Fi adapter, the wireless signal it receives is stronger.
However, if we had to choose, we would always pick the USB Wi-Fi adapter over this PCI/PCI-e. Just because it’s much easier to set it up and use.
How to Set Up a Wi-Fi Adapter (USB Adapter and PCI/PCI-e Adapter)
Final Thoughts – Which One Should You Choose?
Hopefully, you enjoyed reading this article and managed to connect your desktop PC to your Wi-Fi network without any issues.
Of all the options presented here, we suggest using a USB Wi-Fi adapter. Although using your smartphone doesn’t require additional investment and gets the job done, we still wouldn’t recommend it for long-term use. On the other hand, a wireless PCI adapter requires some technical knowledge, and if you’re not tech-savvy, don’t do it on your own.
Here is why we think you should use a USB Wi-Fi adapter:
- There is no need to buy and install any additional devices or hardware
- It is user-friendly and easy to set up. It shouldn’t take more than a minute or two to have your desktop computer connected to your Wi-Fi.
- No cables needed
- Fairly affordable
Now that you know what the best option is, get a USB Wi-Fi adapter and install it. You should have Wi-Fi on your desktop computer in no time.

Hey, I’m Jeremy Clifford. I hold a bachelor’s degree in information systems, and I’m a certified network specialist. I worked for several internet providers in LA, San Francisco, Sacramento, and Seattle over the past 21 years.
I worked as a customer service operator, field technician, network engineer, and network specialist. During my career in networking, I’ve come across numerous modems, gateways, routers, and other networking hardware. I’ve installed network equipment, fixed it, designed and administrated networks, etc.
Networking is my passion, and I’m eager to share everything I know with you. On this website, you can read my modem and router reviews, as well as various how-to guides designed to help you solve your network problems. I want to liberate you from the fear that most users feel when they have to deal with modem and router settings.
My favorite free-time activities are gaming, movie-watching, and cooking. I also enjoy fishing, although I’m not good at it. What I’m good at is annoying David when we are fishing together. Apparently, you’re not supposed to talk or laugh while fishing – it scares the fishes.