Assuming you’re looking for a simple answer, then -YES! Netgear Nighthawk works with AT&T. There are a couple of AT&T internet services and more than a few Netgear Nighthawk models, so be careful what model you’re trying to use.
This article will explain how to utilize a Netgear Nighthawk router with AT&T in a step-by-step process.
It will also explain what Nighthawk models you can use to improve your Wi-Fi coverage and network control.
But first, let’s consider the upsides and downsides of using a Netgear Nighthawk with an AT&T gateway.

CONTENTS
Upsides of Using Netgear Nighthawk With AT&T Gateway
AT&T gateway is a combo unit containing a modem, switch, and router. It will work just fine for an average consumer in a smaller home.
However, it doesn’t even come near the Netgear Nighthawk series when it comes to Wi-Fi coverage, signal quality, and network control.
Suppose you are a streamer, gamer, or any other type of user that needs very precise control over bandwidth distribution or network security.
In that case, you will significantly benefit from using a Nighthawk.
The same goes for the owners of larger homes. Netgear Nighthawk antennas will cover a much wider area with good quality signal than the AT&T gateway.
Downsides of Using Netgear Nighthawk With AT&T Gateway
Added cost since you’ll be buying an additional device on top of the AT&T gateway.
The added complexity of the network because there will be another piece of equipment that can break or fail.
Requires additional cables, a power outlet, space, and setup.
Which Models of Netgear Nighthawk to Get?
As you are probably aware, Netgear Nighthawk refers to a whole series of models. As you want to use it with the AT&T gateway, you should look for routers and not the router/modem combo units.
Just read the product description and specifications carefully, and you should be fine.
Recommended reading:
- Netgear Nighthawk Not Broadcasting Wi-Fi
- Does Netgear Nighthawk Work With CenturyLink?
- Netgear Nighthawk X6 Not Connecting To Internet
Also, look for a router that offers speeds equal to or higher than your internet plan. By doing this, you will avoid having a router as a choke point.
Once you get the Netgear Nighthawk, unpack it, power it up and connect the LAN port on the AT&T gateway with the WAN port on the Nighthawk.
Now, let’s get to the setup process.
Step 1 – Set AT&T Gateway Into “Bridged Mode”
In order to use the Netgear Nighthawk as a primary router, first, you need to disable the router on the AT&T gateway. You can do this by putting the router inside the gateway combo unit into the bridged mode, then disabling the Wi-Fi on the gateway.
You’ll need a PC or laptop connected to the gateway via ethernet cable.
Open the web browser (any browser will work) and type 192.168.1.254 into the address bar.
The login page will load, and you’ll need your administrator credentials to move forward. If you haven’t changed them, the default username and password should be printed on a gateway.
AT&T uses two brands of gateways. Depending on your brand, you’ll have to allow DMZ or IP passthrough.
PACE gateways don’t have a bridged mode as a feature, but you can create the same effect by activating DMZ or DeMilitarized Zone.
Go to the Firewall settings and choose Netgear Nighthawk from a list of connected devices.
Now select Allow all applications to enable DMZ plus mode.
With Arris gateways, this process will go a bit differently.
Go to the Firewall, and you will be asked to enter the access code of the gateway. Don’t worry. You will find the code on a sticker on your gateway.
Select IP passthrough tab, then IP passthrough from the drop-down menu.
Now choose DHCP – fixed as the Passthrough mode and the Netgear Nighthawk from the list of devices next to Passthrough fixed MAC address.
Save the settings.
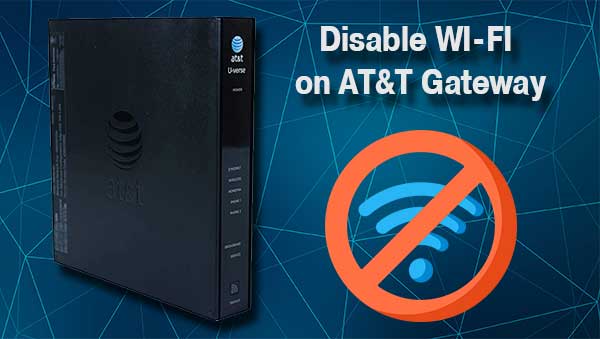
Step 2 – Disable WI-FI on AT&T Gateway

While still in the gateways’ settings, go to Device > Modify your Wi-Fi or settings options and disable both 2,4 and 5 GHz bands.
Strictly speaking, you don’t have to do this, but it may lead to slower Wi-Fi due to the interference between the signals coming from the gateway and the Nighthawk.
Save the settings.
Step 3 – Disable Firewall on AT&T Gateway
At this point, everything should be ready for the setup process on the Netgear Nighthawk. Still, it will not hurt to take one extra step and turn the firewall on the AT&T gateway.
Don’t worry. You will still have the firewall and its features, but only on the Nighthawk.
Go to the Firewall tab, then to the Firewall Advanced, and turn off all Firewall features.
Save settings and restart both Gateway and the Nighthawk.
You can do this by unplugging both devices from power for 20-30 seconds and powering them back on.
Step 4 – Set Up Netgear Nighthawk
All that is left is to set up the Nighthawk.
This process is straightforward. Simply download the Nighthawk app to your phone from the AppStore or Play store and follow on-screen instructions.
Summary
Netgear Nighthawk will work with AT&T gateway, but you’ll need to change some settings. Firstly, you’ll need to choose a suitable Nighthawk model. Look for routers and not router/modem combo units.
Secondly, connect the WAN port on the Nighthawk to the LAN port on the gateway and power up the router.
Thirdly, access the gateway settings and turn on DMZ or IP passthrough (depending on the brand of AT&T gateway you have).
Fourthly, disable Wi-Fi on the gateway to avoid interference with the Nighthawk signal.
Lastly, save the settings, and reboot both devices.
As a bonus, you can turn off all firewall features on the gateway to avoid possible potential problems or conflicts.
Once you do this, download the Nighthawk app from the app store and follow on-screen instructions to set up the network on the Nighthawk router, and you are good to go.

Hey, I’m Jeremy Clifford. I hold a bachelor’s degree in information systems, and I’m a certified network specialist. I worked for several internet providers in LA, San Francisco, Sacramento, and Seattle over the past 21 years.
I worked as a customer service operator, field technician, network engineer, and network specialist. During my career in networking, I’ve come across numerous modems, gateways, routers, and other networking hardware. I’ve installed network equipment, fixed it, designed and administrated networks, etc.
Networking is my passion, and I’m eager to share everything I know with you. On this website, you can read my modem and router reviews, as well as various how-to guides designed to help you solve your network problems. I want to liberate you from the fear that most users feel when they have to deal with modem and router settings.
My favorite free-time activities are gaming, movie-watching, and cooking. I also enjoy fishing, although I’m not good at it. What I’m good at is annoying David when we are fishing together. Apparently, you’re not supposed to talk or laugh while fishing – it scares the fishes.
